
Within the Layer it is possible to add check lists to each product opportunity type that has been created within your instance of the Layer.
Check lists have been designed to help users ensure they do not miss any steps that are required when creating an opportunity and can help users prioritise the steps that are required.
N.B. check lists can also be added to Case Categories and Sales Orders and are different to product opportunity check lists.
Creating Check List Steps for Product Opportunities
In order to add check lists to an opportunity type you must decide which of your opportunity types will require check lists and identify the individual check list steps.
In our example we are going to be creating a check list for our mobile opportunity type to ensure that sales staff capture the correct information when creating an opportunity.
We have identified the check list items that we want to add to the mobile opportunity type and they are as follows:
- Check that 3 months bills are uploaded to Files
- Check that the customer has a full list of the user names. mobile numbers and allocated devices
We will now add the check list steps to the opportunity type in the Layer, to do this follow these simple steps:
1. Log into the Layer
2. Press the  button from the top right hand of the screen
3. Under Inventory Settings, select Product Opportunity Types
4. Select the opportunity type that you want to add check lists steps to, in our example it will be mobile
5. The Layer will then direct to you to that Product Type, open the Check List Steps tab
6. From this tab you will then see any existing steps which can be edited by selecting  button or you can add in new steps, to add a new step press
7. Type in any new step or to save any edits you have made simply press 
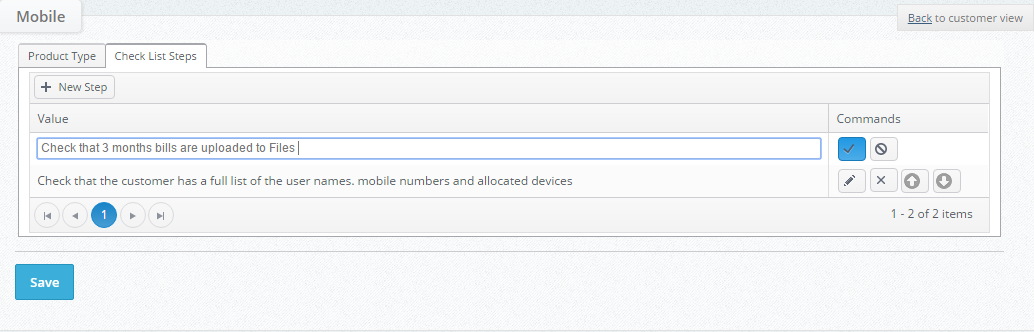
8. Repeat as necessary until you have created all the required check list steps
9. Once all of your steps have been added they can be reordered by pressing the  arrow buttons to move items up or down.
11. Once all of your steps have been added and you are happy with the order press Save.
12. You have now successfully created your check list steps and we will now view these in the next section.
Checking your Check List Steps
Now that you have successfully added your check list steps to your product opportunity it is time to view the check list, we recommend that you test this in a training company account as you will need to create an opportunity to view your steps.
If you don't have a training or test account then alternatively you can create an opportunity in an appropriate customer record.
To view your check list steps follow these simple steps:
1. Open the customer or lead record in the Layer
2. From the SALES drop down menu select New Opportunity, and create an opportunity as you usually would, ensuring that you select the product category that you have just created the check list steps for.
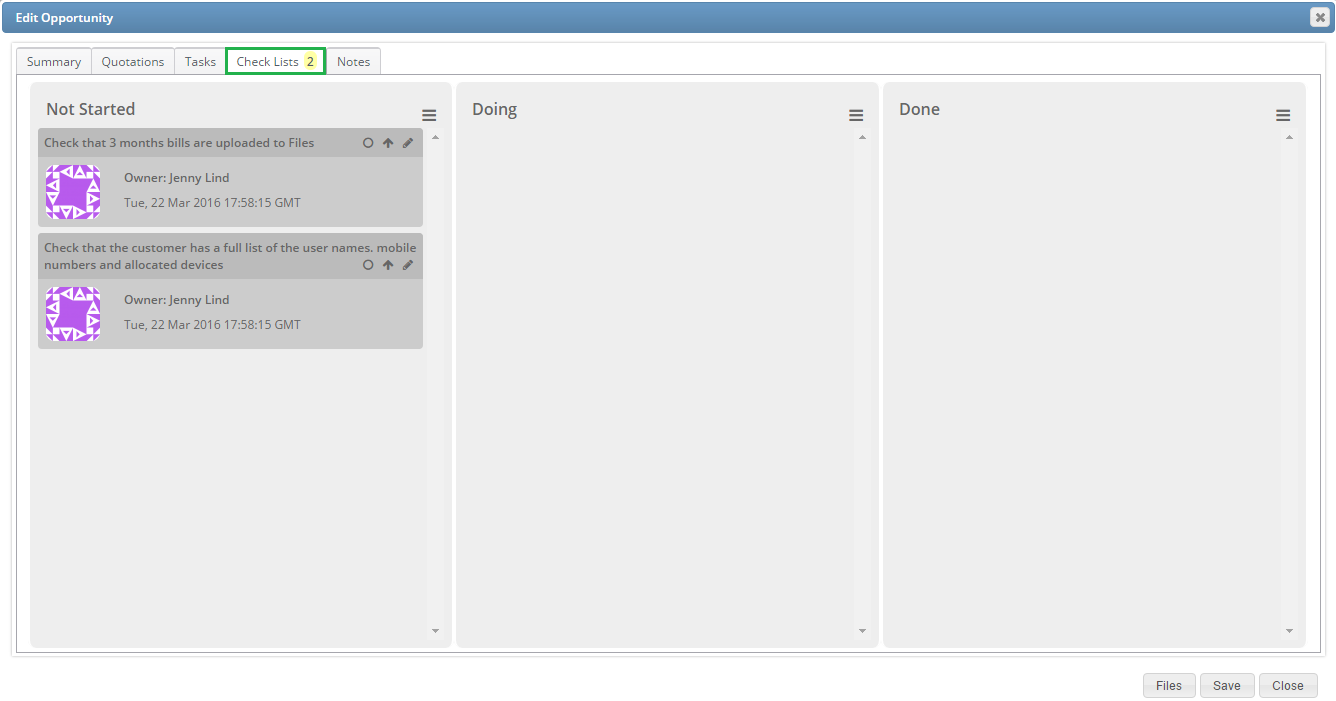
3. Now open the opportunity that you have just created from the Opps Tab within the record
4. You will now see that within the opportunity there is a Check Lists tab with the number of check lists required highlighted in yellow:
5. Once a checklist item has been marked as done users will note that the number of checklist items highlighted will be amended to reflect the number of steps remaining:
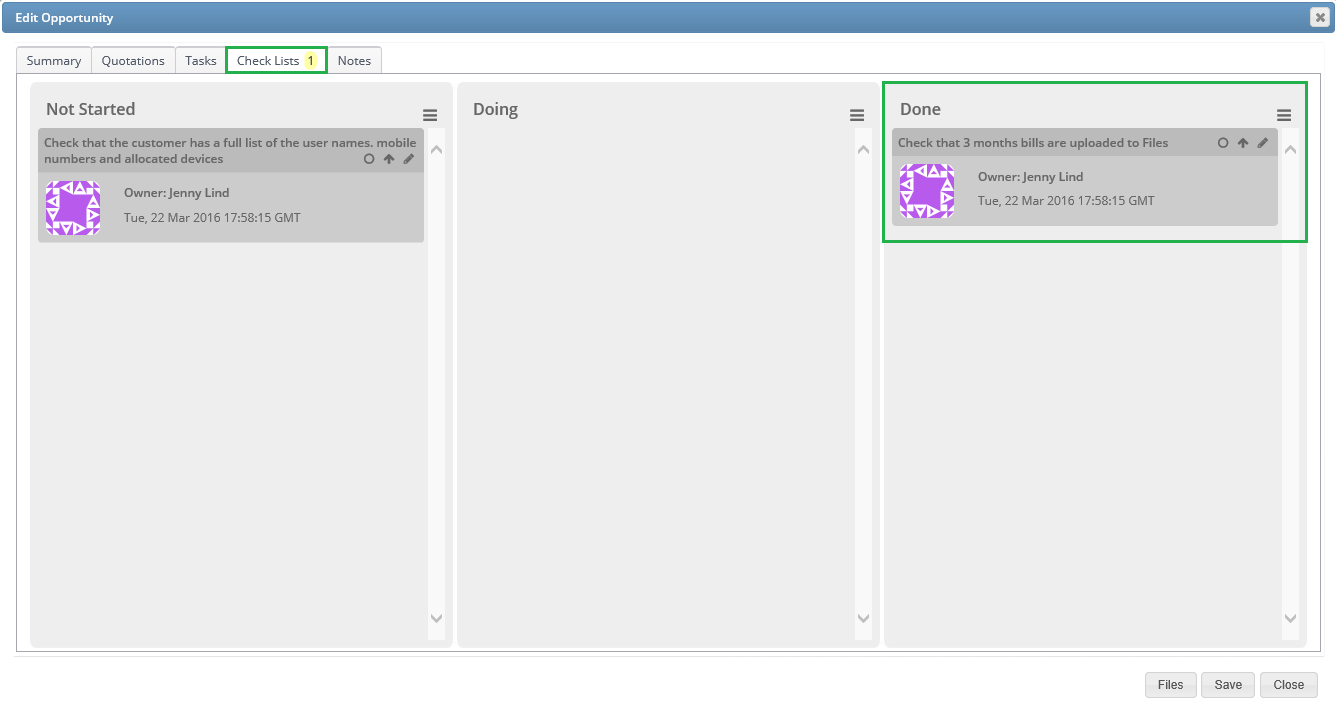
If you are unhappy with any of the check lists then simply repeat the steps mentioned above until you have perfected your opportunity check list items.
Useful Articles:
Understanding Opportunity Checklists: How opportunity changes affect opportunity checklists