
Applying Branding to Layer Emails
It’s possible to include your company branding in Layer generated email templates. Additionally, you can select which areas of the Layer you wish to have this automatically applied to. In this article we’ll demonstrate how to configure your company’s branding and to then enable branding on specific templates.
What is branding?
“the promotion of a particular product or company by means of advertising and distinctive design”
Branding refers to the colours and design of your company logo or design.
Whilst branding is applied in many ways in the Layer (such as via the user interface skin which reflects your company colours and logos), email branding involves templating your emails to include fixed images above and below the text being sent to provide a professional and consistent view for customers.
Based on feedback, we have created an area where customers can specify which templates automatically have branding applied and which don’t. This removes the need for users to have to select this manually and provides a more consistent image for customers. If you wish to include branding on templates the format will look similar to the example below.
Please click here to see an example of a branded email.
Please click here to see an example of a non branded email
How to upload logos to your instance
Please click here for our guide on how to upload logo's to your instance
How to add branding to your instance
Please click here for our guide on how to add branding to your instance of the Layer
How to set up auto branding on the Layer
In the Layer you have the option to set up auto branding on specific areas of the Layer. I have detailed below the options available. Please note that branding areas apply to external (customer facing) emails generated from the Layer.
- Case
- Invoice
- Opportunity
- Order
- Quotation
- Task Appointment
To make your selections please follow these steps.
Step 1. Access the settings area
Step 2. Select Company Setup
Step 3. Select Auto branding
Step 4. Make your selection
Select the relevant types to include email branding, this will ensure all emails which are sent from the selected area of the Layer will be automatically branded. 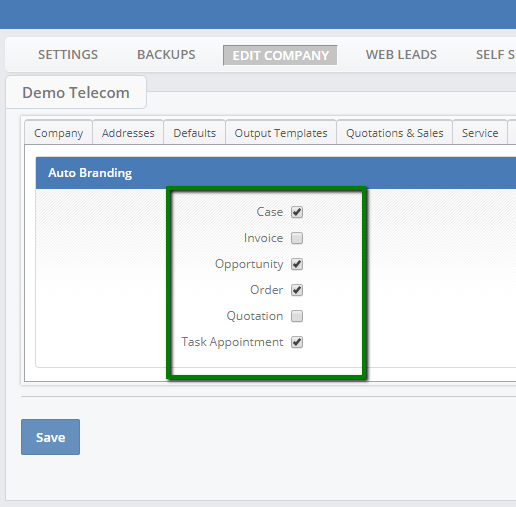
Once you are happy with your selection click save.
This means any user sending an email from the sales order will be branded, please see example of branded emails here. For example if you send a generic or free typed email from sales order and you have auto branding selected all emails will be sent out with the company branding.
How to manually add branding to emails
If you are creating a generic email to the customer and wish to have company branding applied, you can apply this on an individual basis.
Firstly identify if the branding has been automatically applied.
When you create an email template on the layer you will be able to see if the branding has been applied if there is a tick in the branding box, in the example below the branding has not been applied. 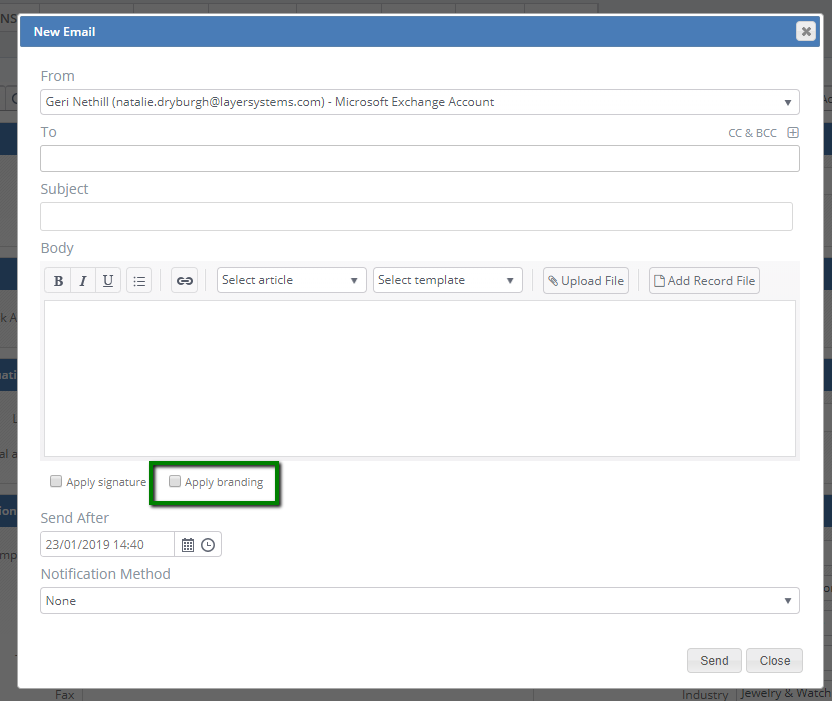
Enable the checkbox above prior to sending to apply your branding.