What is a warehouse?
A warehouse can be used to identify a distinct storage space for your stock items. Technically, a warehouse could be a cupboard or a dedicated warehouse location. It's also possible to segment stock by creating either physical or virtual warehouses, helping to identify stock tracking, values and managing stock across multiple locations and suppliers.
How to create a warehouse
In settings zone  select warehouses
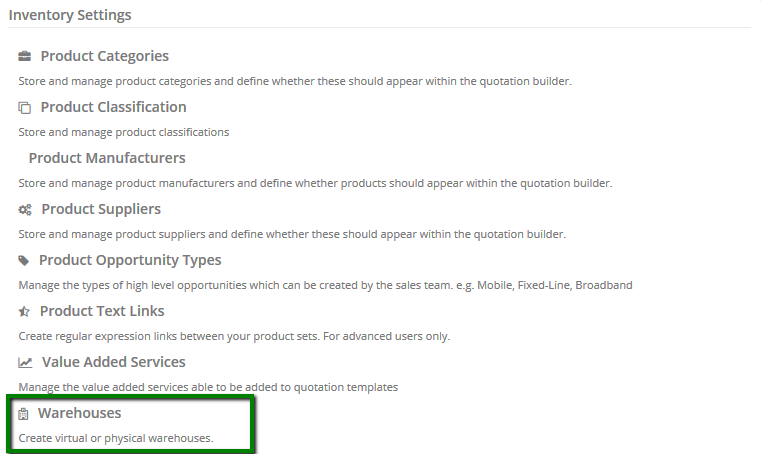
You will be presented with the following screen
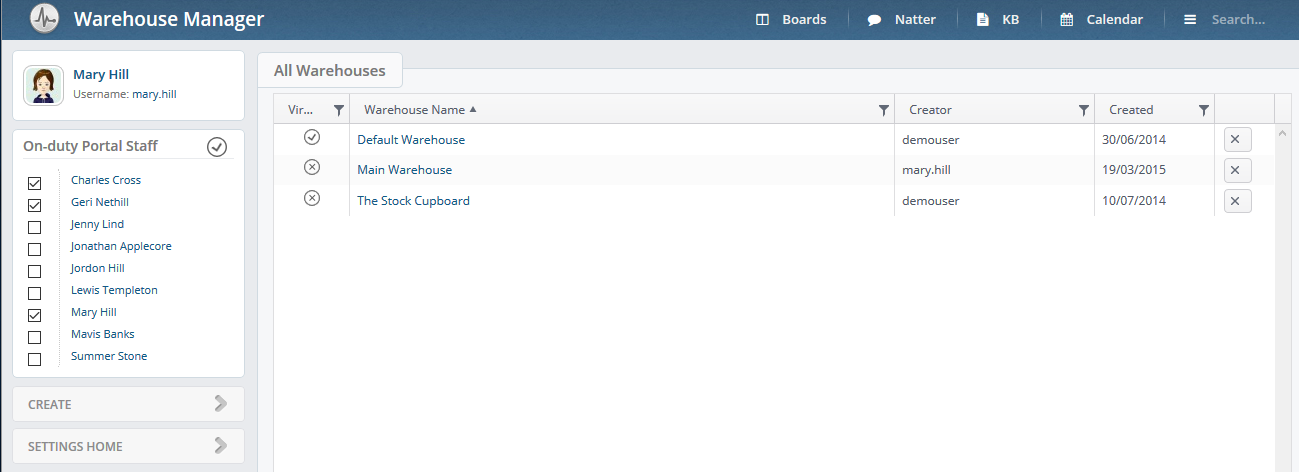
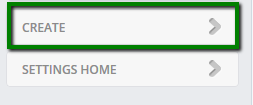
Here you can amend your existing warehouses or create a new one. To create a new warehouse simply click on Create
and fill in required details similar to our example.
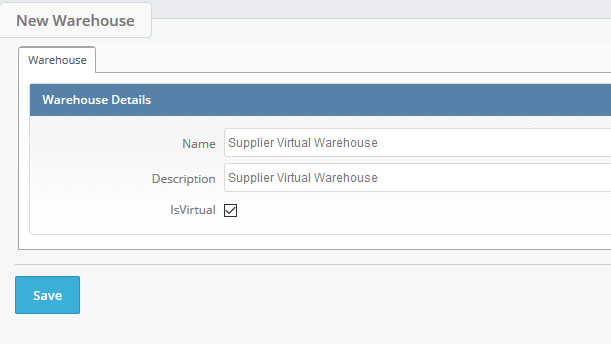
Create a virtual warehouse if the items are being delivered directly from your supplier.
You can create different types of warehouses including:
- Mobile stock
- IT stock
- Phone Systems stock
- Accessories stock
- Loan stock
Book stock into the correct warehouse
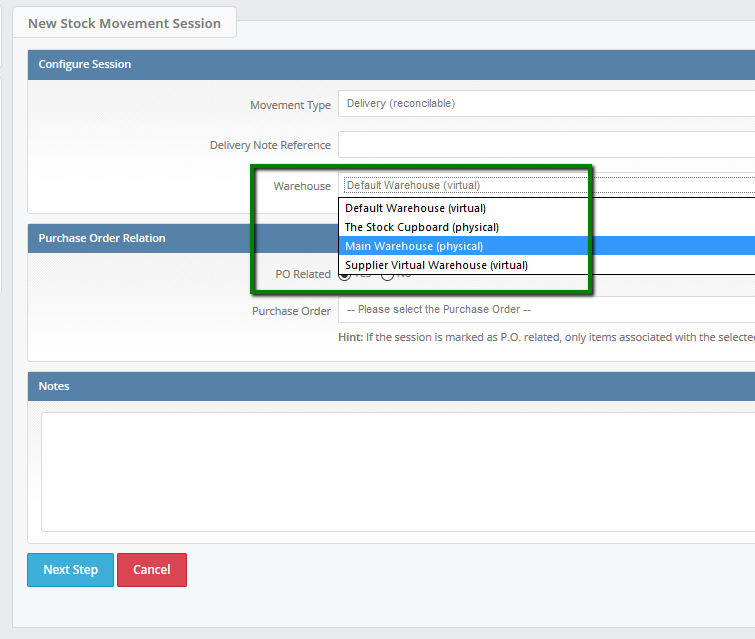
When you are booking in stock, make sure you select the right one. Follow this link to find out How to book stock in.
How to do a stock check for each warehouse
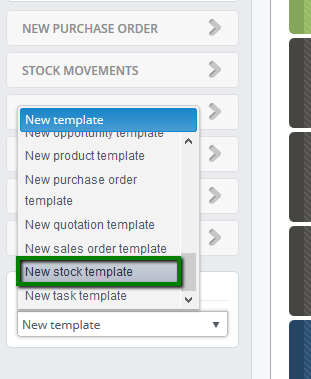
Once you have created your warehouses in the Layer, we recommend creating stock stacks for each of them. To do this, select the Stock module  and select new stock template from the work stack templates.
You will be presented with the following screen
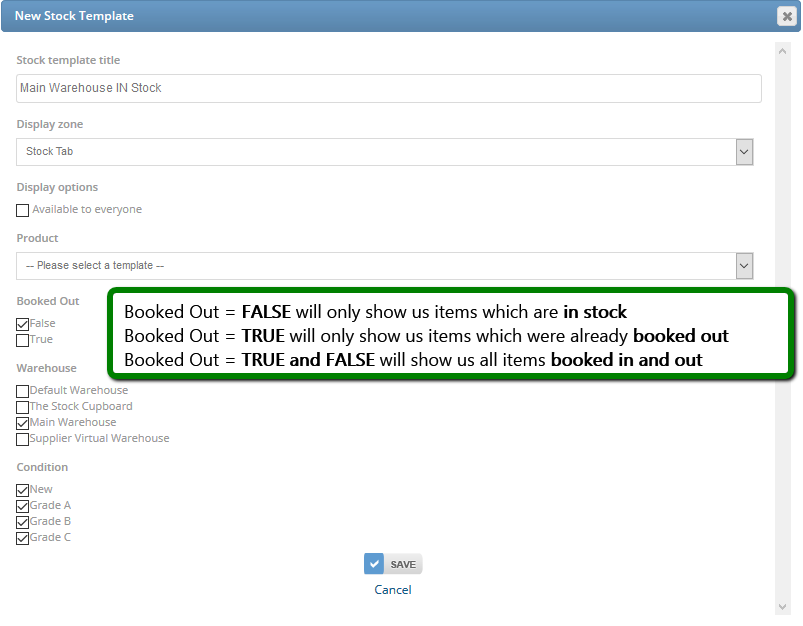
Fill in the required details as per our example.
1. Name your stack template - in our example 'Main warehouse In stock'
2. Select display zone depending where you want your stack to be saved. In our example, we have opted for the stock tab.
3. Display options - select this if you would like every user to have access to this stack.
4. Product - from the drop down list select an item if you would like to run a filter for a selected product only.
5. Booked Out
Booked Out = FALSE will only show us items which are in stock
Booked Out = TRUE will only show us items which were already booked out
Booked Out = TRUE and FALSE will show us all items booked in and out
6. Warehouse - select one or multiple warehouses
7. Condition - this is condition of your items which is specified while booking the stock in. Select one or multiple conditions
and Save.
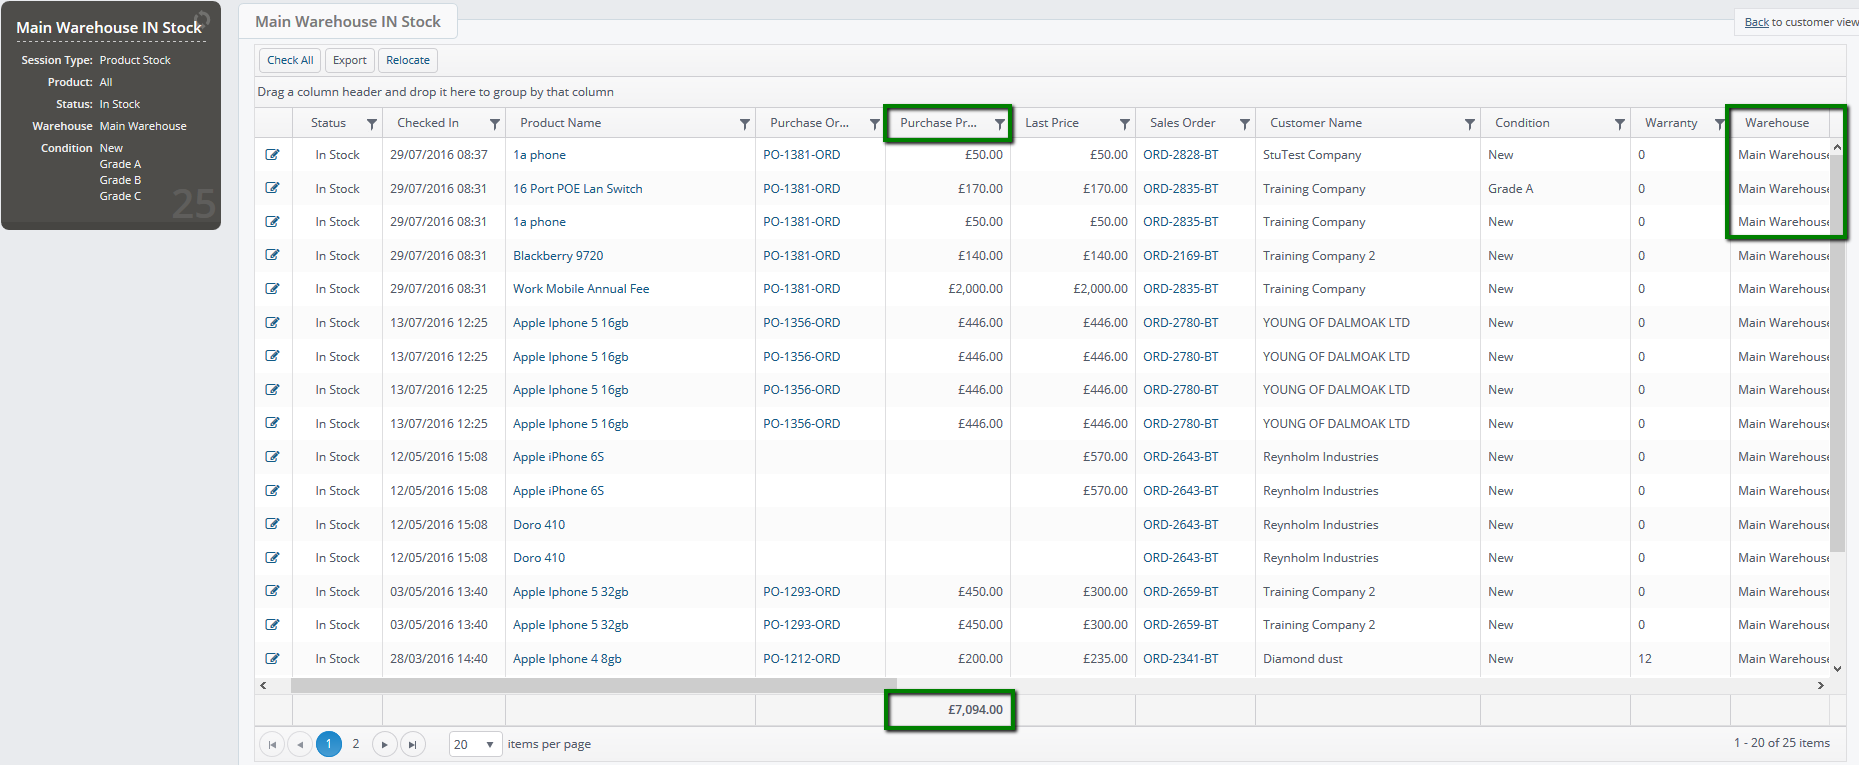
In the stock stack you will be able to filter further by serial number or specific handsets. You will also be able to tell the value of your stock and which customer the handset has been allocated to.
You can also export the stock stack and perform a stock check weekly or monthly.
How to transfer items from one warehouse to another warehouse
In case you have booked your item into an incorrect warehouse, or would like to migrate stock from one warehouse to another, you can easily transfer.
1. If you need to amend one or two items
Click on the edit button:
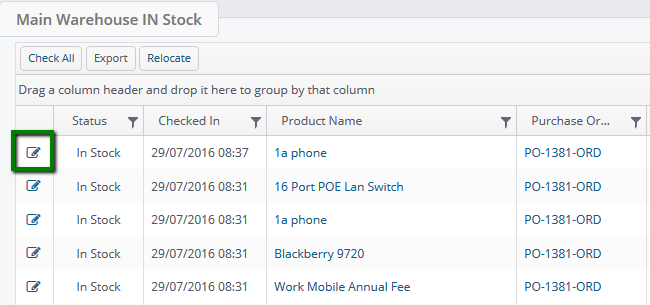
and in the edit screen simply change the warehouse from the drop down list
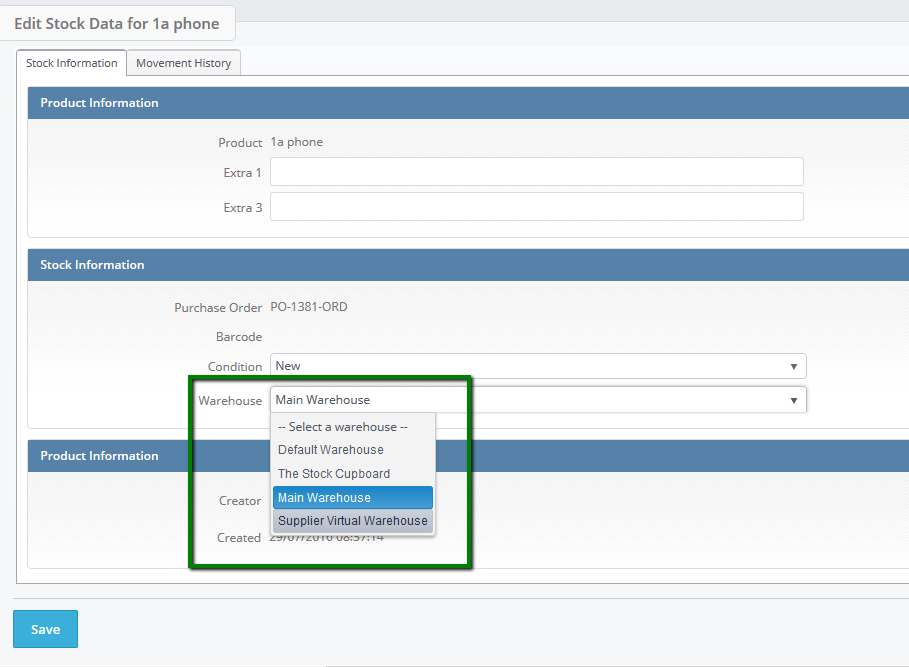
and Save.
Or,
2. If you need to amend multiple handsets
Check all or select items that you need to move
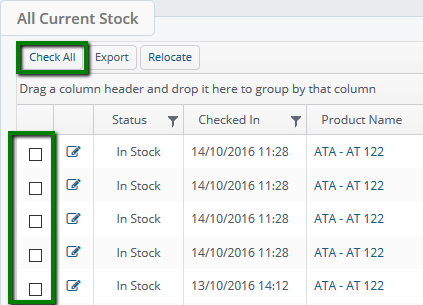
then press Relocate
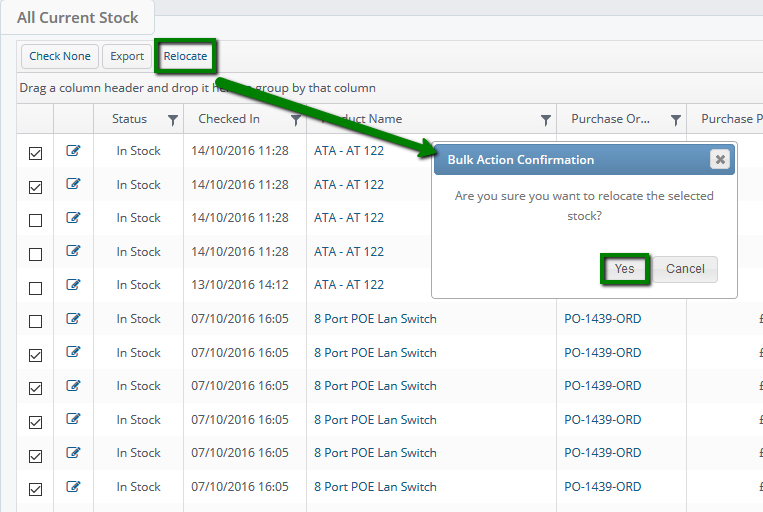
and confirm the selection. You will be presented with the following screen
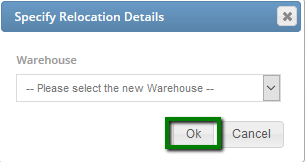
Select a warehouse from the drop down list and confirm. This is where the handsets will be moved to.
You will also see a confirmation message that items were relocated.

