N.B. You will need to have the plug in installed on your PC to be able to use this feature.
N.B. You are unable to create ‘Jobs’ from the Plug-in.
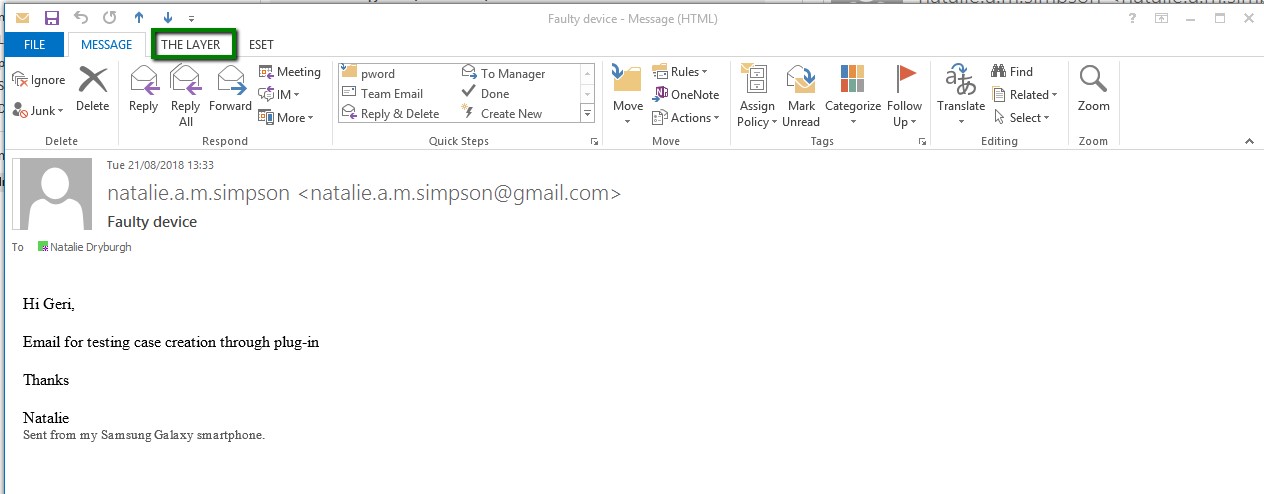
This method of case creation is ideal if the customer has contacted you via email direct.
Open the email the customer has sent you and from the top of the screen select ‘The Layer’.
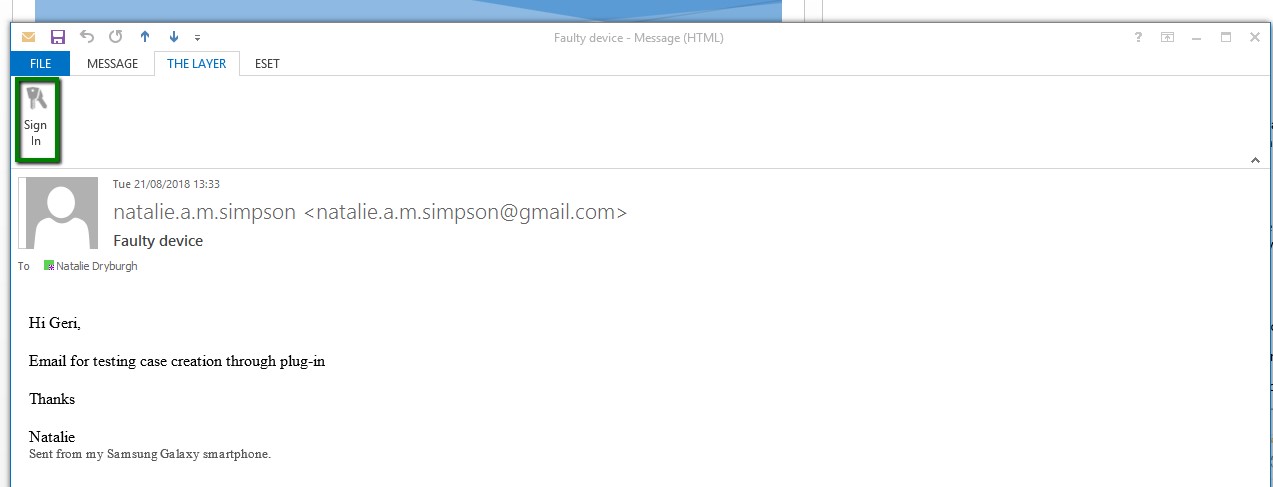
If you are not signed into the plug in you will first need to do so. Click on the sign in box
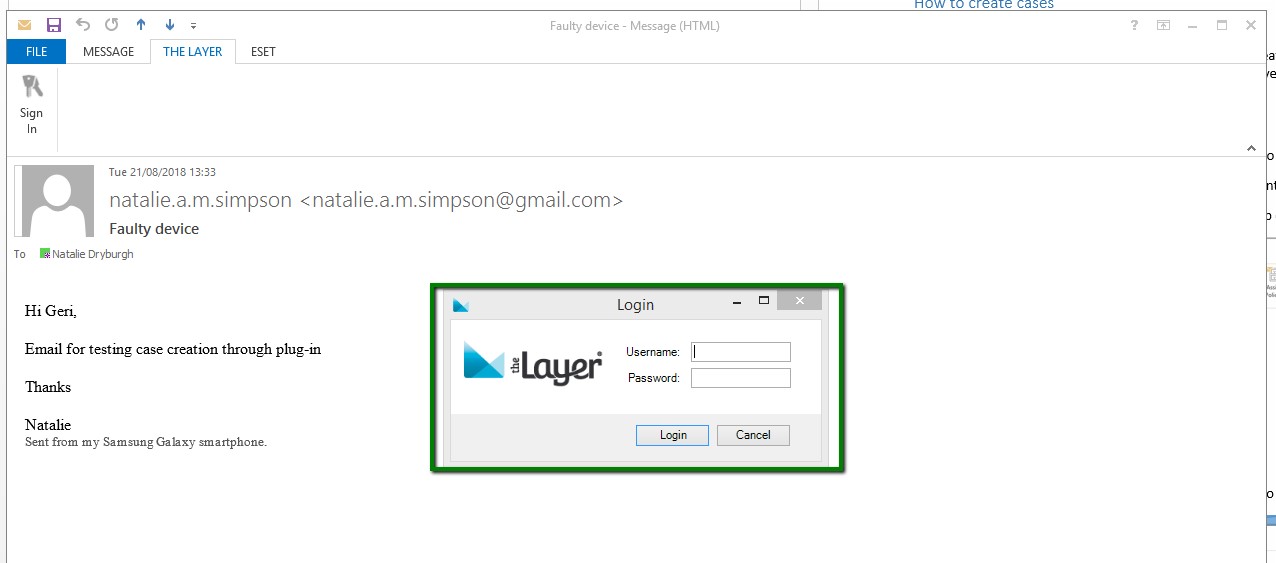
Use your Layer username and password to sign in.
Once you have selected 'The Layer' you will be able to select the option for 'New Case' from your list of options, please see below.

We have detailed below the steps to create the case.
1. Click search for customer this will open the search box
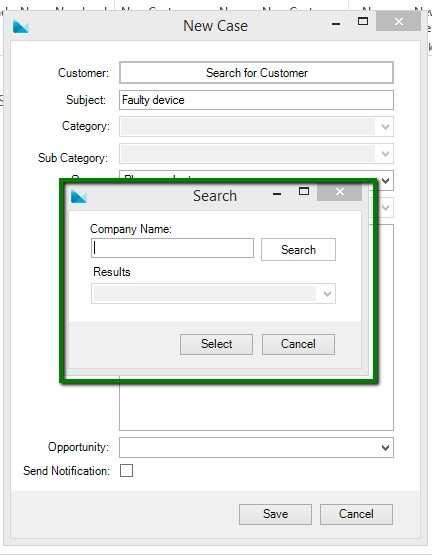
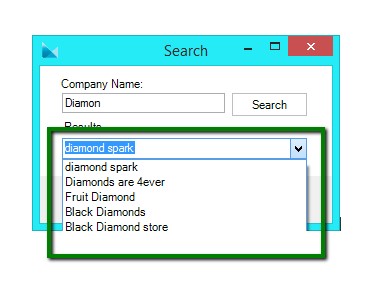
In the Company name box please detail the customer company name and select search this will provide you with a drop down list of all customers which have the searched name detailed.
Select the relevant customer from the drop down list and click select.
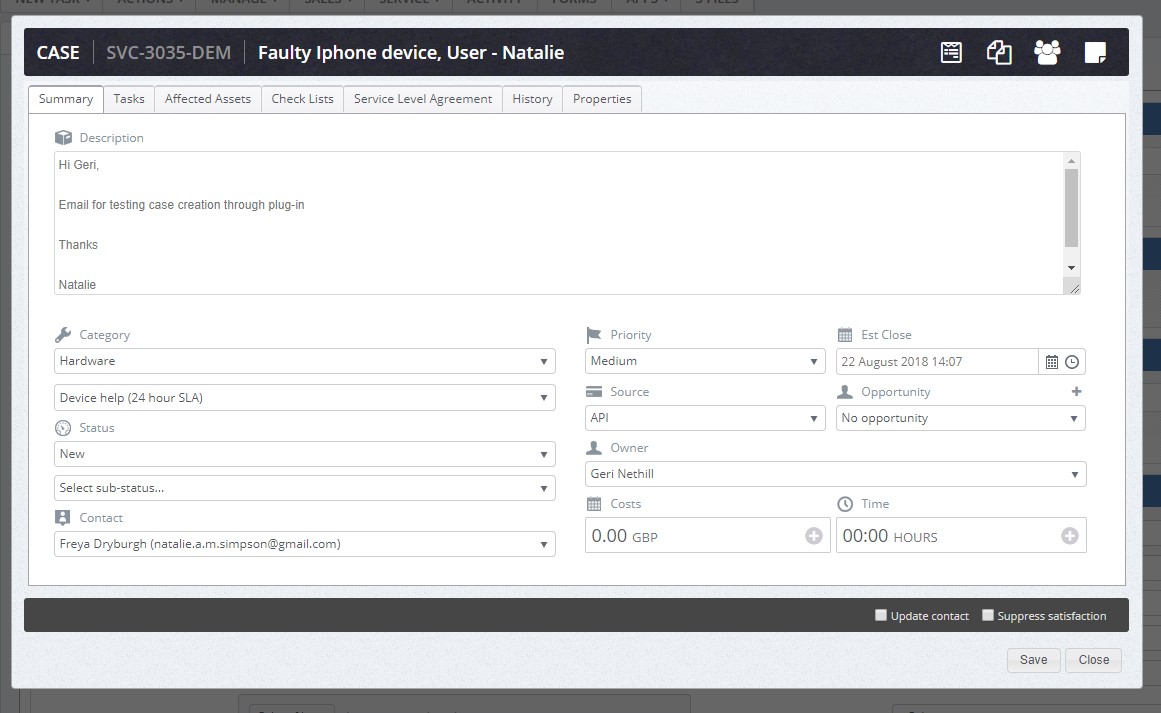
2. Subject – This will automatically populate with the details the customer has entered into the email subject field, you are able to edit this if you wish to change it or add more details, for example in this case you may wish to add that is relating to faulty Iphone, or the user the query is relating to.
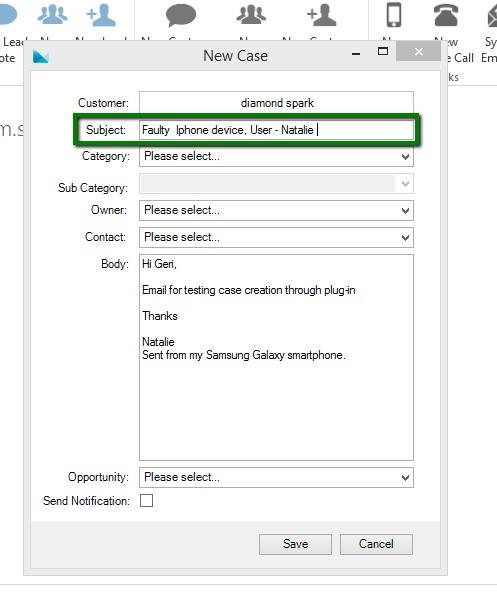
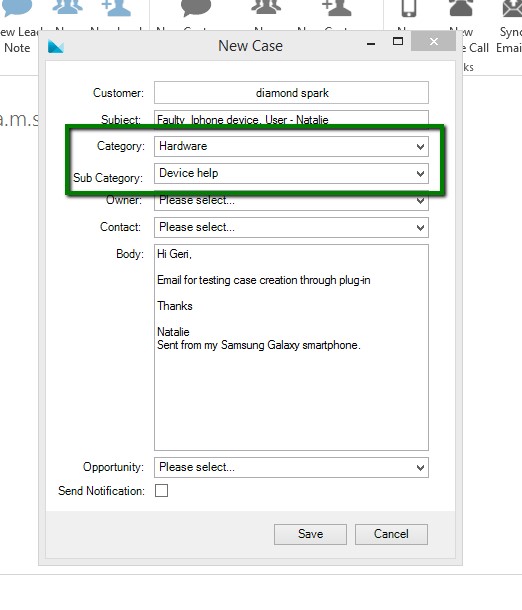
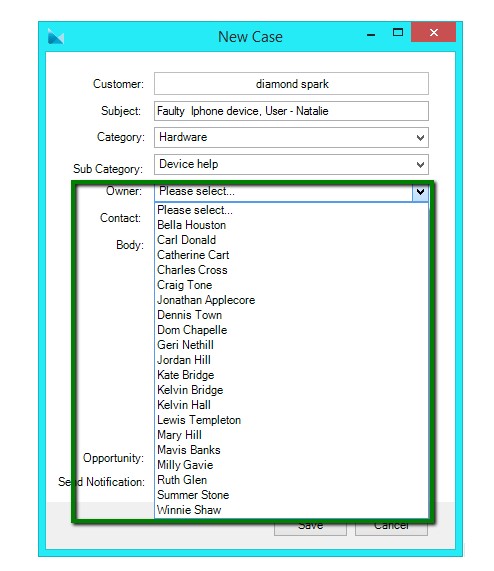
3. Category- This is your case category please select the relevant case category and sub category the case is relating to.
4. Owner – select the case owner from the drop down list.
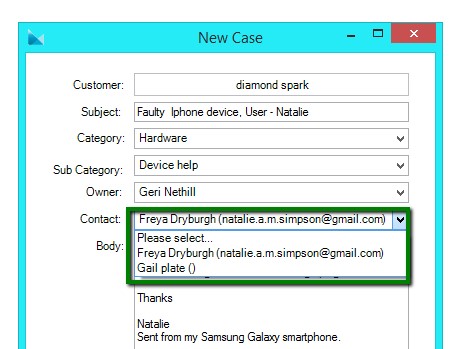
5. Contact – Select the case contact from the drop down list, the list will only provide you with the list of contact which have already been registered on the Layer for this company. If your contact is not listed you will need to create them as a contact in the customer record.
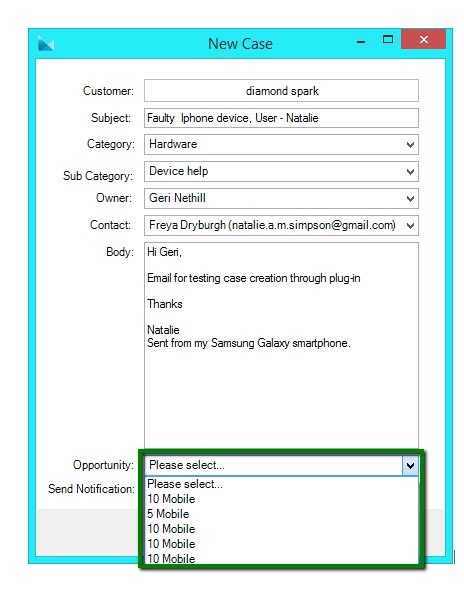
6. Body – The body of the email will be pulled through and detailed here, which will create the body of your case, this section is also editable, if you have an email chain you may wish to tidy this up prior to creating the case. The reason this is recommend is the body of your case is detailed on the case emails which will be demonstrated later in this document, please see email section for more information.
7. Opportunity – You can also link the case to an open opportunity, all open opportunities will be detailed in the drop down box.
8. Send notification – By ticking this box it will automatically send the customer an email to advise the case has been created.
9. Select save
This will create you case and you will be presented with a pop up box asking if you wish to work on the case now.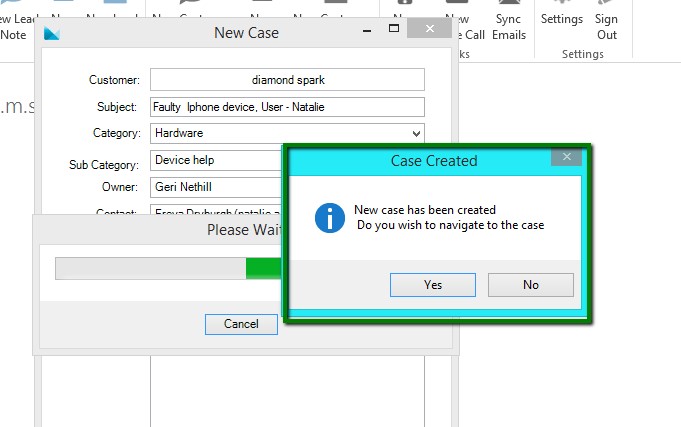
In order for you to be able to access the case you will need to be signed into the Layer in your default browser otherwise you will be asked to sign in. You will be taken to the case if you are signed in.