In the Layer it is possible to create custom fields to ensure that any data you require in the Layer is recorded and accommodated, reasons for creating custom fields include:
- Required to accommodate data migration e.g. they did not fit into any of the standard core fields or META fields
- They do not exist in The Layer as core fields or existed in your legacy CRM system but have been identified as useful to your company going forward
- They have been identified as being required to store information that has been captured via a form that has been created in the Layer
Where are custom fields stored within a record?
All custom fields that are created are stored within the Custom Fields tab in both the customer and lead record types:

In our instance you can see that no custom fields have been configured which we will now demonstrate how to do this.
What do I need to do, to create custom fields?
Prior to creating any custom fields you must first carry out the following steps:

How do I create Custom Field Groups?
Once you have established your custom field groups you will need to create them, to create a custom field group, you must locate the Custom Fields Groups section within the  menu, and then follow these simple steps:

What types of Custom Fields can I create?
The supported custom field types are outlined below and will determine how your users are permitted to store information within these fields:
1. Drop Down – will allow users to select from a list of created drop down options
2. Check Box – Allow users to check a box to show TRUE or FALSE
3. Text Area – Allow users to add larger text mainly designed for forms where more than one sentence is required
4. Text Box – Allow users to free type any text required
How do I create custom fields?
Once you have created your custom field group, you will be able to create your custom fields.
To do this follow these simple steps:

What do each of the headings mean in custom fields?
When creating your custom field above you will note that there are different headings for each of the fields above and these are as follows:
- Group: The custom field group that your custom field will belong to
- Name: The name of your custom field and how it will appear within your custom fields tab in a customer or lead record
- Description: Here you can enter a short description of what is required in your custom field so that users understand what is required
- Type: This denotes the types of custom field it will be, e.g. check box, drop down, text area or text box
- Sort: This will be the sort order of any custom fields that belong to the group, e.g. 1 will appear first in the list and so fields should be created in a logical order
- Req: Denotes that a field is required and should be active within the list of custom fields that can be applied to a customer or lead record. The benefit of this is that any fields that become redundant can be hidden from view.
- Encrypted: This is a security feature within the Layer and allows you to encrypt any sensitive information that is stored within a field, only users with permission to view encrypted data will be able to review this data.
- Please note for the purpose of data migration fields can only be encrypted after import
- Encrypted fields can't be used in forms or documents.
Can I create a form from the custom fields?
Custom fields can also be used to create forms, simply drag the relevant custom fields to the right to include the required fields.

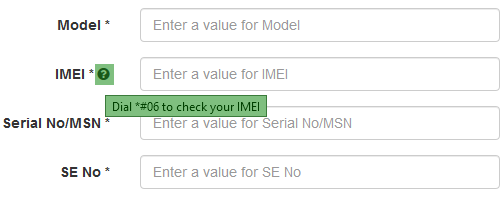
The 'Description' field provides you with an option to specify what needs to be filled in

The little question mark next to the custom field will present users with your description.

How do I create drop down options within a custom field?
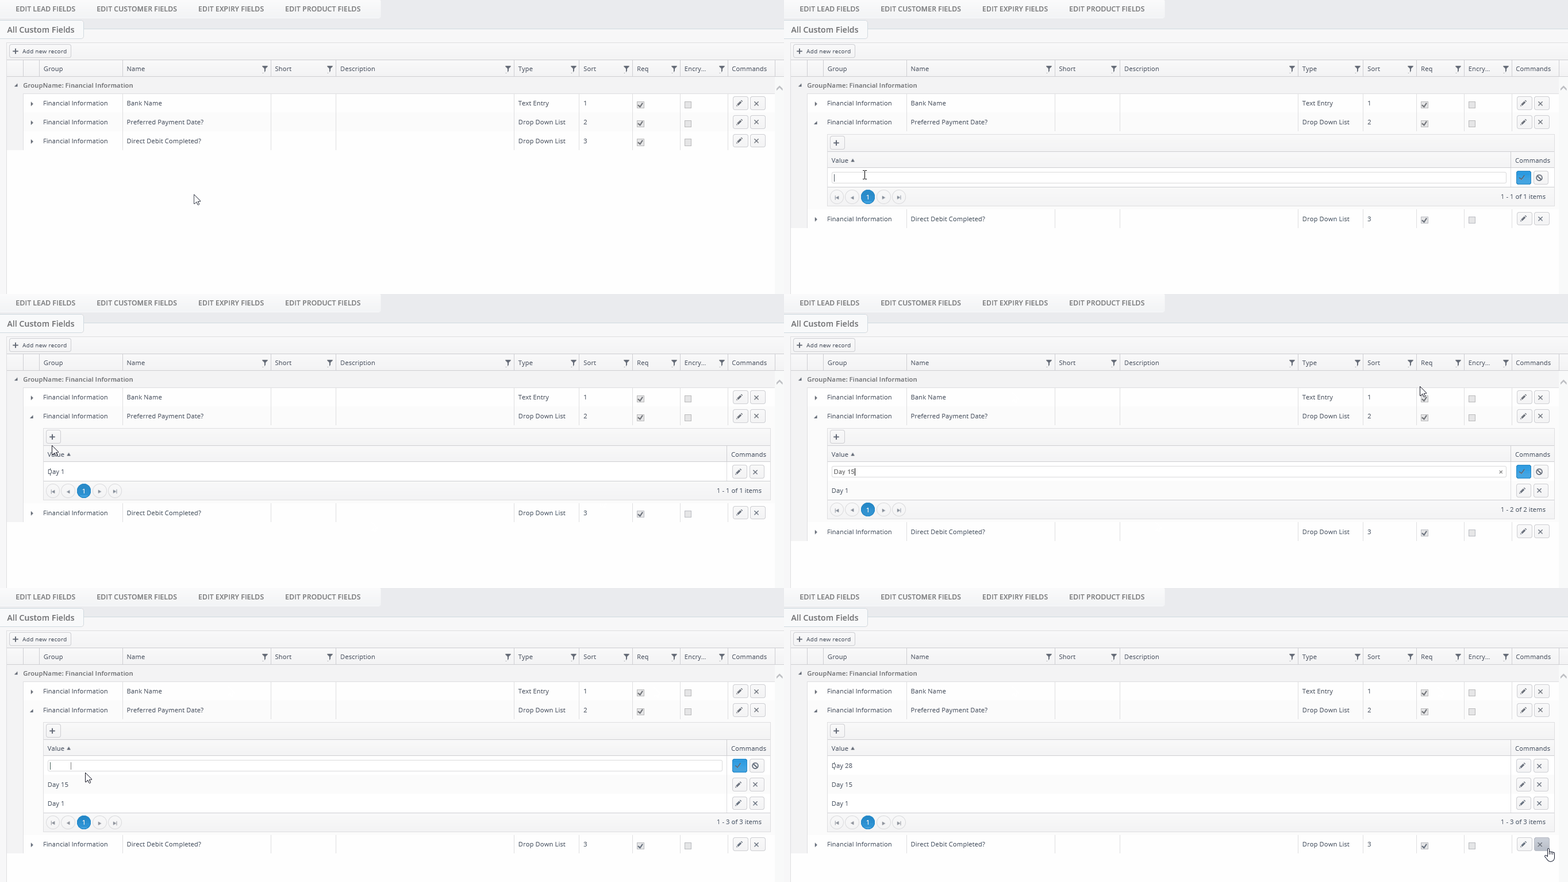
To create any custom fields that present a list of drop down options to users, follow these steps:

You can also follow this process to add check box options to your custom field simply choose the Check Box List as the Type.
How do I make my custom field text boxes bigger?
To make a custom field with more room for larger text answers you can chose to make it a Text Area insteand of a Text Box. You can see the difference below.

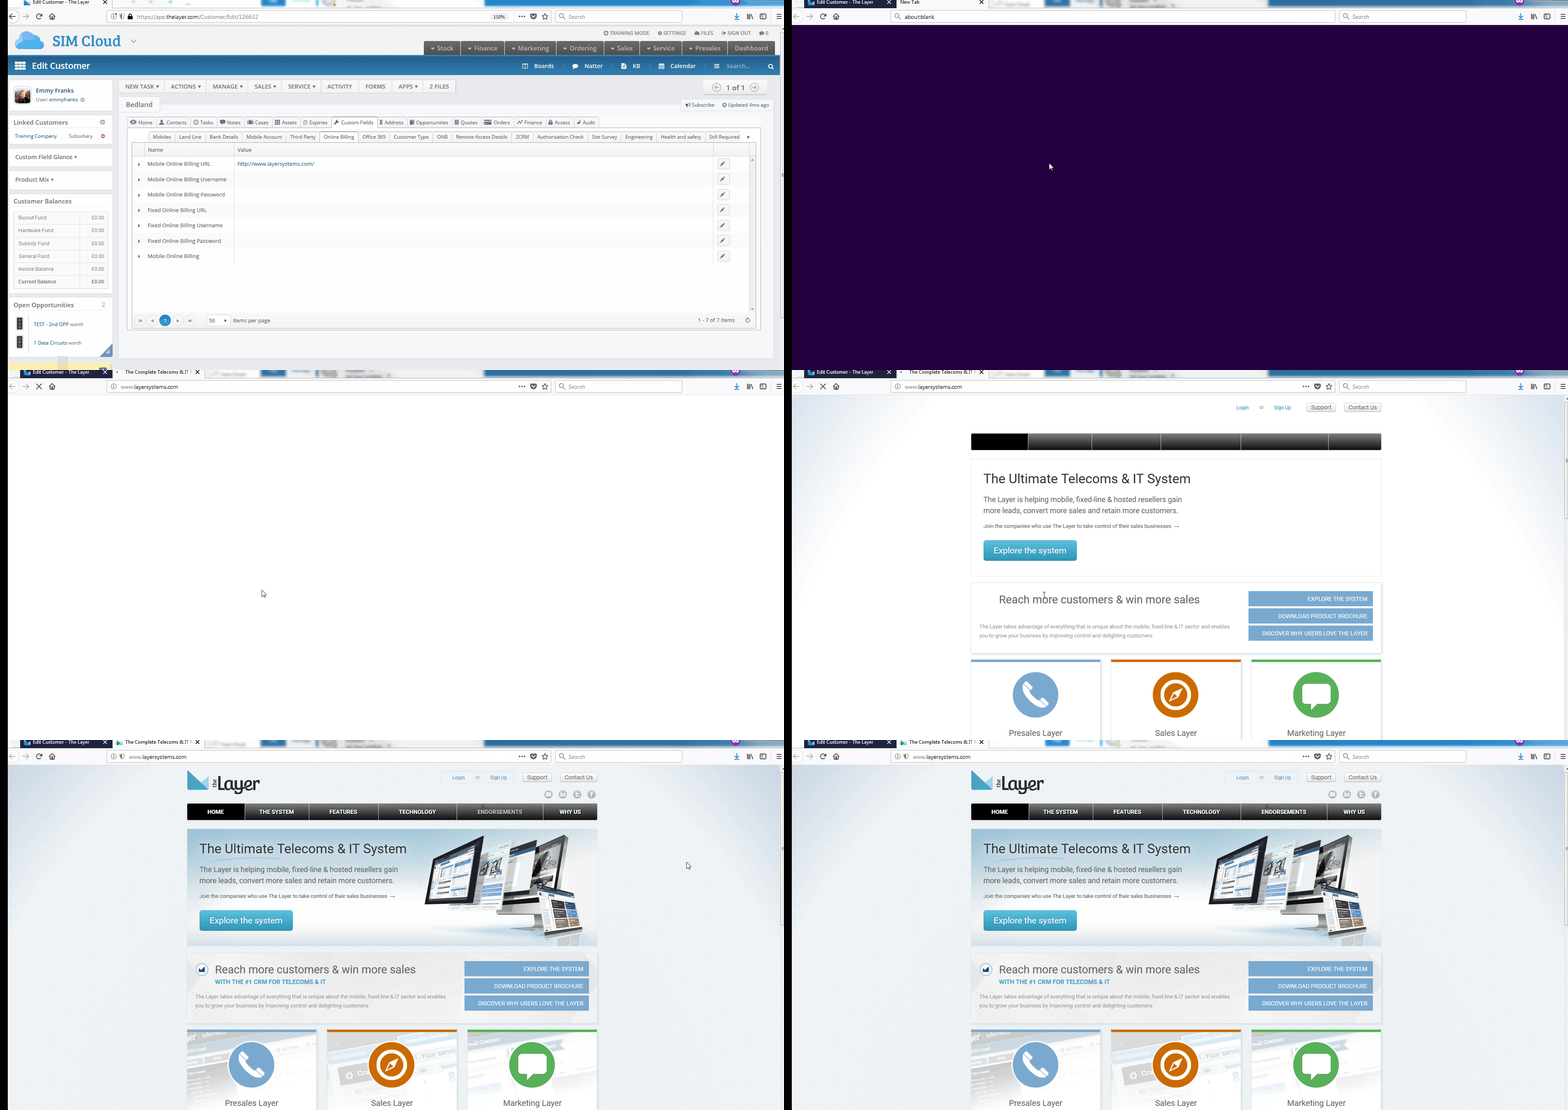
Text Area and Text Box custom fields also allow you to store hyperlinks within the customer record. This can be used to store links to customer specific billing platforms or even just a link to the customer website.

N.B. If the custom field is promoted to the Home page the link will be stored in a text only format. You can find out how to promote fields to the customer Home page below.
How do I add my custom fields to a customer or lead record?
Once you have created your custom groups and fields in The Layer you will need to enable them to be viewed within the Lead or Customer record. The steps are the same for both leads and customers are as follows:
1. Select either Lead or Customer fields depending on which record type you want to add your custom field to

TIP: The same field can be included in both a customer and lead record if required, simply ensure the field is included in both record types.
How do I test my custom fields?
To test that your custom field works once you have created them and applied to a lead or customer record simply open a customer or lead record, depending on what is required and follow these steps:

How do I add a custom field to the Home Page in a customer or lead record?
It is possible to add a custom field to the home page of your customer or lead records however we advise that this is kept to a minimum and only applied on a strictly must need basis to prevent your home page from becoming disorganised.
Users will have noted that when enabling a custom field in a customer or lead record there was a column tick box for Priority, it is this tick box that ensure a custom field is promoted to the home tab of a record:

Once a field has been promoted to your record it will appear at the top of the home tab:

How do I delete custom fields?
Once a custom field has been created and has been populated for data integrity purposes, it can't be deleted. It can however be removed from view.
To do this simply located your custom field and until the required option and remove its membership by reversing the steps demonstrated above.
Can I rename a custom field to use it for something else?
No, we advise that you do not edit a custom field once it has been used, i.e. populated within information, by re-purposing its use e.g. changing it's name to capture other information should the original field become redundant.
The reason for this is that these fields will still contain information that has been populated previously under the original name of the field. When any exports on your data are ran from The Layer it will result in mixed information within that exported column.
Instead we recommend that you create a new field and remove the redundant field from view to prevent users from populating information within that field. This ensure that you data integrity is not compromised as a result.
The only time that it would be acceptable to edit a custom field name would be to correct a spelling mistake.
Can I export custom field data?
Yes, any custom fields that are created in the Layer are exportable from the Layer via the following custom reports:
1. All Customers
2. All Leads
To run any custom reports please refer to our How to access custom reports guide.
