In some instances when sending an email from the Layer a user may need to update more than one contact at a time.
To add multiple email addresses you must first ensure you are in the appropriate New Email window within the Layer, difference scenarios include:
- Sending a quotation
- Sending a case update
- Sending appointment confirmations
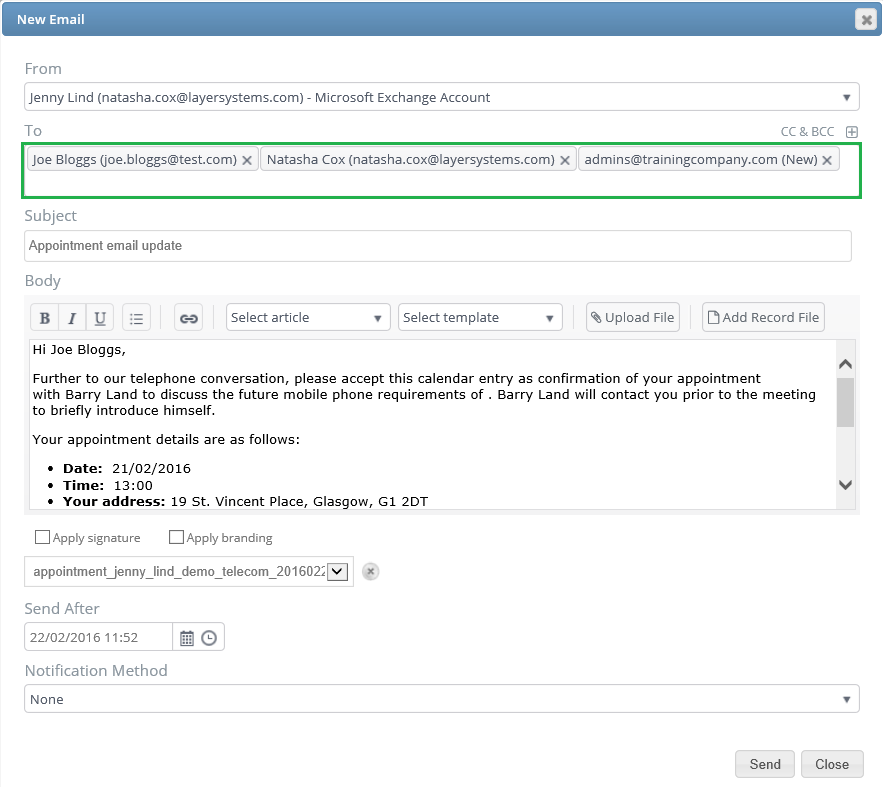
Once a user is within the appropriate New Email window, users will note in our example we are sending an appointment email update but the steps are the same regardless of what is being emailed e.g. quotation or case update. To email multiple contacts users must follow these simple steps:
- Populate the appropriate email window
- Within the To field of the email add your mail contact as usual and then continue by adding additional contacts in the same manner:

- Add in any contacts that are to be CC’d or BCC’d fields
- Once all appropriate contacts have been added and any amendments have been made to the body of the email press send.
In some instances the contact that a user wishes to email may not exist, users can either free type the new contact in or add a new contact to the record and we will now discuss both of these options:
Creating a new contact:
- Press the
 symbol on the right hand-side of the To, CC or BCC field
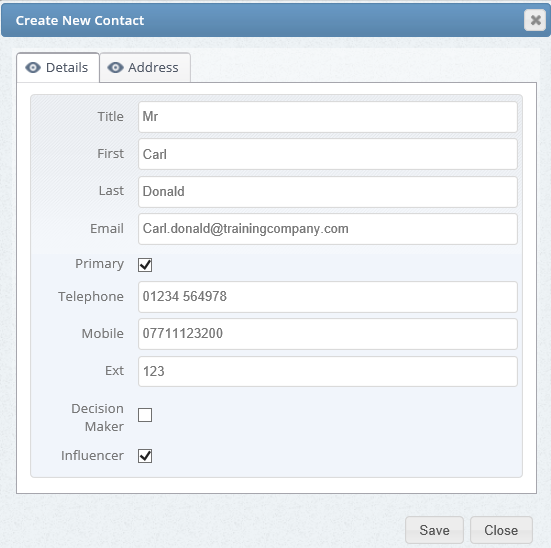
 - TheCreate New Cotact window will now populate
- Populate the appropriate details for the contact:

- Ensure you also populate the Address details if appropriate:
- Once you have populated all details press save.
- You can now add your contact to the email

Free Type in an email address:
In instances whereby a contact needs to be emailed but does not require to be made a contact in the customer record users can free type the email address into either the To, CC or BCC fields, to do this simply follow these steps:
- Type in the email address
- Once you have typed in the email address press the contact bubble that appears to confirm that this is a new contact:

- Your email address will now be populated into the field:

