
This guide will explain to you how you create a new user in The Layer.
N.B.In order to create a new user you must have at least one user access license credit available on your account, please check with your account manager for your current limit. Further to this you must also have at least one business unit set up, the reason for this is because you will need to assign your new user to a department.
Instructions
- Log into The Layer
- Select SETTINGS
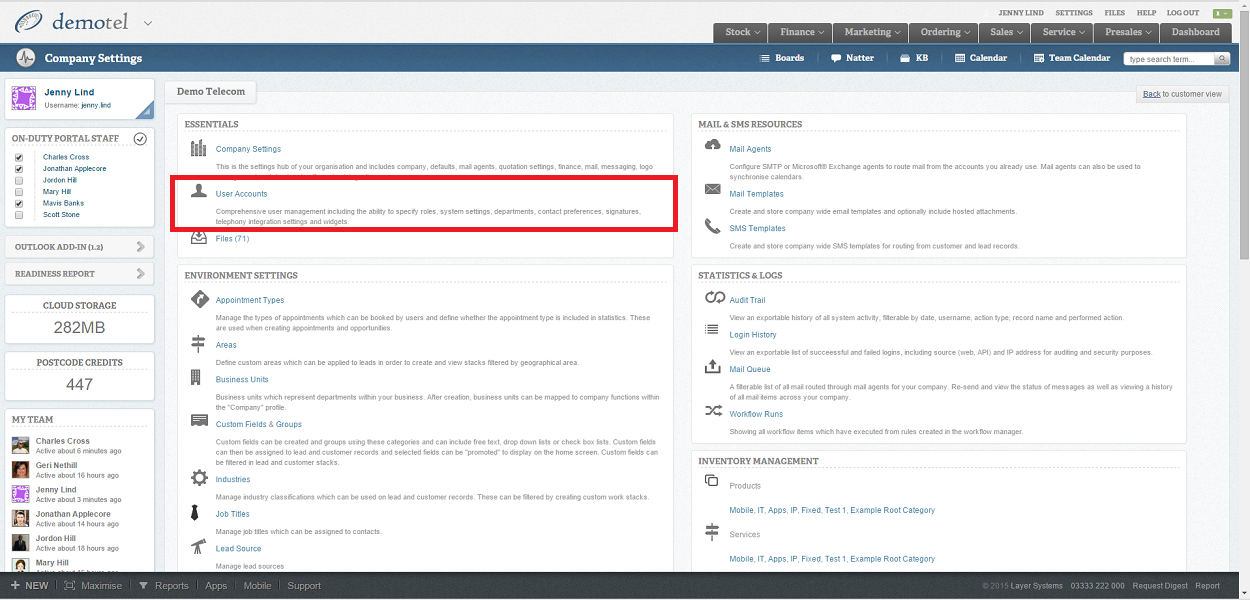
You are now on the SETTINGS page and you will see a list of sub headings
- Under ESSENTIALS select USER ACCOUNTS
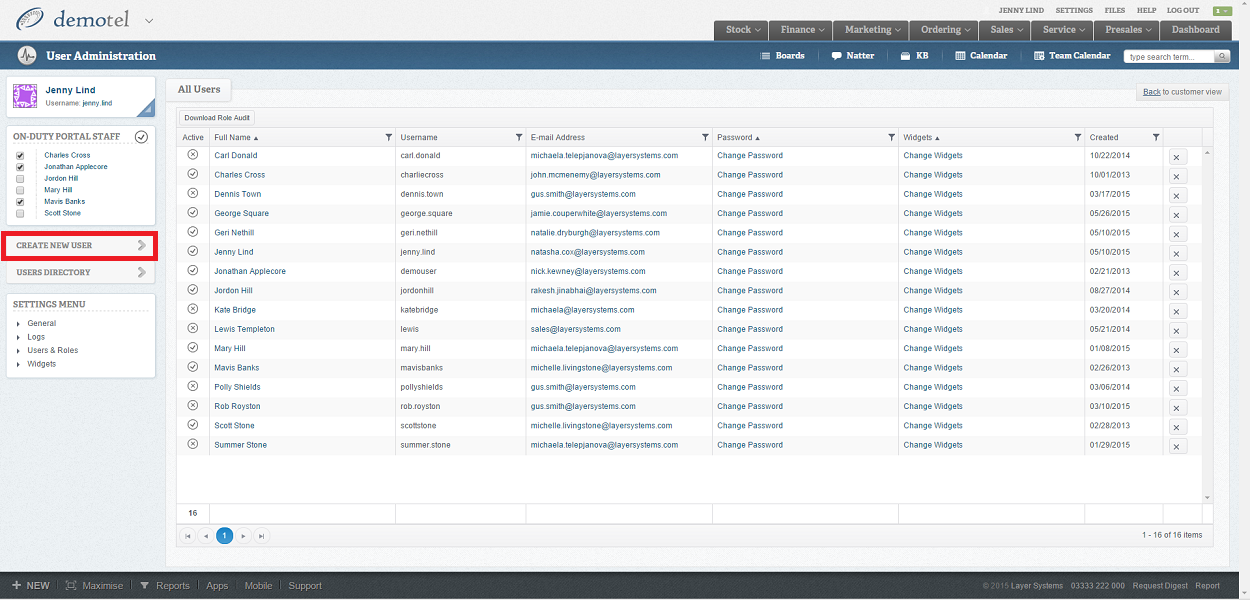
You are now on the USER ADMINISTRATION page where you will see a list of all current users.
- On the left-hand side select CREATE NEW USER
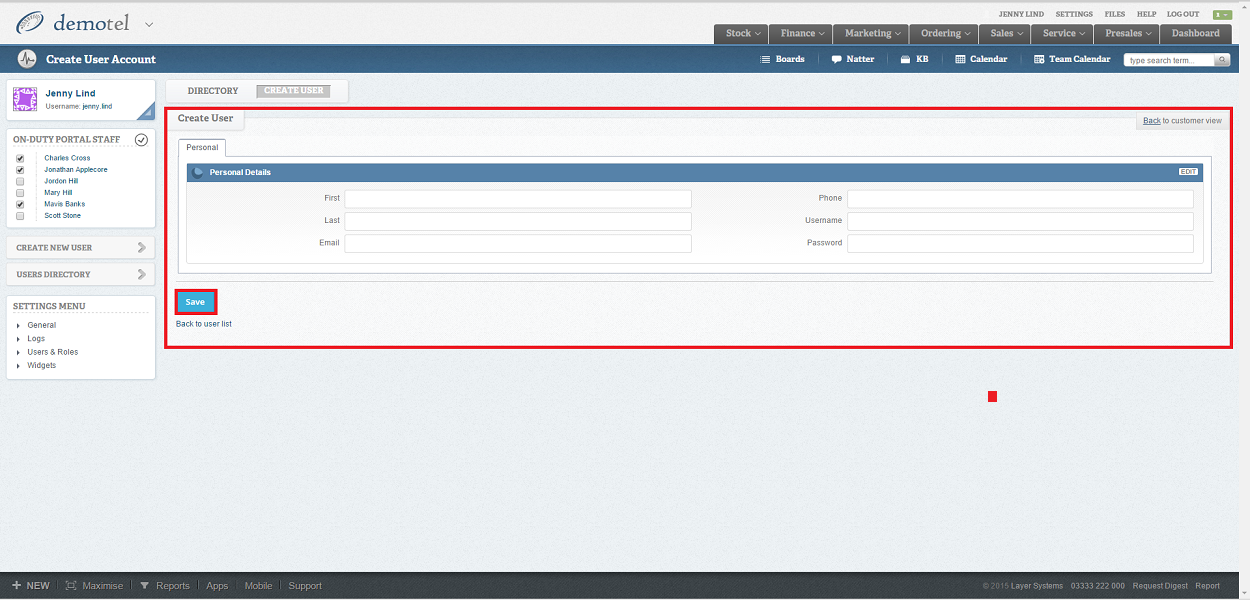
You will now be on the CREATE USER page where you will see the following fields:
First Name, Last Name, Email Address, Phone number
Username: Try to set and follow a convention e.g. firstname.lastname
Password: The system will generate this for you
- Now fill out all six fields and press SAVE
Now that you have created the user you will be taken to the EDIT USER screen and it is here you need to specify some more information such as your new users access. You will see that there are tabs on this page titled Personal, Roles, System, Departments, Contact Preferences, Signature, Telephony and Information, it is here you will be able to give The Layer more information about the user.
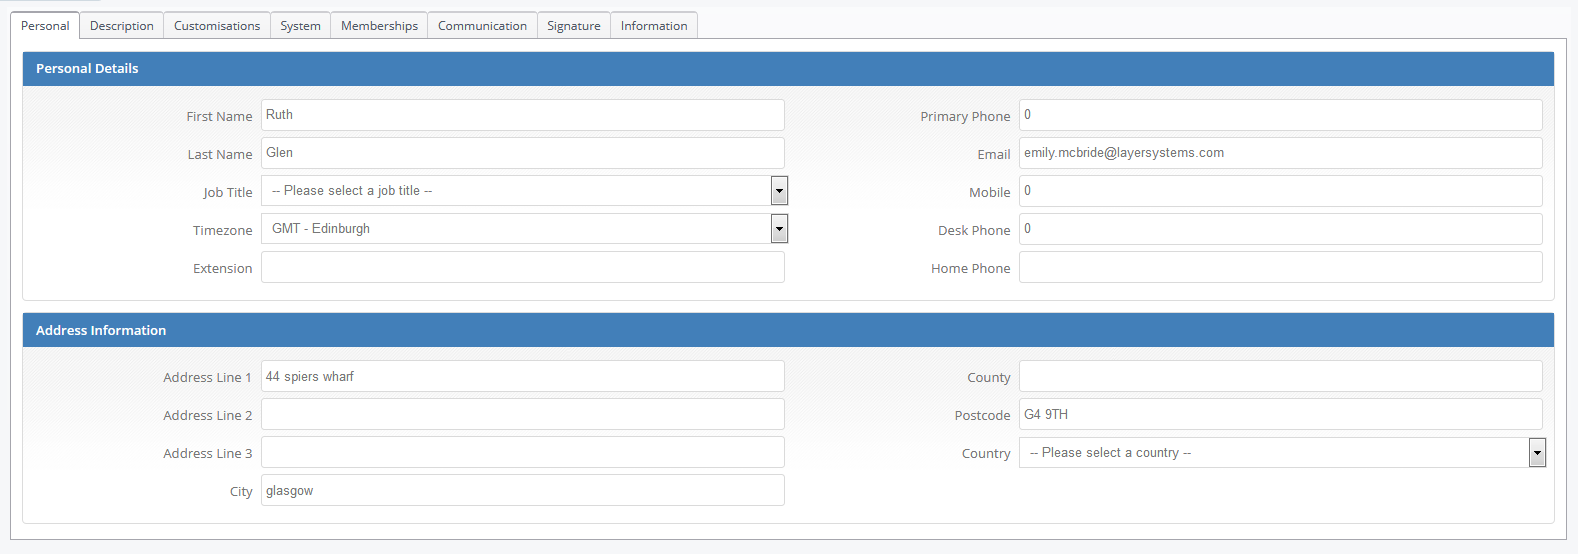
PERSONAL
The first tab you are presented with is PERSONAL and it is here that you will populate the users personal details and address information. The following fields are mandatory: Timezone, Mobile phone, Address Line 1, City and Postcode.
- Fill out the appropriate information to your new user and select SAVE
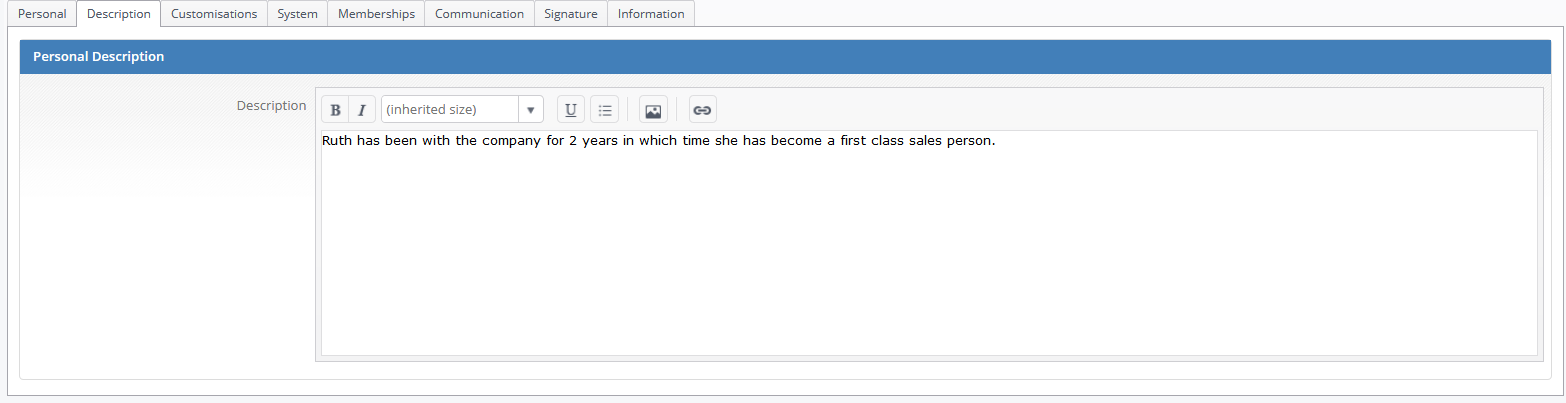
DESCRIPTION
Here you can add a short description of the user which can be pulled through to quotations if required. This is optional and can be left blank.
CUSTOMISATIONS
This tab is where you can apply specific quotation and sales order permissions.

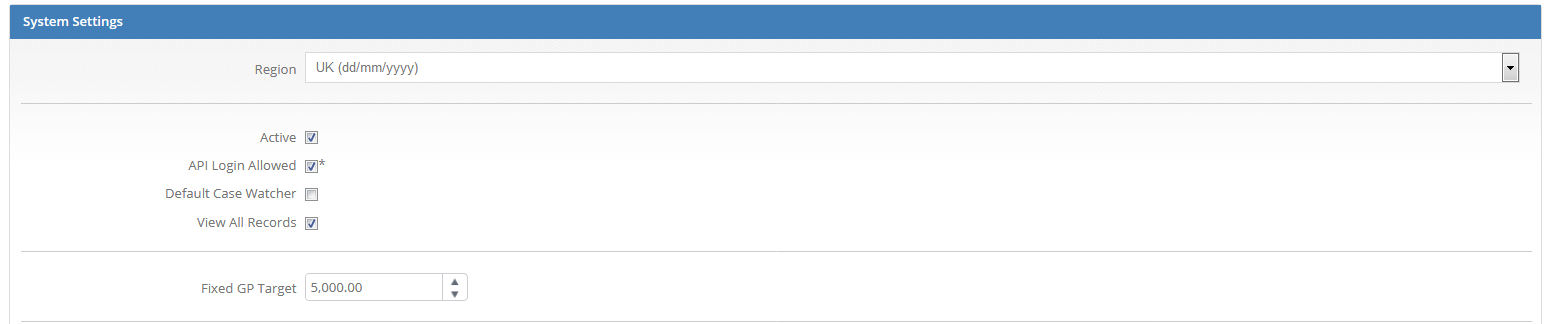
SYSTEM
The System Tab is where user accounts are set to active and also where some other fundamental fuctions are controlled. You will need to ensure that ACTIVE has been ticked otherwise your user will not be able to use The Layer.
Region: This will set the user's date format to either UK or US.
Active: Must be ticked to make the user account active and allow the user to login. Please note you will have to ensure you have enough licenses available to activate a user.
API Login Allowed: Selecting True will allow a user with administrator permissions to masquerade as this account.
Default Case Watcher: This is a mandatory field and if set to True flags the user as a Default Watcher on all cases.
View All Records: This will allow the user to access all records including ones they don't currently own.
Fixed GP Target: This will be the target profit for the user idf not required leave as 0.00.
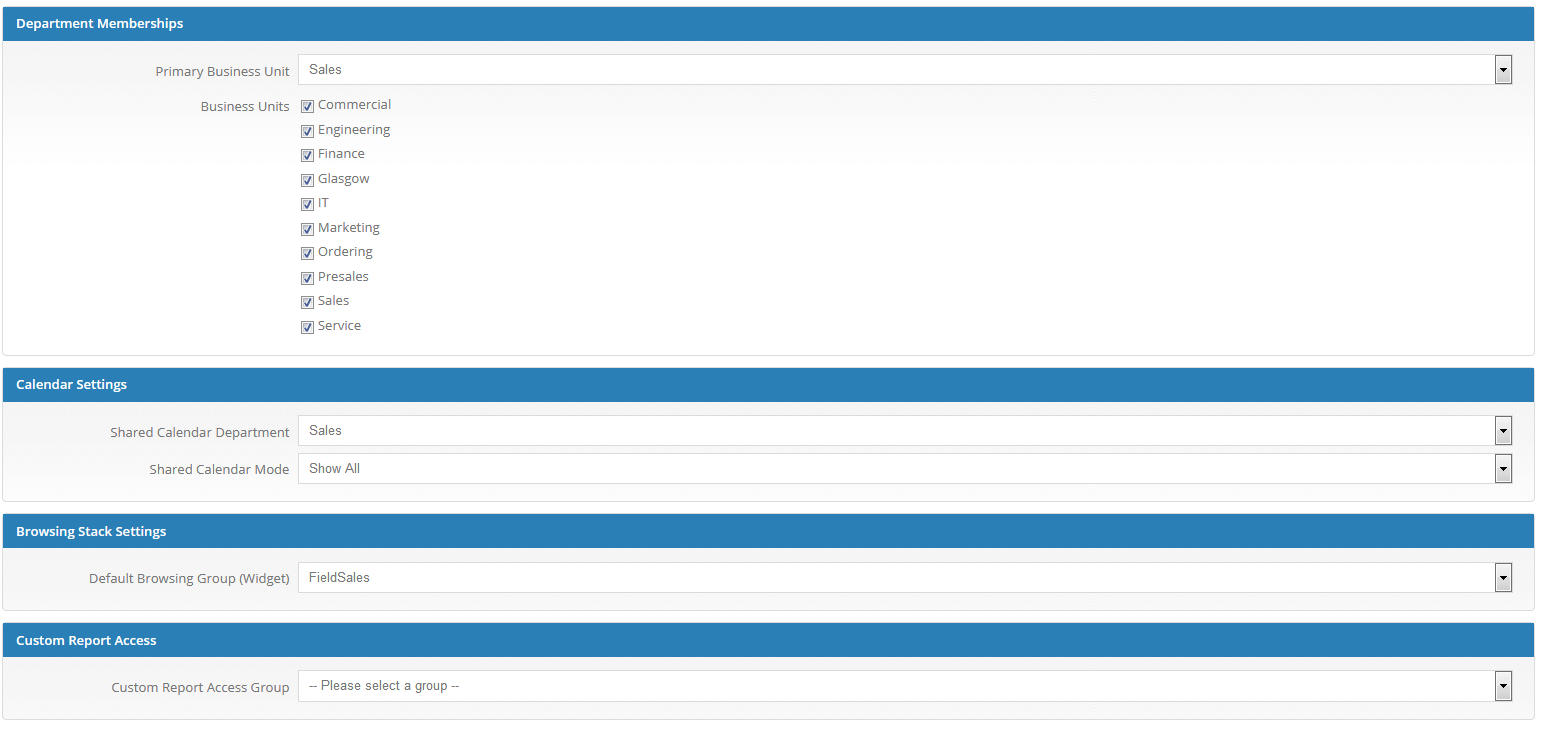
MEMBERSHIPS
In the departments tab you will see that it is split into three sections which are Department Memberships, Calendar Settings and Browsing Stack Settings.
Department Memberships: Will allow you to choose a primary Business Unit for the user and select any addtional units they require.
- Choose from the drop down
- Tick the relevant check boxes
Shared Calendar: Here you have the option of choosing a business unit to stipulate which Layer Calendar the user will be able to view but this is not mandatory.
- Select the appropriate business unit if applicable.
- Select whether you would like their calendar to show only Layer generated appointments or both Outlook and Layer appointments
Browsing Stack Settings: This will ensure that My Stacks widget features the widget from the users preferred module (This widget can only draw the stacks from one module).
Custom Report Access: This will give the user access to the specific reports that are in the relevant report group. These groups can be created in the settings zone for more information see here.
COMMUNICATION
This is where you select the relevant mail agent for the user which will allow them to send emails through the layer and also syncs their outlook and layer calendars. This is also where you can set if schedule conflicts should be allowed, meaning that two appointmetns can be set at the same time.
N.B. The users mail agent must be created before it can be set see here for further details.

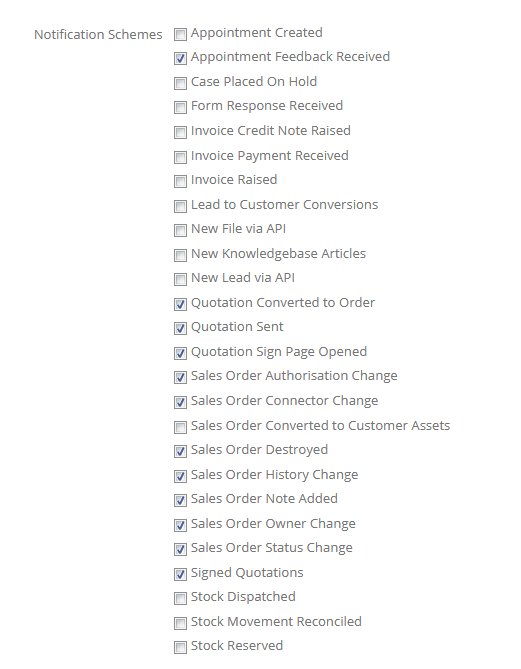
You can select whether or not the user subscribes to a predefined list of Notification Schemes in this section .
N.B. Opting a user into the options specified in this list will results in them receiving all company notifications i.e. all signed quote alerts, leave it unchecked for them to receive only their own quote signed alerts.
You can also select their Preferred Contact Method and whether or not they can be contacted by other means.

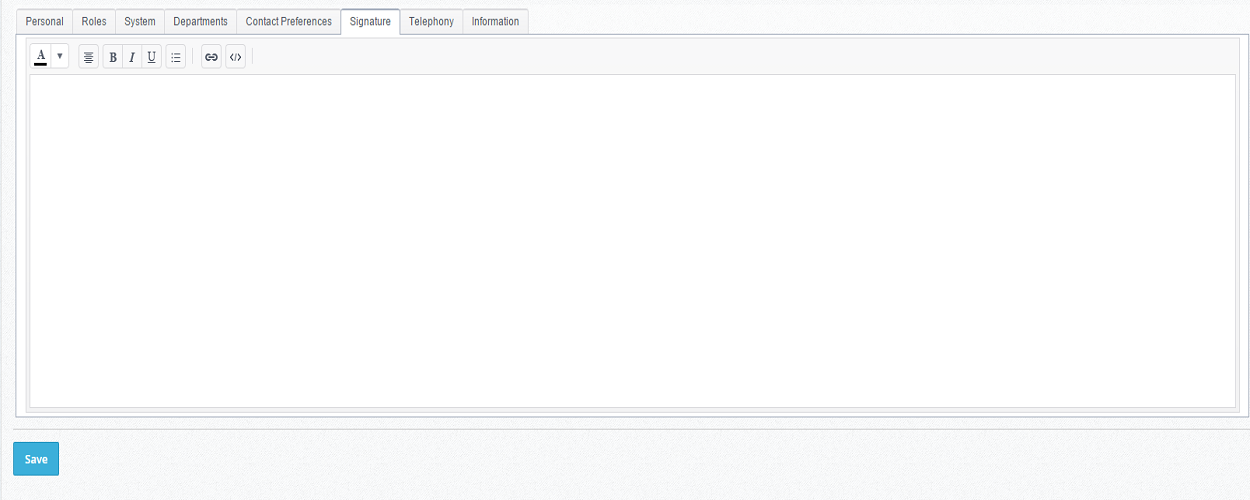
Signature
This is where you can design an email signature for the user, this can be as straightforward as copying and pasting their signature from a live email.
If the user has an existing signature that is applied visa their Exchange Service or Microsoft Office 365 account then this will automatically be appended to emails send from The Layer, if their signature is applied visa Outlook etc then you will need to recreate their signature in the Signature box in The Layer.
N.B. While you have the tick option of applying this signature to an outgoing email from The Layer, you won't see it anywhere only the recipient will see the signature.
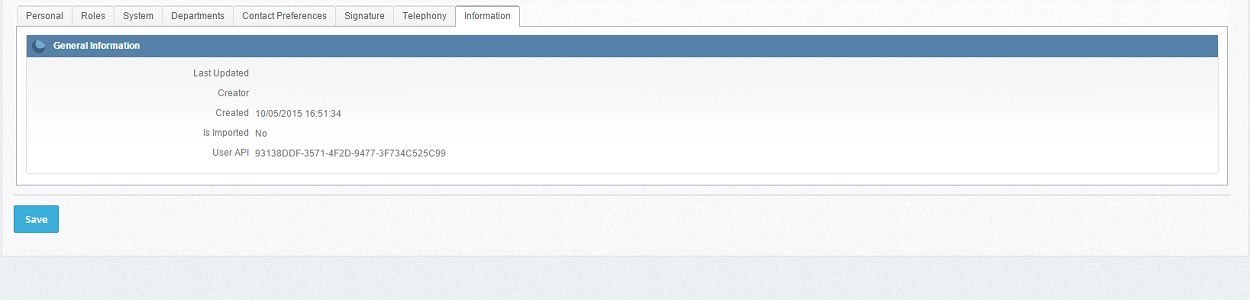
Information
This screen is a basic audit trail of the user account and will tell you the following:
Last updated: The date the record was last updated
Creator: The administrator who created the record
Created: The date the user was created
ROLES
From the list of options above the intital user settings you will see a roles button.

The roles section is a list of permissions that when enabled will allow the user to carry out certain activities or grant them access to certain record types in The Layer. You will also see that each role has a description beside it to advise you on what each role grants.
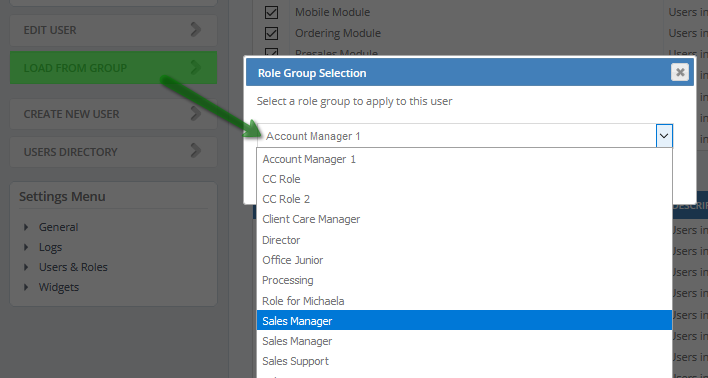
TIP: It is possible to load pre-defined settings for this screen from a Role Group. Role Groups are setup in the Settings Zone. See here.
- Tick each box to grant permission and then click SAVE.
N.B. You can jump between sections quickly by using our handy jump to drop down menu.
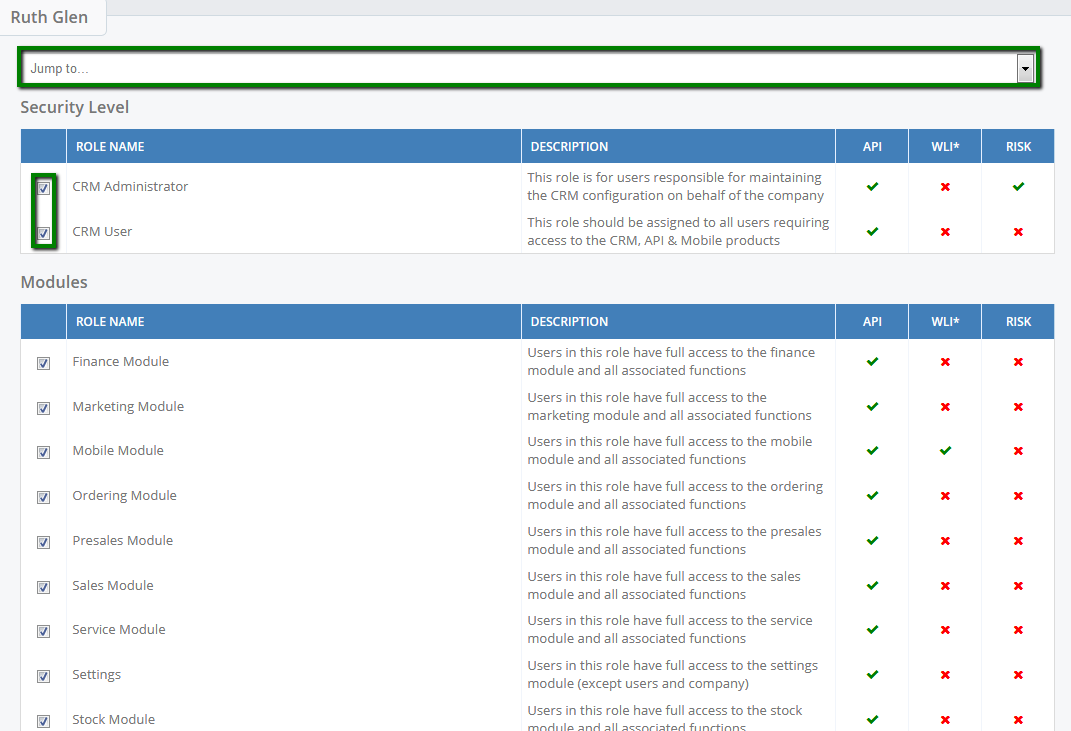
OR
Use 'Load From Group' option from the left hand side.
WIDGETS
From the list of options above the intital user settings you will see a widgets button.

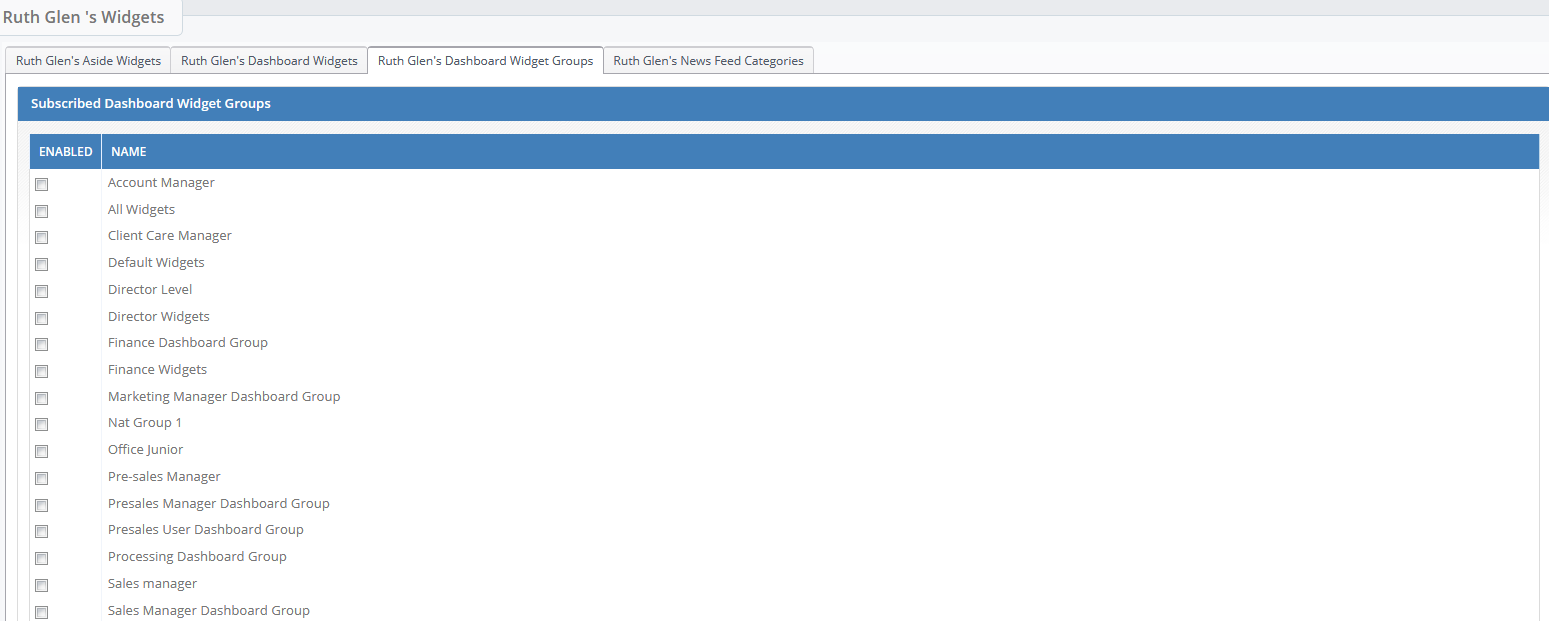
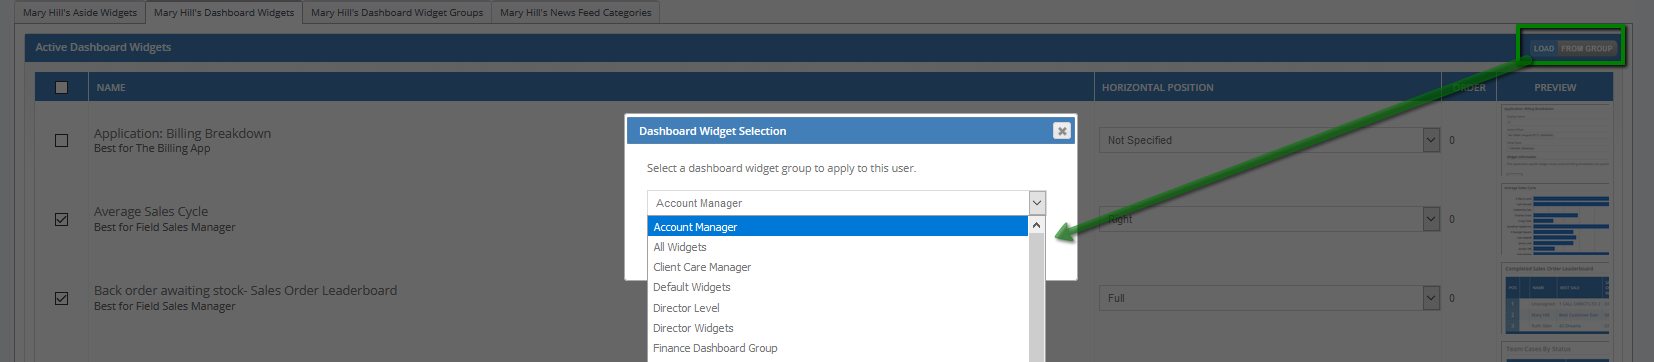
You will have to select the widgets you would like to appear on the user's dashboard. If they will have the same widgets as another group of users you can apply a widget group to the user. For more information please see here.
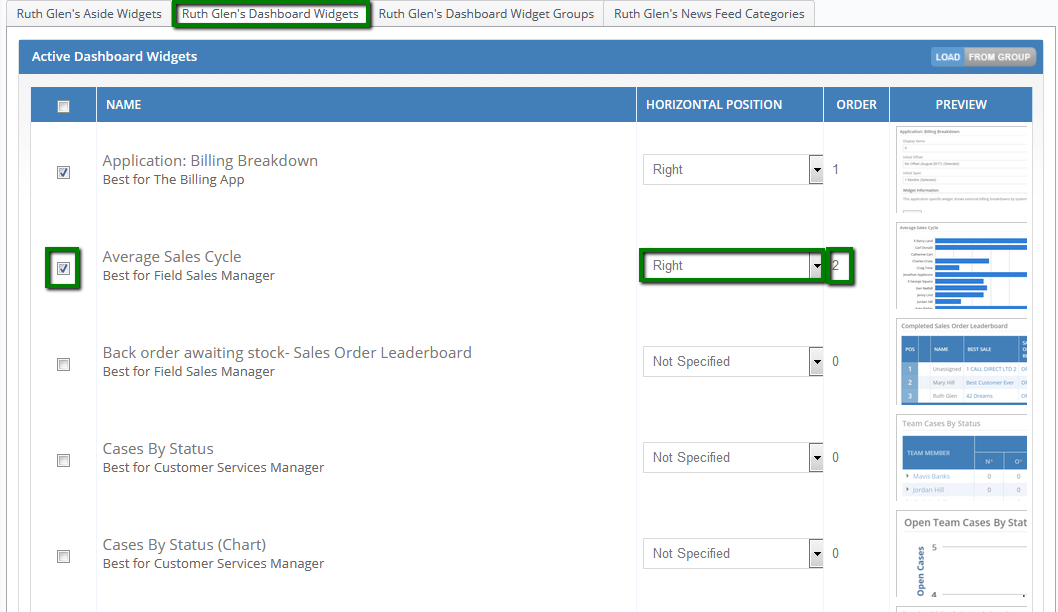
Alternatively you can apply widgets just to the the user by ticking them in the Dashboard widget tab. you can also set what side and in which order you would like the widgets.
N.B. Order of the widgets is numerical with 0 being the top and the bigger the nmber after the further down the dashboard the widget will appear.
OR
Use 'Load From Group' to load pre-populated dashboards.
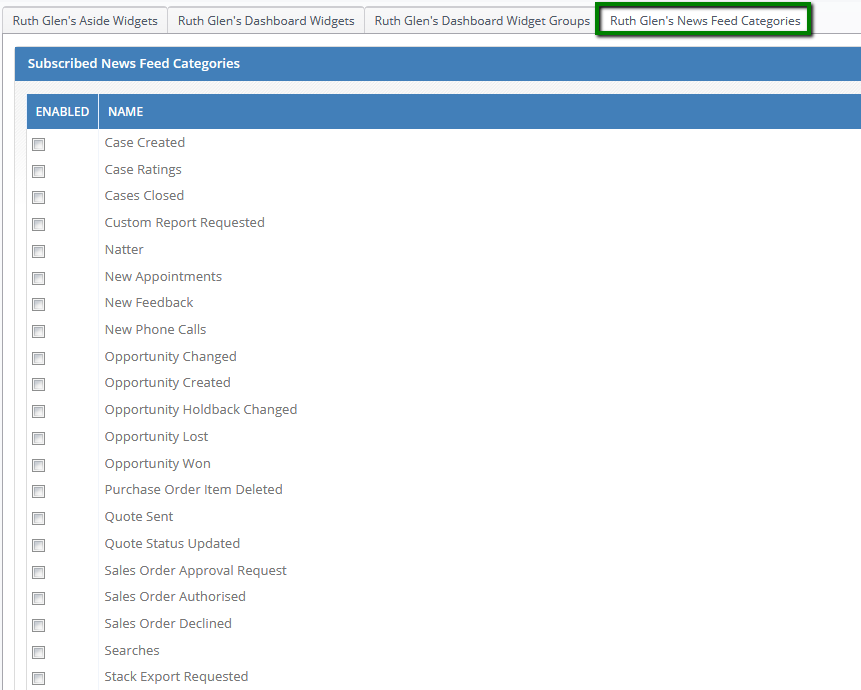
You can also select what fields you would like to include in the users news fed. This will be a summary of all users data sent at the end of everyday.
DIGESTS
Digests are Daily summary emails that can be sent to users for a variety of Layer data points.
To set up a daily digest for a user click on the Digests button at the top of the user settings. Then tick the subjects the user will require a daily update on.

N.B. You can click as mainy subjects as required they will all arrve on the one email.
WORKSTACKS
Before you can let the new user log in you will have to promote workstacks to their module tabs. You can do this by copying an existing users stacks, see here for more details.
If you have to apply unique stacks you can do this by masquerading as the user. To do this first go back to the Edit screen and then click Masquerade.

This will take you to the users account and you can now promote workstacks as normal, for more information on how to do this see here.
WELCOME
When you are happy that the user information has been entered correctly click on the Welcome button at the top of the page to send a Welcome email to the user. This will give them details to log in for the first time.

You have now created a new user, if you need any further information please contact your Layer Account Manager.