
Creating an impersonation user on Office 365
Managing Exchange mailbox access centrally is recommended for businesses with 5+ users in order to avoid asking users to update their password on both Office 365 and The Layer.
In order to achieve this, a maintenance account can be created on Office 365 which has impersonation access.
Exchange Impersonation enables a caller to impersonate a given user account. This enables the caller to perform operations by using the permissions that are associated with the impersonated account, instead of the permissions that are associated with the caller's account.
Please note that the ApplicationImpersonation feature is available in Office 365 Enterprise, but not in Office 365 Small Business, since it is based on RBAC, and Small Business users cannot create new admin roles in Exchange admin center.
How to create a user account on Office 365
It is best practice to create a separate user account to handle impersonation and set a strong password. e.g. layeruser@yourdomain.com.
This account acts as the impersonating account and it is important to specify that the password for this account should not expire.
How to create an Exchange impersonation user via Powershell (Recommended)
PS C:\WINDOWS\system32> $Session = New-PSSession -ConfigurationName Microsoft.Exchange -ConnectionUri https://outlook.of fice365.com/powershell-liveid/ -Credential $UserCredential -Authentication Basic -AllowRedirection
PS C:\WINDOWS\system32> Import-PSSession $Session
If signing isn't available...
PS C:\WINDOWS\system32> Set-ExecutionPolicy RemoteSigned
PS C:\WINDOWS\system32> Enable-OrganizationCustomization -Verbose
PS C:\WINDOWS\system32> New-RoleGroup -Name "Layer_Impersonation" -Roles "ApplicationImpersonation"
PS C:\WINDOWS\system32> Add-RoleGroupMember -Identity "Layer_Impersonation" -Member "layeruser@yourdomain.com"
How to create an Exchange impersonation user via Office 365
- Login to the Office 365 Exchange Admin Center
- Scroll down to "Admin" and expand
- Select "Exchange"
- Select "Permissions"
- Click on "Admin Roles"
- Click the "+" Icon to add a new role
- In the role group dialog box Provide a name for your Role Group (ie. "LAYER_Impersonation")
- Under Role click the "+" icon to add an RBAC Role.
- Select ApplicationImpersonation", click "add ->" and then click OK.
- Under Members click the "+" icon to add a new memeber to the RoleGroup
- Select your admin user account that will act as the maintenance account for The Layer (layeradmin), click "add ->", and then click OK.
- Click Save
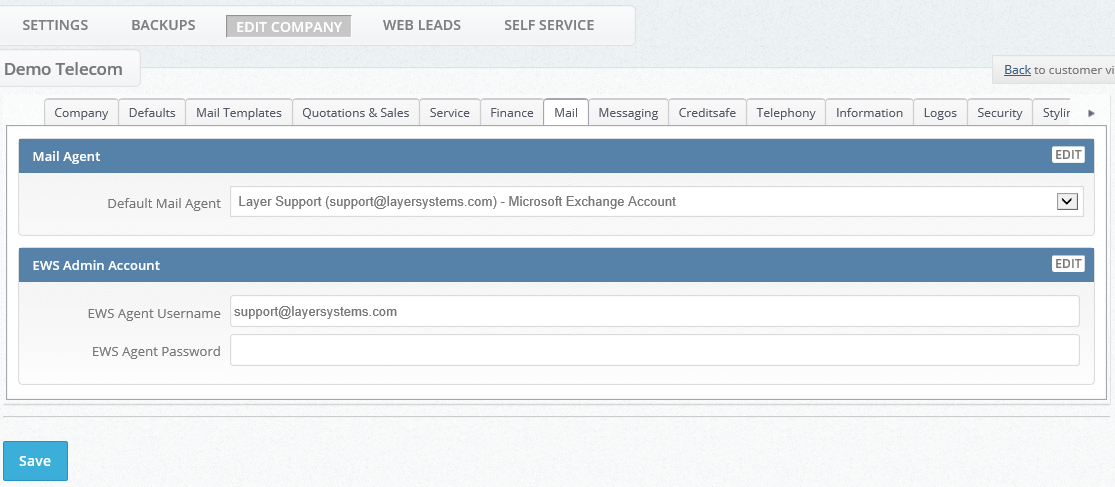
Adding your secure Exchange Web Services (EWS) password in to The Layer
Log in to your account in The Layer and go to the company settings as below then go to the Mail tab and then add your Exchange Web Services Agent Password:
As a guide we would recommend not using the following in your password:
- Your company name
- your own name
- your address
You should choose a random yet secure password which contains the following:
- a minimum of 8 characters
- contains a mixture of both numbers and letters
- at least one capital letter
- at least 2 special characters