The Layer have introduced three different ways for you to update your customer contacts preferences.
1. Create a marketing campaign for your Consumers and Sole Traders with the follow up elements
2. Send an individual email to the customer contacts
3. Manual update of the contacts
Method 1 - Marketing Campaign
To create a marketing campaign please follow our detailed Marketing guide here.
Before you create your marketing campaign we recommend doing the following:
1. Check your data:
- Ensure that all your customers have a business entity specified correctly.
- Ensure that your contacts are up to date and that contacts which no longer work for the company are deactivated on The Layer.
2. Create required workstack/-s:
Create the customer stack which will be used for your marketing campaign. Depending on who you want to send the marketing campaign to. Use available filters like business entity and customer status (Live, Pending, Cancelled, Pending Cancellation)
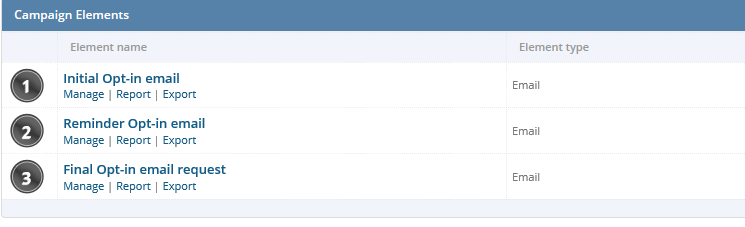
Now you are set to create a marketing campaign as per our example below. Please note, you can create multiple campaigns depending on the company type (Sole Trader, Consumer etc.).
Add relevant elements for the marketing campaign as a follow up to your original email. See examples below.
Select Recipients

Make sure that you use the option ‘Load from stack’ as this will update the contact preferences within customer record.
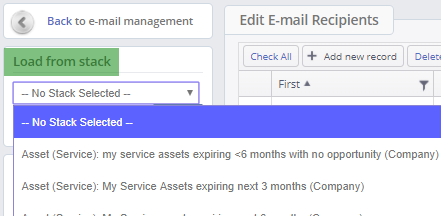
Note: You won’t be able to use the option ‘Load from list’ in this type of marketing campaign as that won’t update the contact preferences against the record.
Edit the recipient list via available buttons
- Remove Duplicates
- Remove Unsubscribes

Within the follow up element don’t forget to use:
- Option to ‘Remove Opt-In’ contacts and
- Option to ‘Remove Opt-out’ contacts
to ensure that you are only sending an email to contacts that haven’t updated their preferences yet.

Once you are happy with the list of recipients continue to design your campaign email.

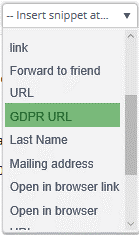
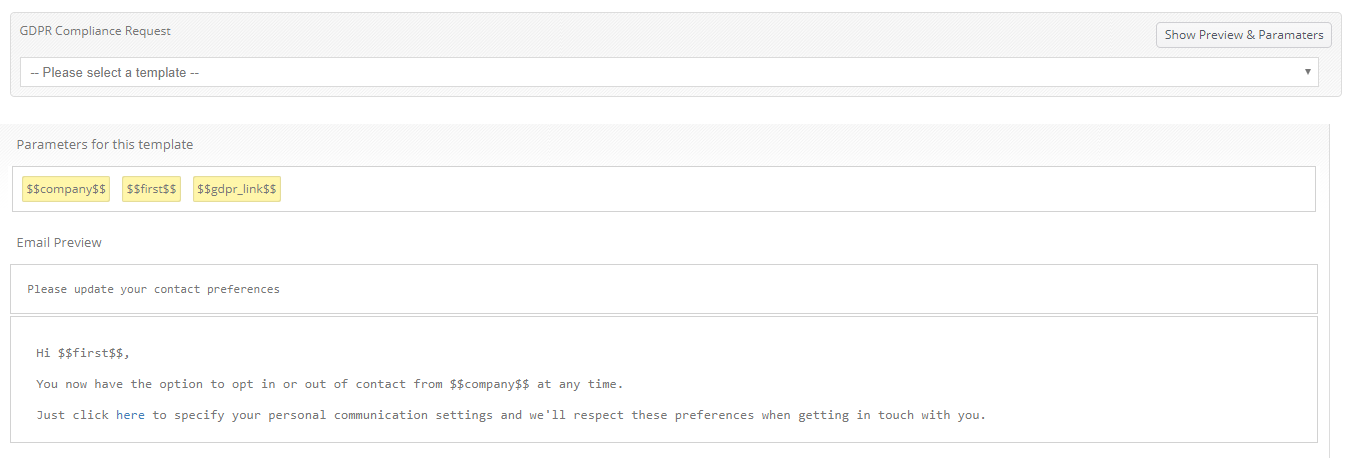
Within your ‘Edit E-mail Content’ screen add a link to the ‘Compliance’ landing page where your recipients can specify their contact preference.

To add the GDPR URL into the marketing template go to ‘insert snippet at..’ and from the drop down list select ‘GDPR URL’ option.
This link take the customers to the following landing page. If you would like to create your custom landing page please read our KBA here.

Once the preferences are saved your contact will be presented with this screen
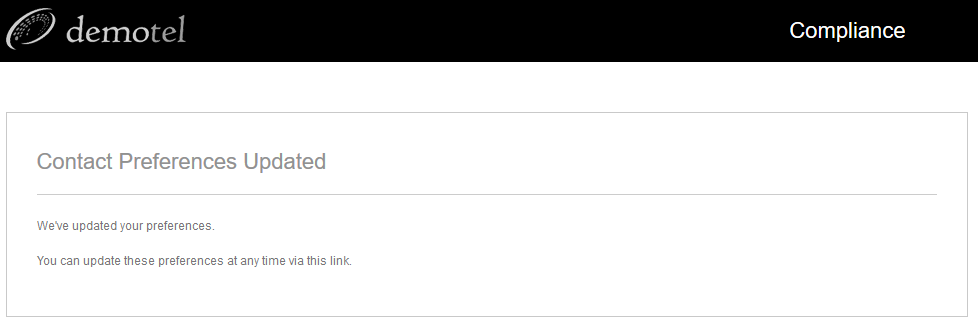
Note: Previously selected preferences will be saved and will be visible when you access the link again. Therefore, your customer contacts will always be able to go back to the link and check which preferences they have already selected.
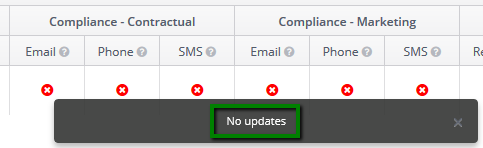
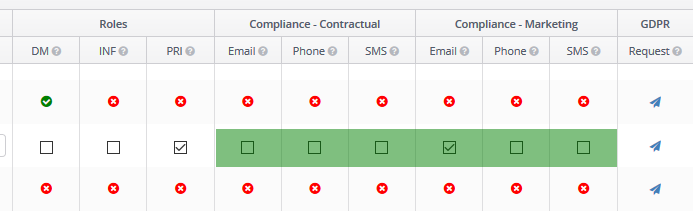
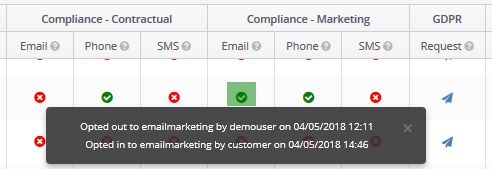
The contact preferences will be updated and saved within the contact record under Compliance - Contractual & Compliance - Marketing column. Every change will be recorded with the date and time stamp, this is split into customer change via the external link or internal change within The Layer (see Method 3)

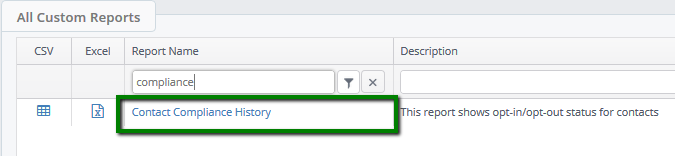
A report has been created which shows the break down of the opt-out status.

Method 2 - Individual email to a contact
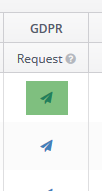
Within the contact Tab in the customer or lead record under GDPR column you will be able to prompt an individual email for selected contact with the ‘GDPR Opt-In Request’.

To send the request email simply click on the ‘Send’ icon
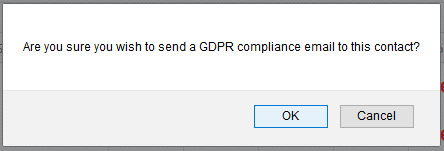
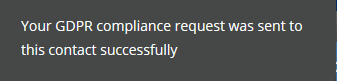
Confirm that you want to send the compliance email by pressing ‘OK’. If you don’t wish to send the email at this stage simply click ‘Cancel’.
You will see the confirmation of the email being sent to the selected contact.
See example of the default email below.

You can customise your email in the settings zone and map it to your selection in Settings -> Company Set up -> Mail Templates.
The default email template has already been set up for you.
Method 3 - Manual update of a contact
Note that you can also amend customer contact preference manually simply by editing the contact entry 
This will be noted within the history with the date and time stamp and the user name that has made the change.
If the customer hasn't confirmed Opt-out option you will be presented with the message 'No updates'.