
This article will show you how to create a new work stack.
Please note there are many variations for work stacks and this article illustrates the basics of creating a work stack, the example we have used for this article is to create a "my overdue cases" work stack.
INSTRUCTIONS:
- Log into The Layer
- Select the module you'd like your work stack to be listed under
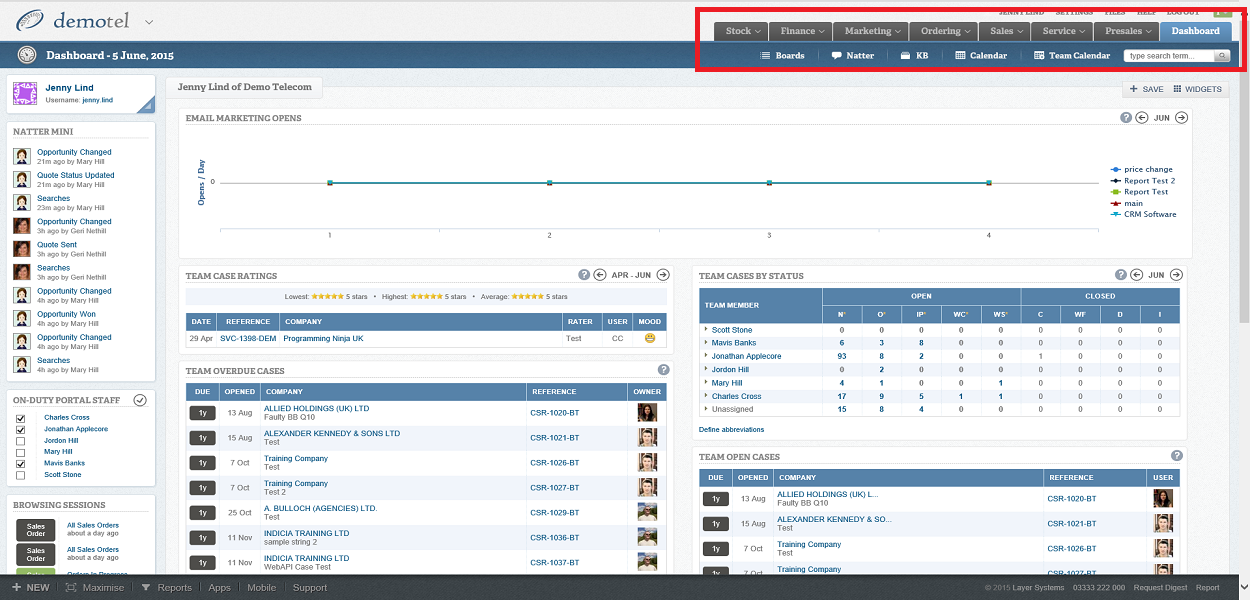
- Access your desired tab, in this example we have selected the Service Tab to create a new case work stack for overdue cases.
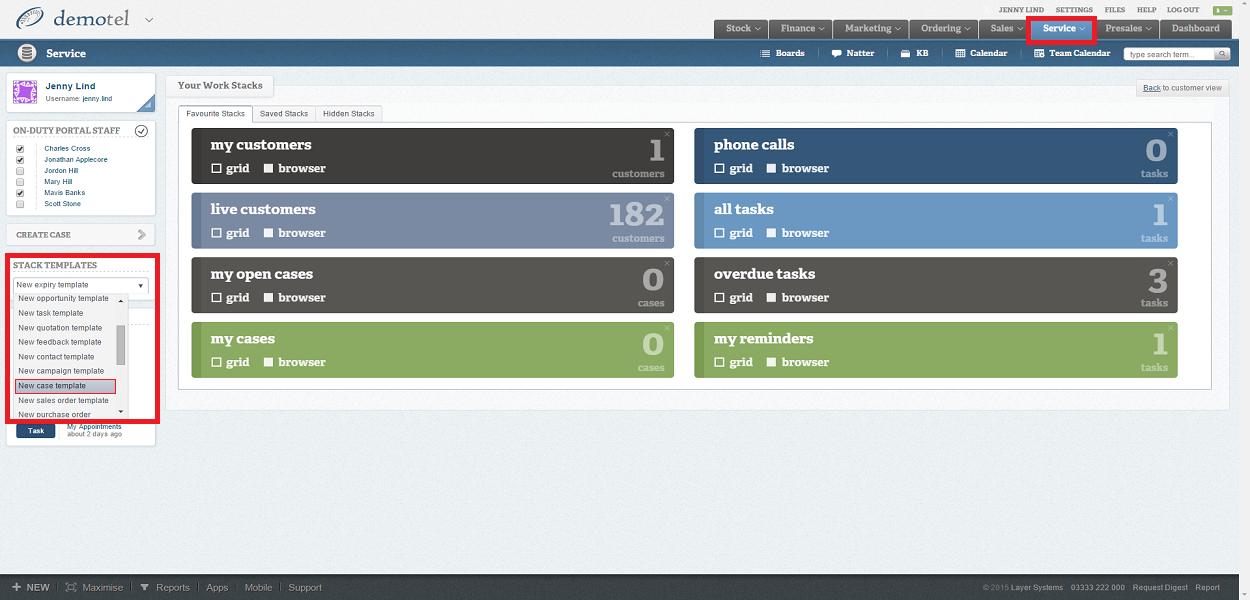
- On the left-hand side you will see STACK TEMPLATE, select the appropriate existing stack template, in this example we have selected new case template.
In the New Case Template it's possible to set your parameters for the work stack.
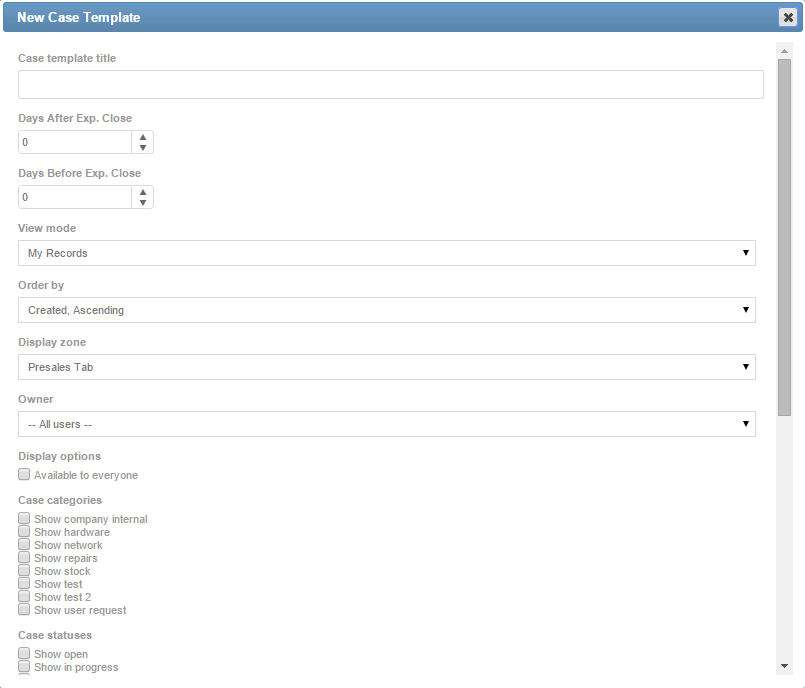
- Case Template title: Title of your work stack
- Days After Expected Close: Days after your SLA due date
- Days Before Expected Close: Days before your SLA due date
- View Mode: Pick from all records or just your own records
- Order by: Order in which results appear
- Display Zone: This is where you pick which tab the work stack falls under. In this example we are choosing Service because we want the work stack to be in the Service Tab.
- Owner: Whose cases you want to view in the stack, e.g. your own or another users or all.
- Display Options: Whether you want this to be available to everyone or not.
- Case Categories: Select which of the categories are relevant to you.
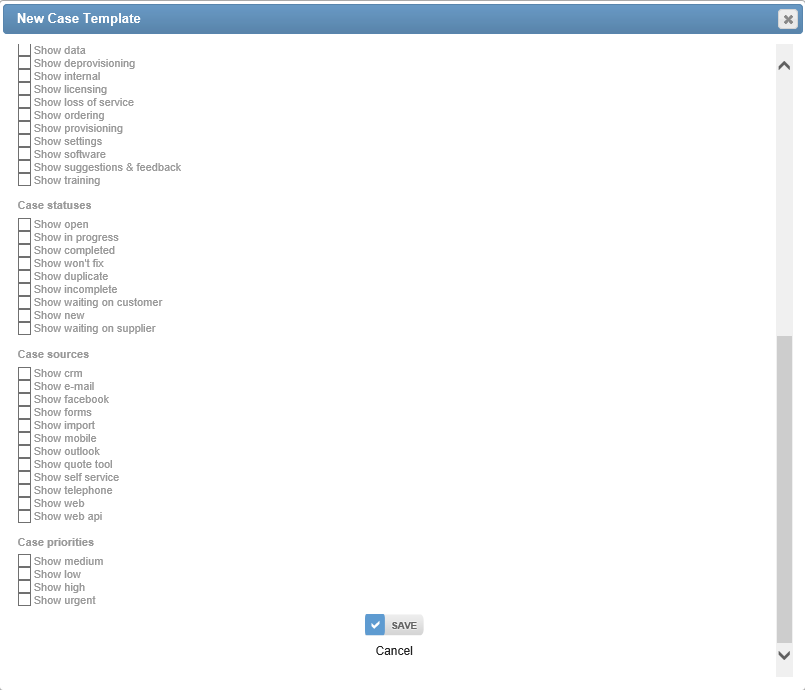
- Case statuses: Which case statuses you want to be included this work stack
- Case sources: Which case sources you want to be included in this work stack.
- Case priorities: Which case priorities you want to be included in this work stack.
N.B. Where there are multiple check option under a header, leaving them all unticked will pull through all variations for your work stack. Note the Categories and Statuses options will vary depending on the settings configured in your instance of The Layer.
- Once you have set your parameters press SAVE
Now that you have set the parameters for your work stack you need to test it. Confirm that it has been created properly by promoting it to your Service Tab.
Testing your work stack:
- In the Service Tab select SAVED STACKS
- Find the title of the work stack that you just created
- Click on the title

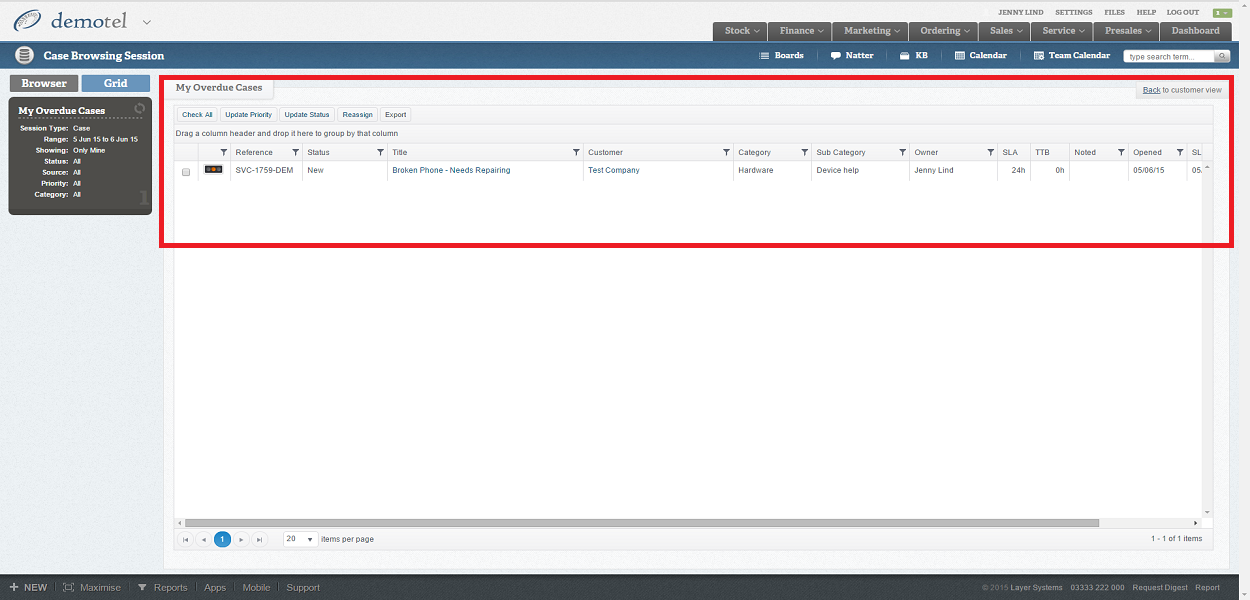
This should now take you to a list of all records that meet the parameters you have set for your work stack if, when testing your work stack, it does not take you to the below screen there could be number reasons why. We've provided the most common reasons below:
- There are no current records that meet the parameters you have selected, however, data will pull through to your stack as relevant cases are updated/created etc.
- You have set the parameters incorrectly meaning no data can be pulled through. If this happens you will need to delete your work stack and start again.
If you are sure there should be records within this stack and you have created the stack correctly please contact your system administrator for further investigation.
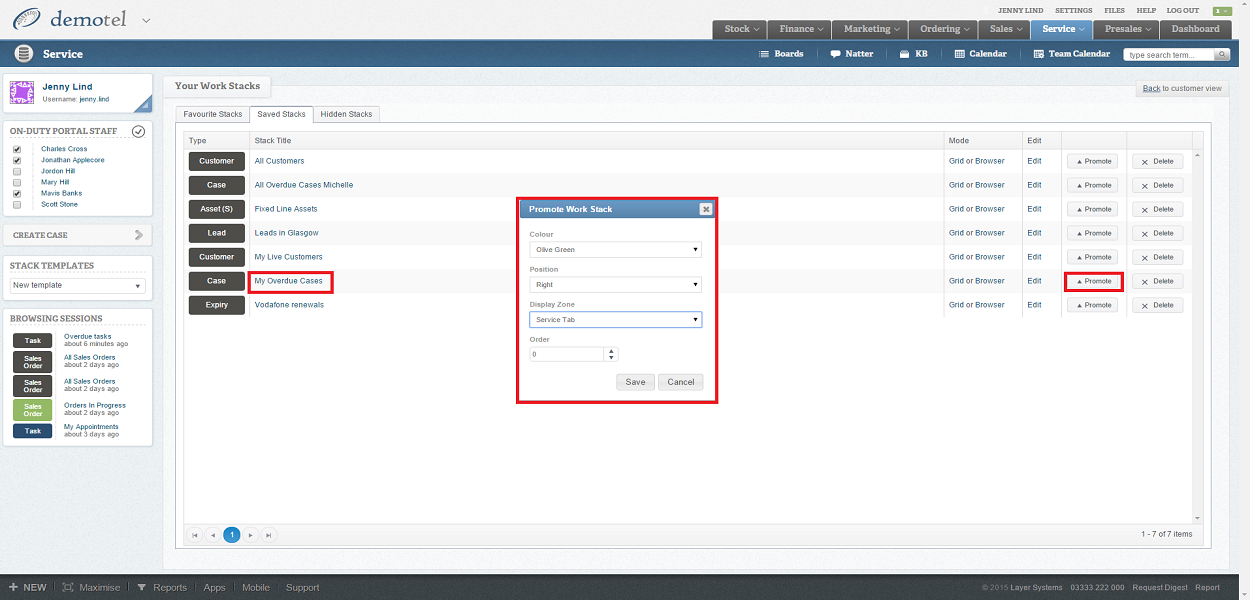
PROMOTING YOUR WORK STACK:
Now that you know that your work stack returns the correct information, you can promote it to the desired module tab. In this instance it will be the Service Tab as per our previously set parameters.
- Select the Back to customer view on the top right-hand side of your screen
- Find the work stack that you have just created
- On the right-hand side you will see the Promote button, press this.
- A screen will pop up to allow you to promote this work stack.
- Colour: Colour of your Work stack
- Position: Either Left or Right
- DISPLAY ZONE:YOU MUST SELECT THE TAB IT NEEDS TO APPEAR IN, IN THIS EXAMPLE IT IS SERVICE TAB
- Order: Row order
- Press SAVE
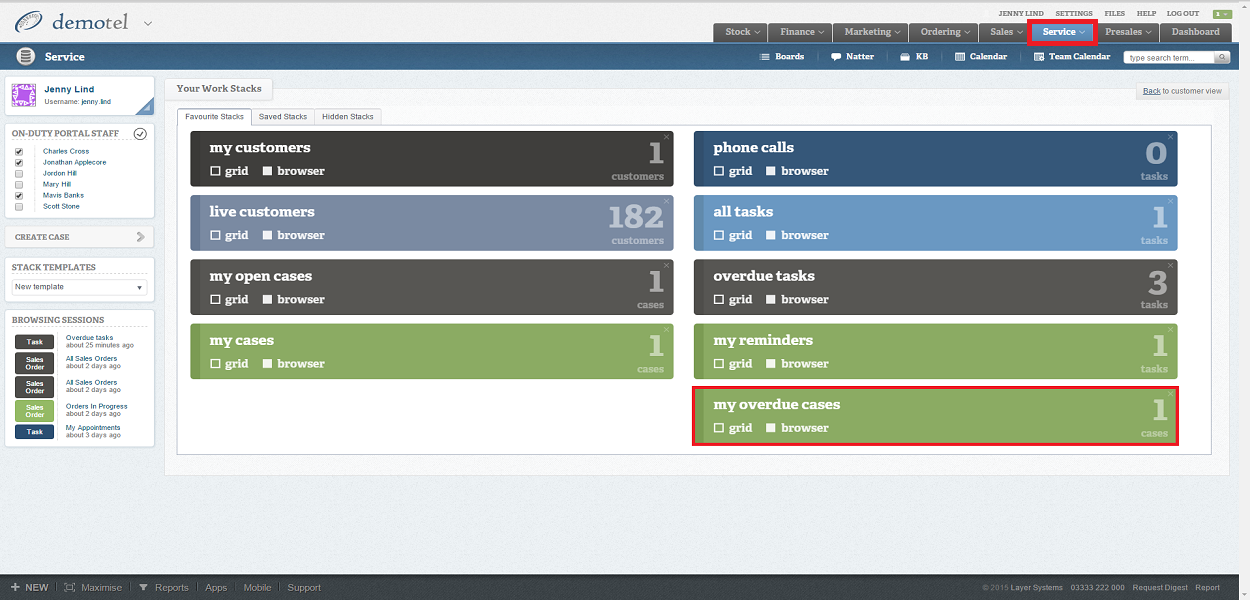
Next, you'll see the work stack overview within the tab you selected for the Display Zone. In this instance we selected the Service Tab and you will see your created work stack in this tab.
N.B. To promote stacks is a permissions based role. If you currently don't have this permission please contact your administrator.