
How to import sales payments into Sage 50
1. Go to your invoice payment stack. this will be named to your businesses preferences and is typically stored in stock or finance.

2. Export your required file - 'Sage Payments Export'
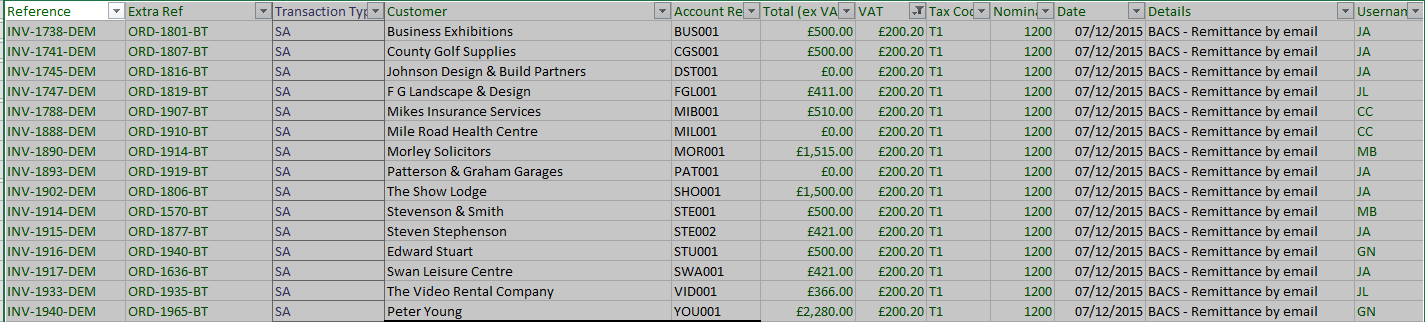
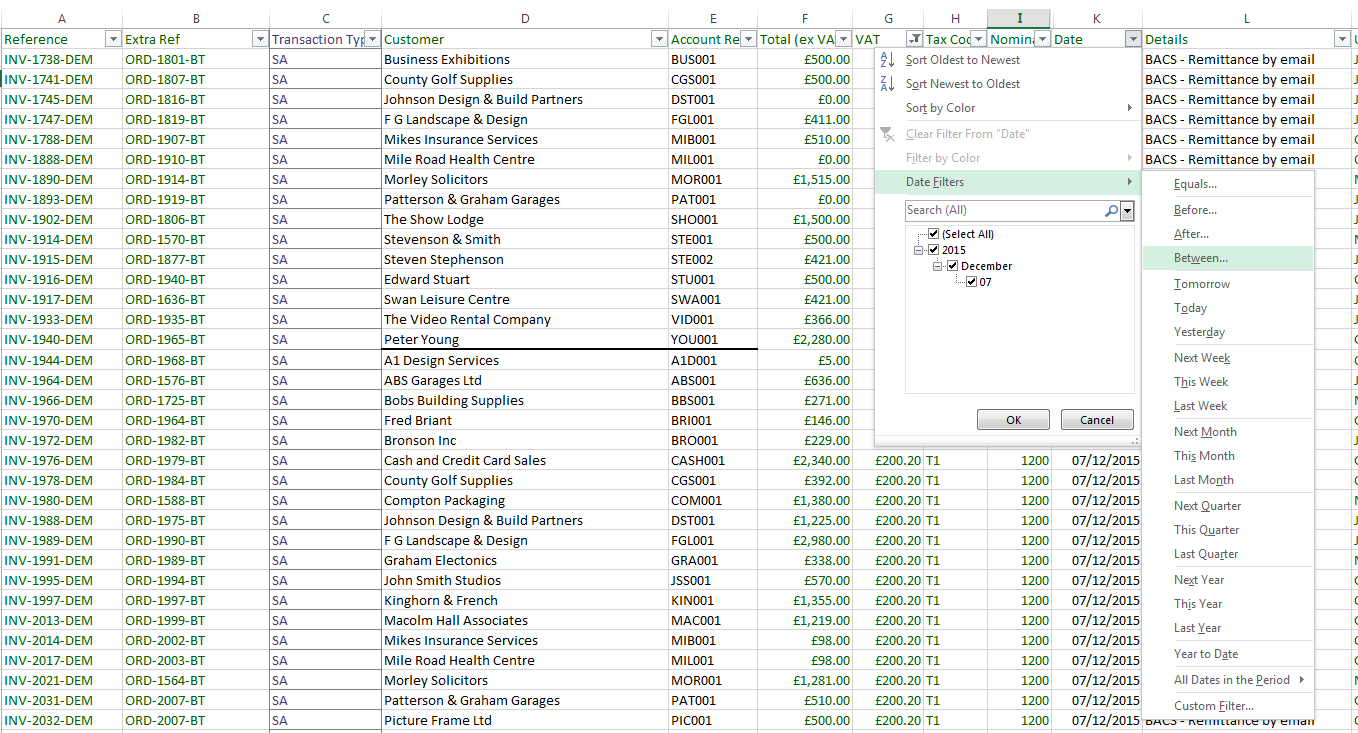
3. Review your export to ensure that your date range for import is filtered correctly. To do this, select the filter icon in the column K (our example), select ‘Date Filters’ and ‘after’ this should be the day after the date of the last payment import. Add a column named ‘Nominal’ and add the relevant bank account that the transactions should be imported to. If you have multiple accounts, use the ‘details’ tab to confirm the customer method of payment.
4. Save a copy of your file to your chosen location and provide an easy to identify name such as 011205_071205_SalesPayments_Sage_ML. We’ve used this naming convention to identify the date range applied (1st December 2015 – 7th December 2015) and also the transaction type (SA – Sales Payment on Account).
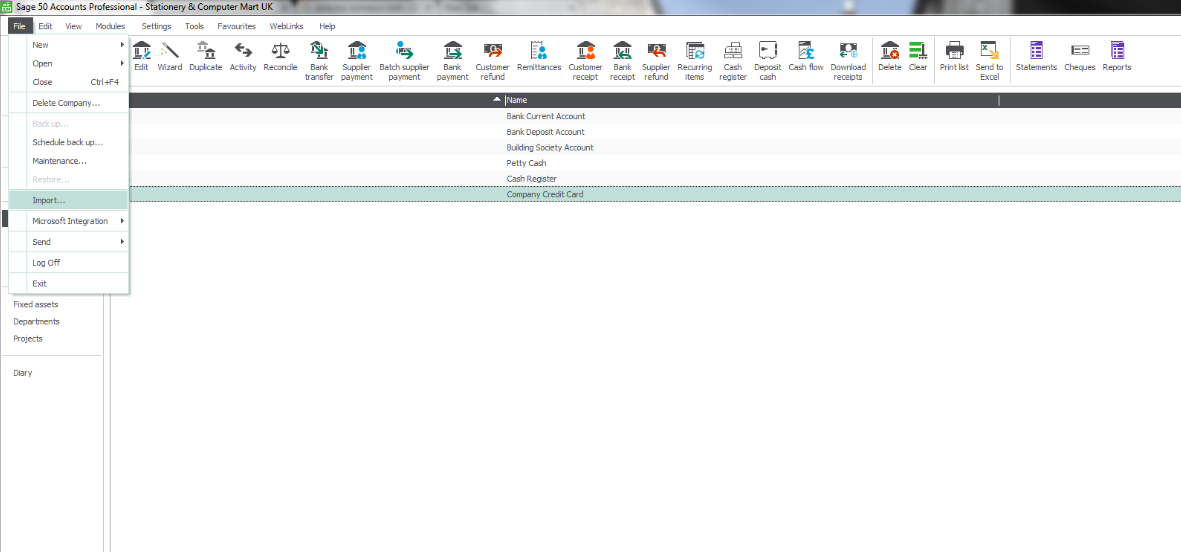
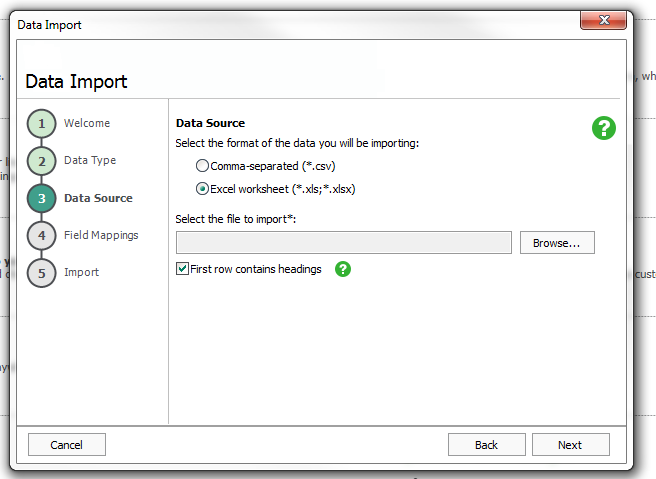
5. Open Sage 50 and select File and then Import:

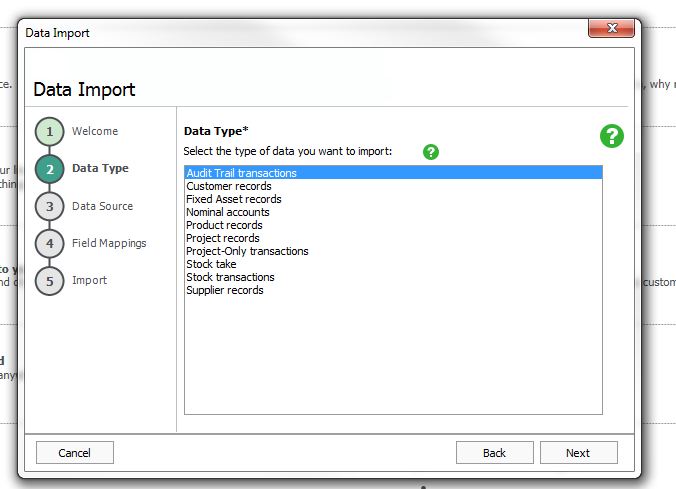
6. Select 'Audit Trail' transactions
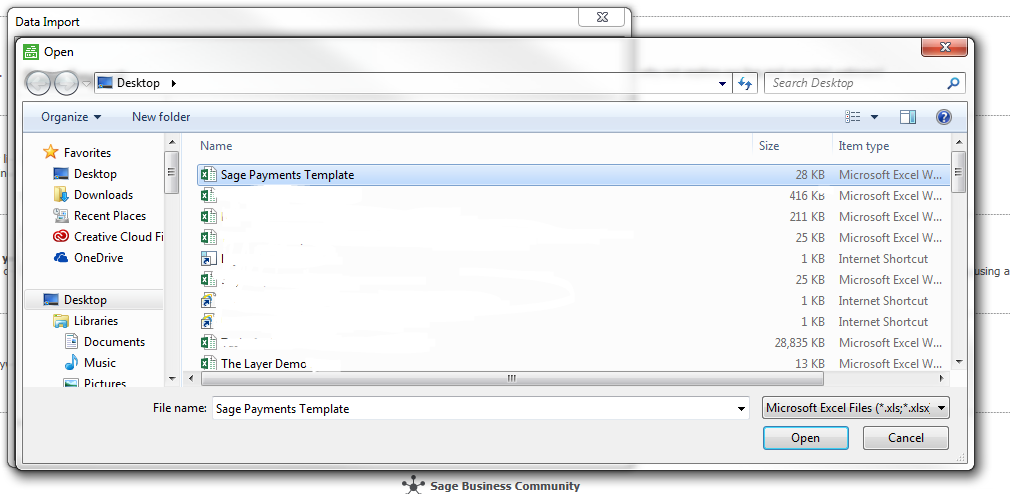
7. Select the file stored earlier 011205_071205_SalesPayments_Sage_ML (Sage Payments Template) and select ‘Next’
8. Select 'Open' and then 'Next'
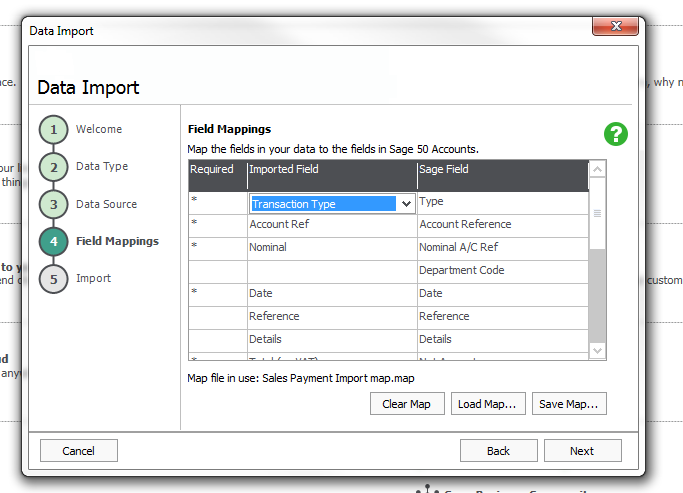
9. In The Field Mappings screen, map up the fields from your import file to the available Sage Fields.

*Please note that if you change the name of the column header in your spreadsheet you will need to map this to the correct Sage Field name.
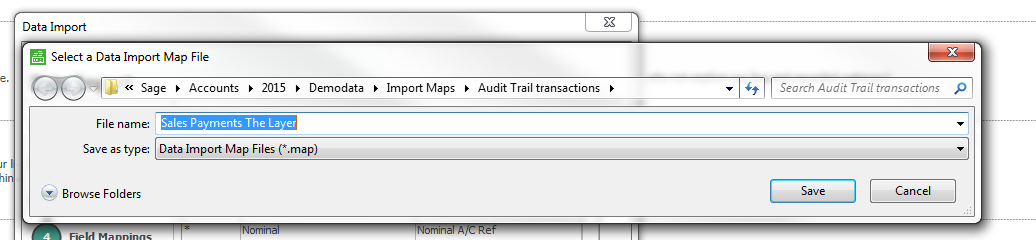
10. The first time you import your file, it is important to save the mappings. Click ‘Save Map’ and name the mapping file as Sales Payments - The Layer.
11. You're now ready to Import your files. Click on ‘import’
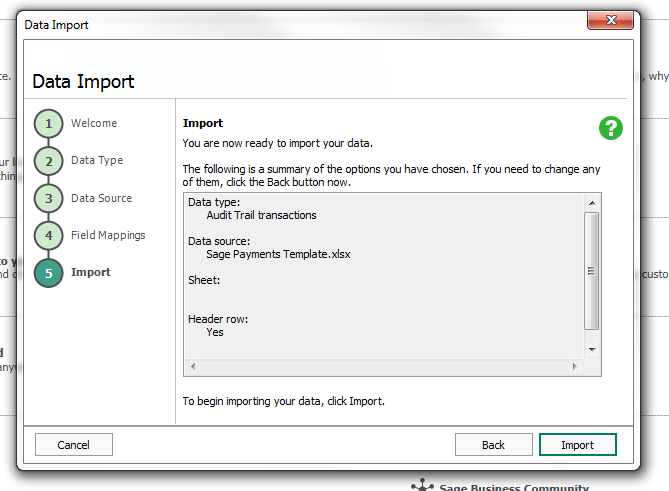
12. If there are any issues with your data, you’ll see an error prompt which highlights the cell that has the issue (don’t forget to exclude the header column in the count). You can then edit the changes and save the file before trying again.
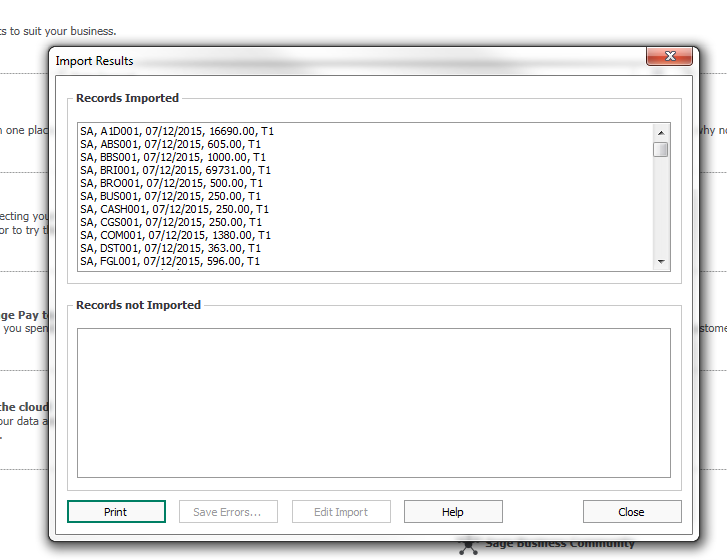
13. If all has gone well you’ll see an import results file, which can be printed if required.
14. Please be vigilant when importing data as Sage will allow you to duplicate import data as such it is key that strict date ranges are referenced during the import stage. If you have any issues with duplication of import, please contact Sage support for assistance.
15. Viewing your data
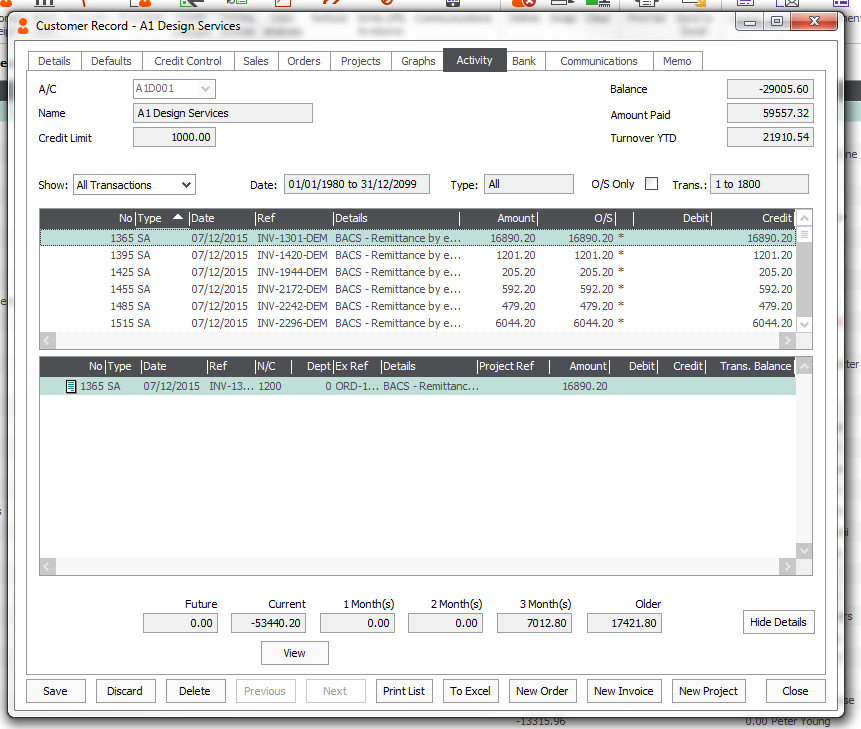
Customer Record
In the customer record, you can now filter by transaction number or Type to view all sales payments on account (SA). By importing the invoice reference linked to the payment, you are able to match up sales payments to sales invoice (SI).
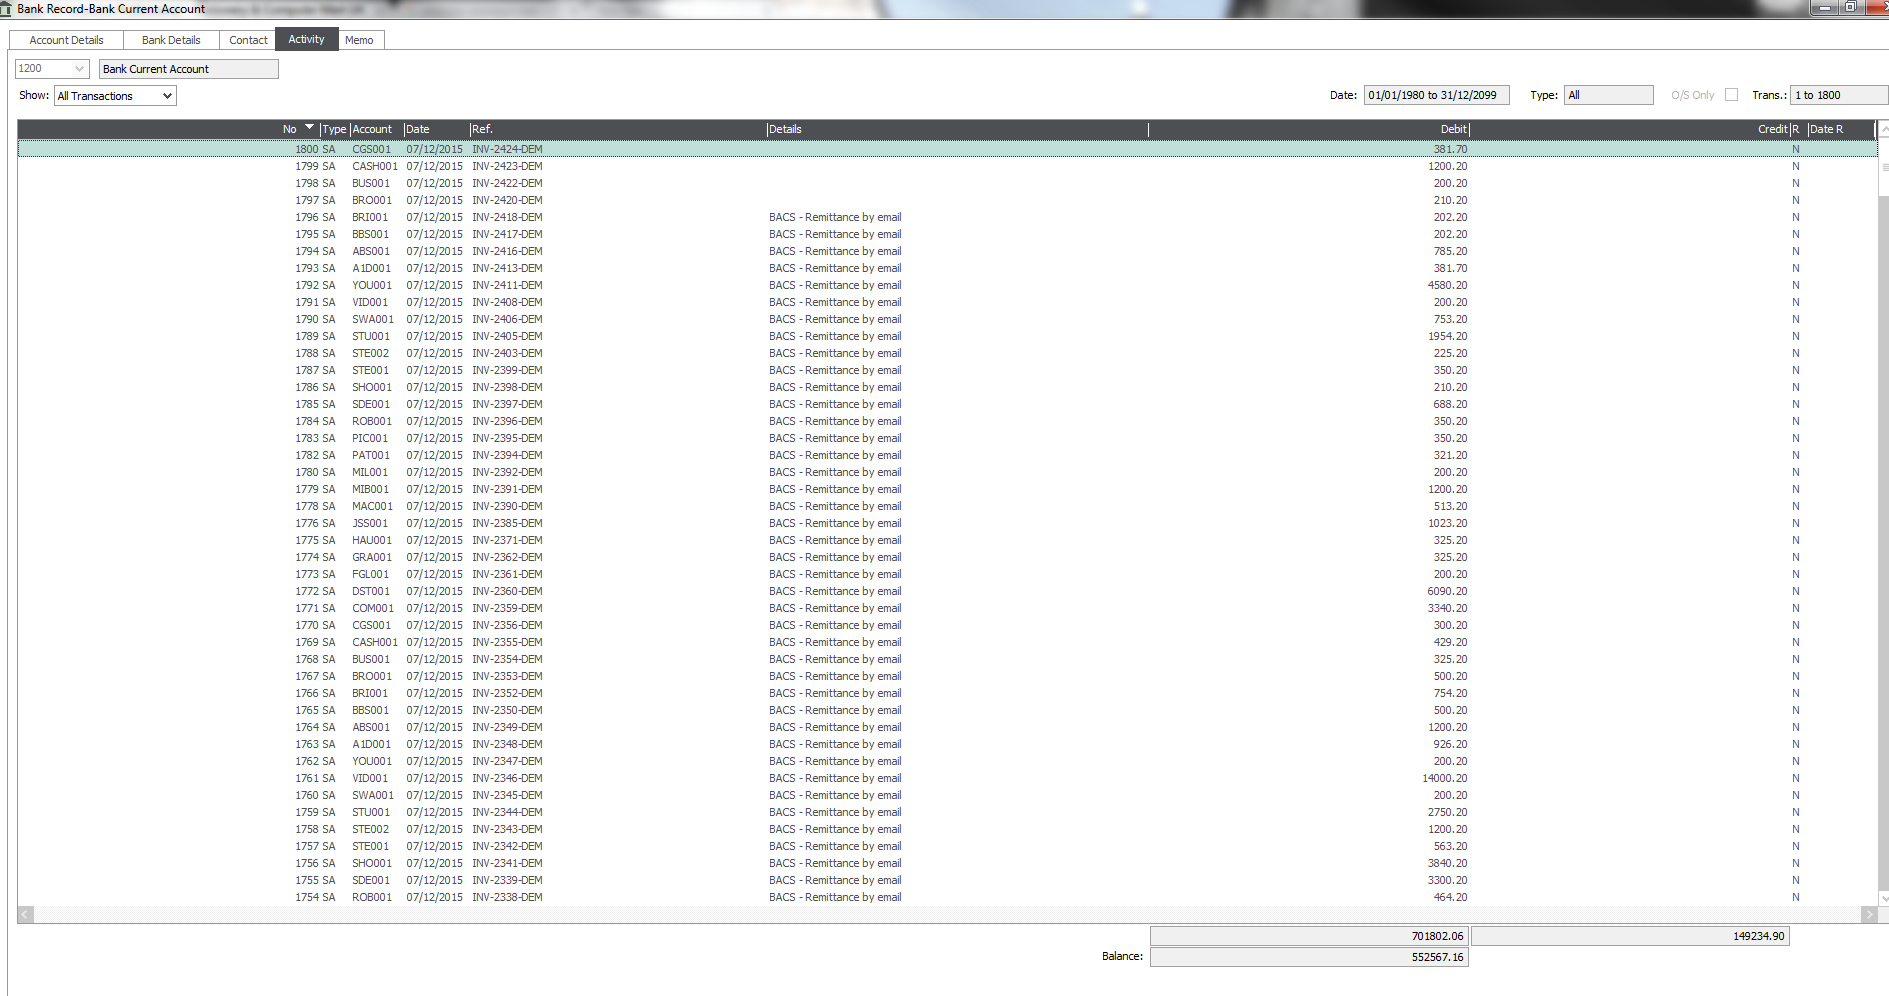
Bank Accounts View
You will see all imported transactions in the bank account view.
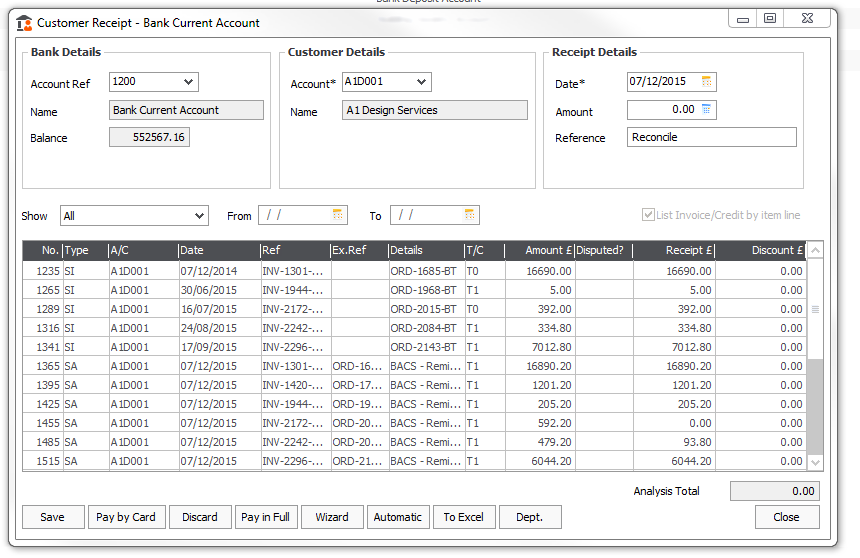
16. To reconcile the bank payments against the invoice, go to Bank Accounts and then select Customer Receipt using the original file, work through the customer accounts and either automatically apply the payments or manually use ‘Pay in full’ to attach the payment on accounts to the specific invoices.
The reference field contains the invoice number to make reconciling easier. It is also possible to reference the order number in External Reference/ Details.
17. Once completed, we recommend that you click on the ‘Activity’ Tab, highlight your date range and then select ‘To Excel’ to store a copy of the transactions you’ve made. You can then reference this before filtering your next import file.