
How to use cases in the Layer
In this article we will go through the case section of the Layer and explain the functionality of each section.
If you require support on creating a case please check out knowledgebase articles on how to create a case for the method you wish.
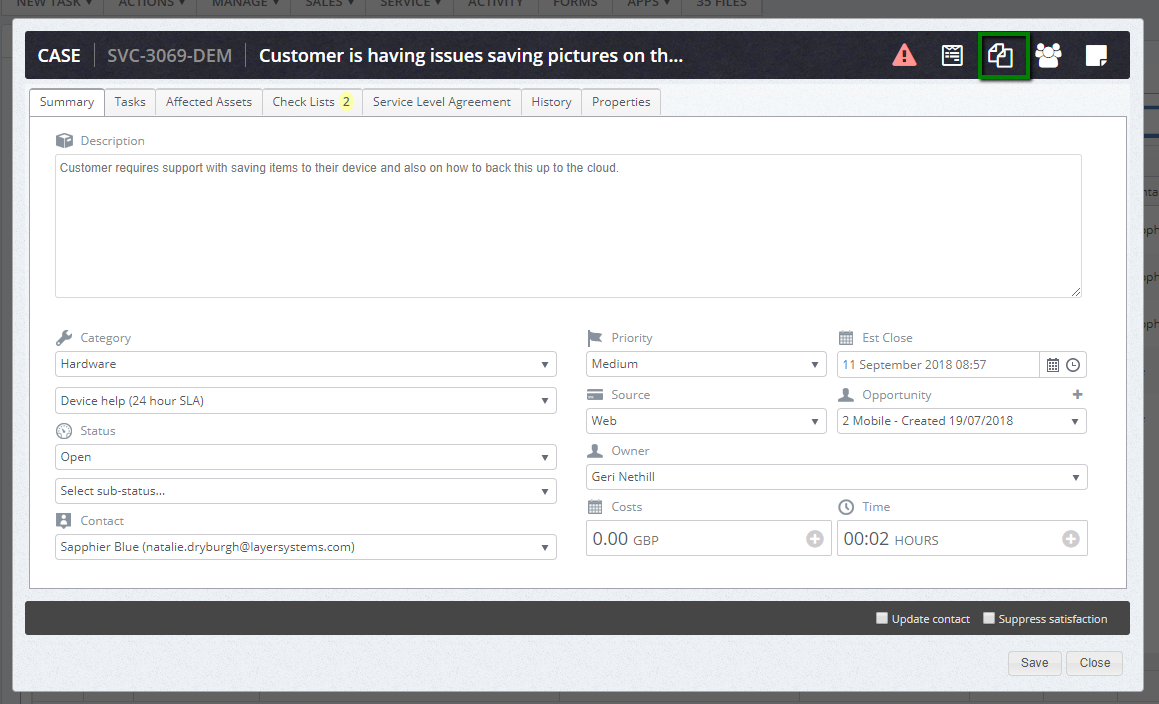
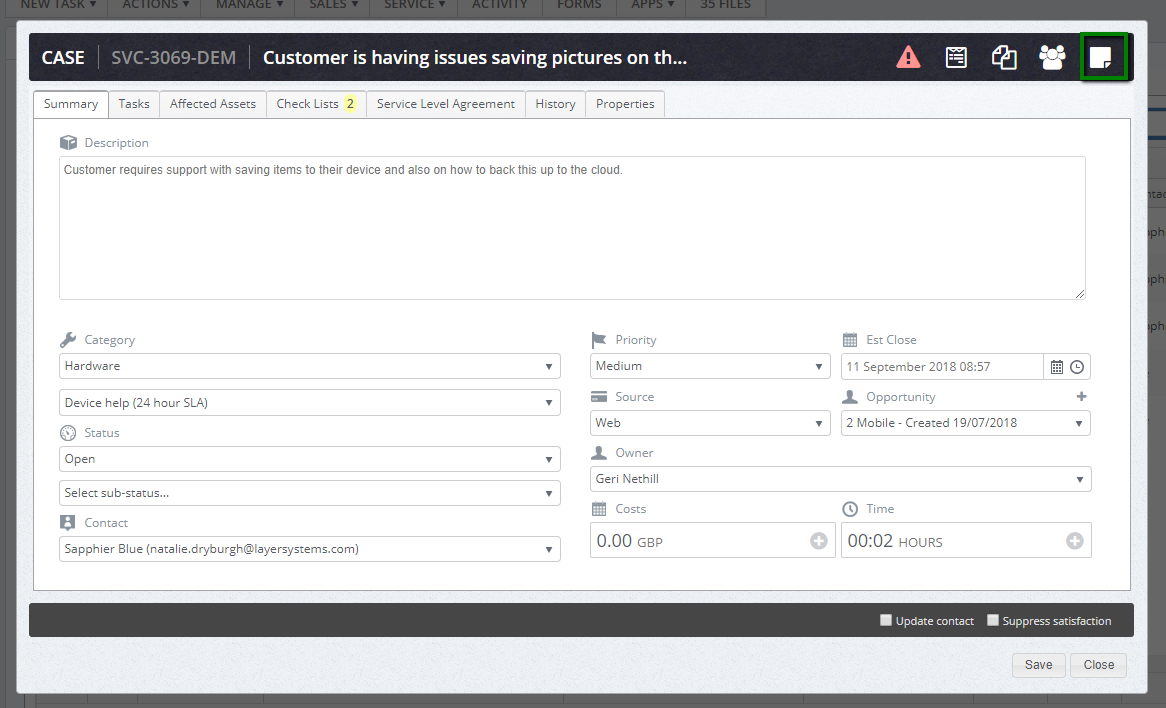
Below is your case home screen, this screen will populate when you open the case.
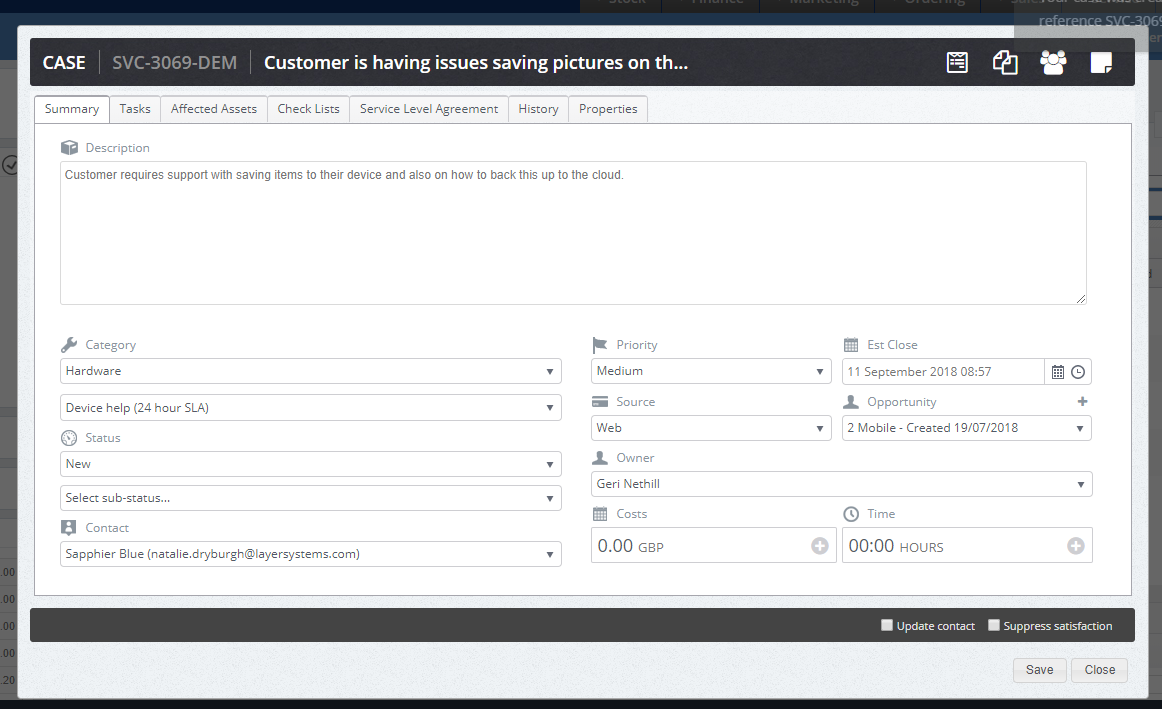
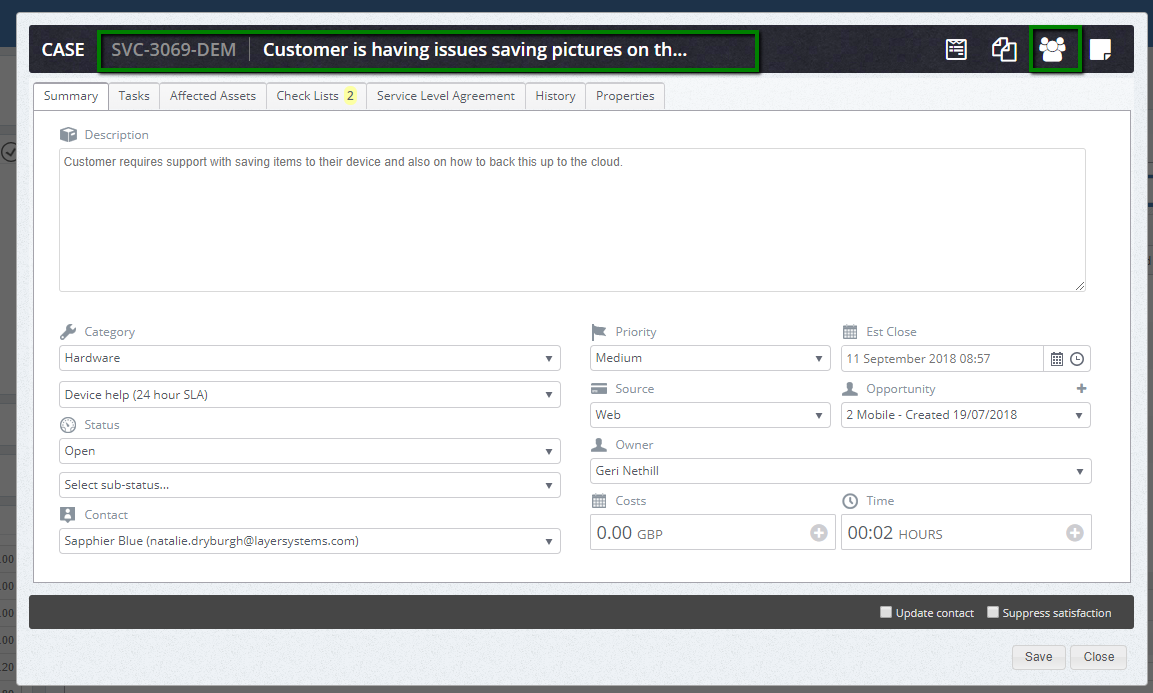
The case reference is detailed on the top along with the case title.
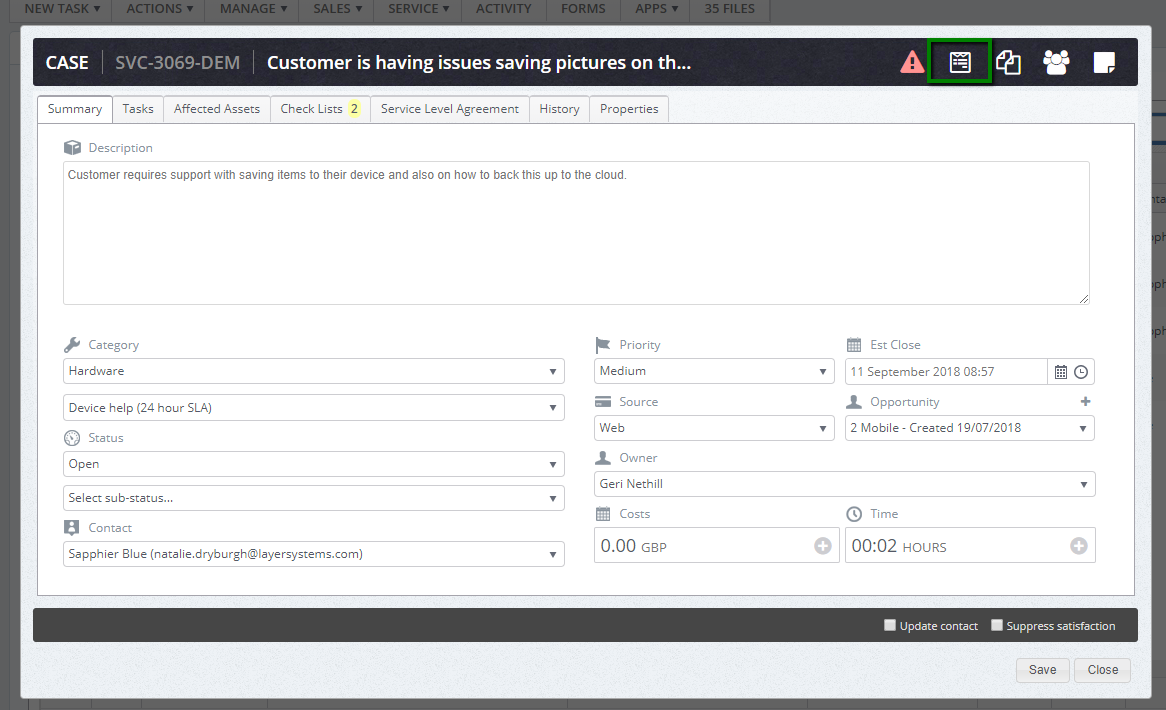
Summary
This page is the summary page of the quote and will detail the following :-
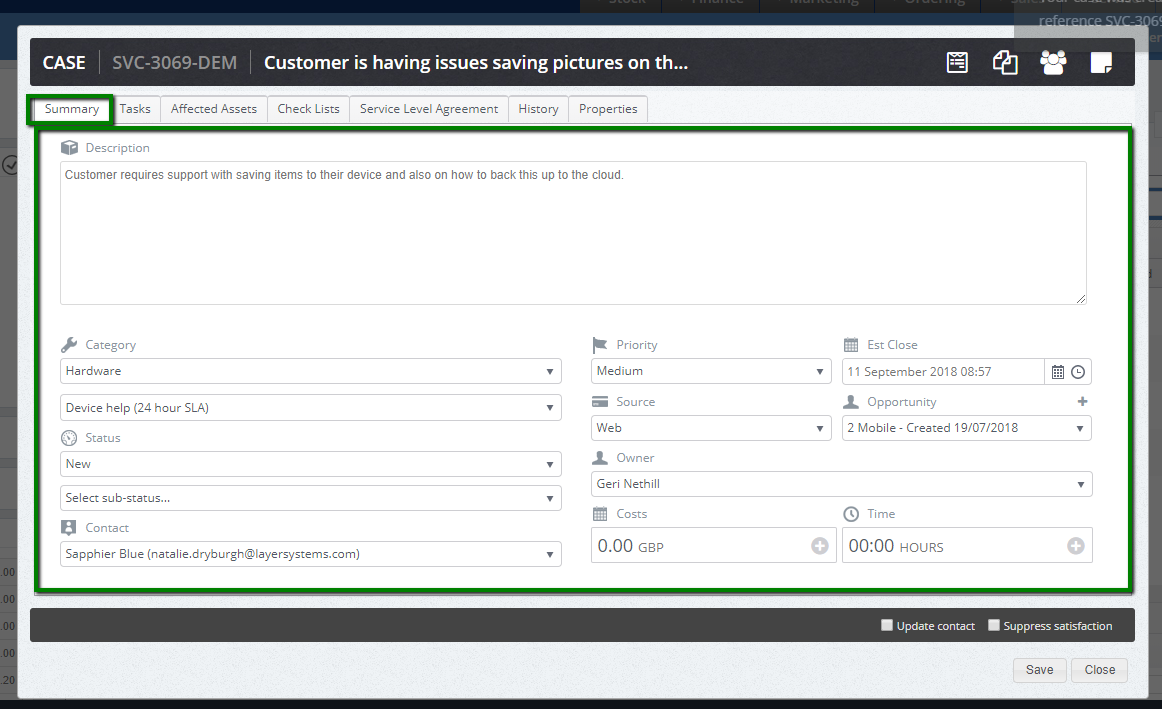
Description – this is where you will get a detailed version of the customer request.
Category - This is your case category and sub category – you are able to change this at any time should you need to.
Status – The status the case is currently in, and also the sub status, you will update your status here when required.
Contact – The contact for the case again this can be changed at any time.
Priority – The priority of the case will be details here you can also change the priority here using the drop down.
Est Close – This is the estimated close date and will be populated based on the case SLA, however this can be amended should this be required. N. B. changing the estimated close date will not impact the SLA of the case.
Source – The source the case was created from i.e. by a user will show Web, or if the customer created the case using the portal this will show self-service.
Opportunity – If the case is connected to an opportunity it will be detailed here, again you can add this at any point whilst the case is open.
Owner- this is the case owner again you can change this at any time. This will trigger an email to the person you have selected as the new owner to let them know they have a new case.
Cost and Time– You can add a cost for dealing with this case here as well as adding the time you have spent on a case. Please click here for more details on how to add this and what reporting you can get for this feature.
Tasks
The tasks tab will allow you visibility of all tasks which have been actioned or are due on this case, in our example you can see there are some different task which have been completed and also some which are due to be complete.
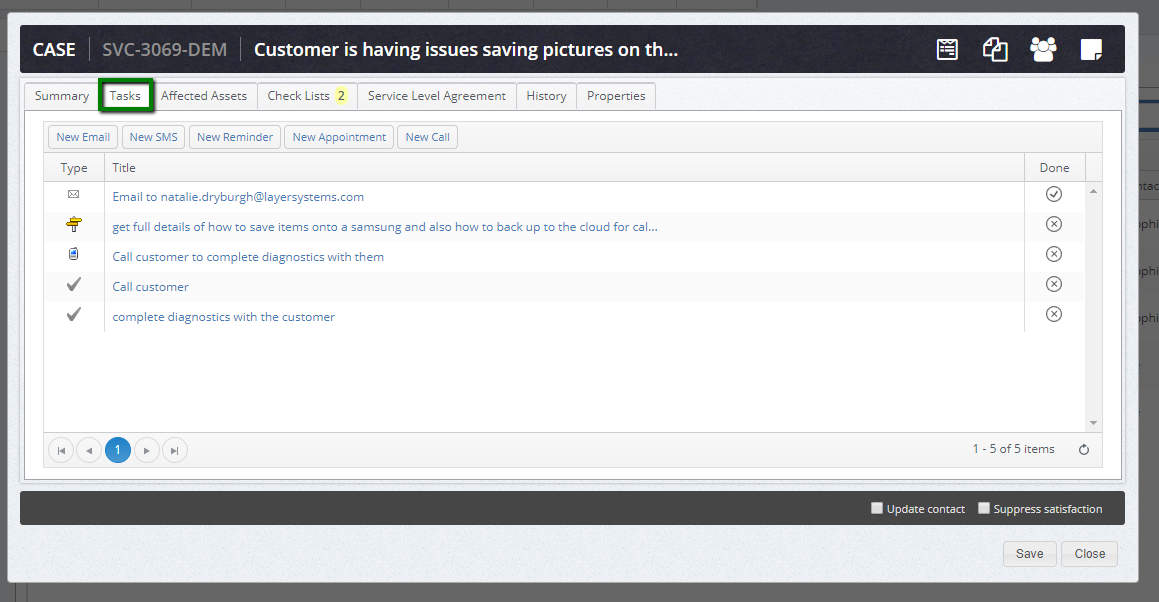
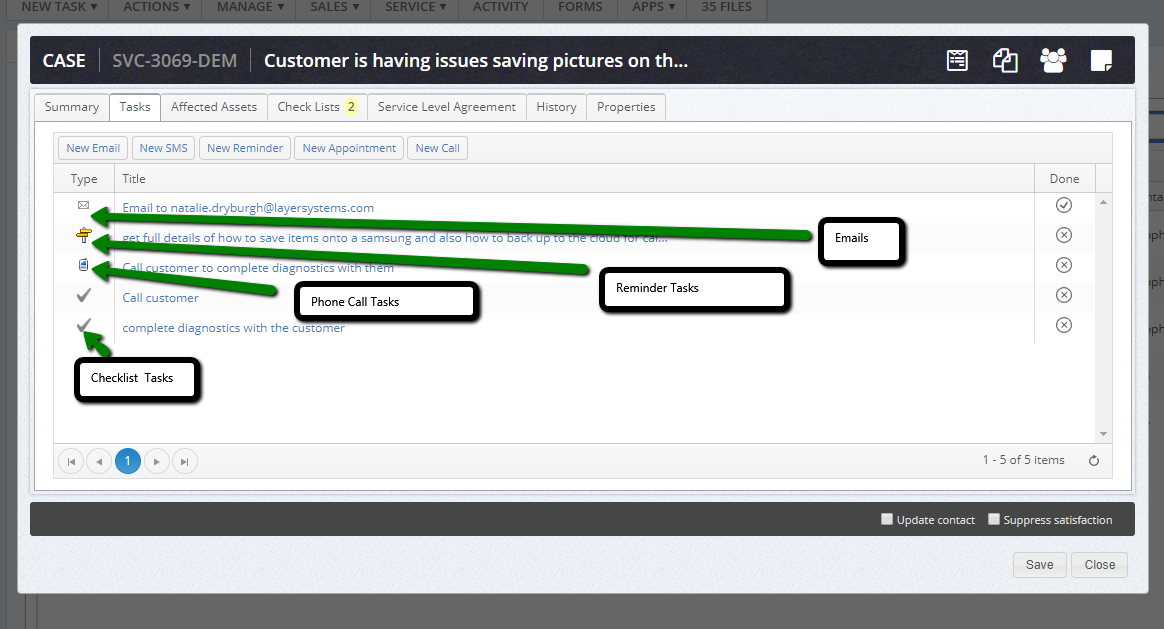
This is the section of the case where you will book in calls, reminders, appointments and email updated which are not triggered by a status change. If you change the status of the case this will automatically trigger the pop-up of the case status email for you to update the customer. However should you need to email the customer without changing the status you can do this here.
To create a new task simply click on the radio button for the task type you wish to create.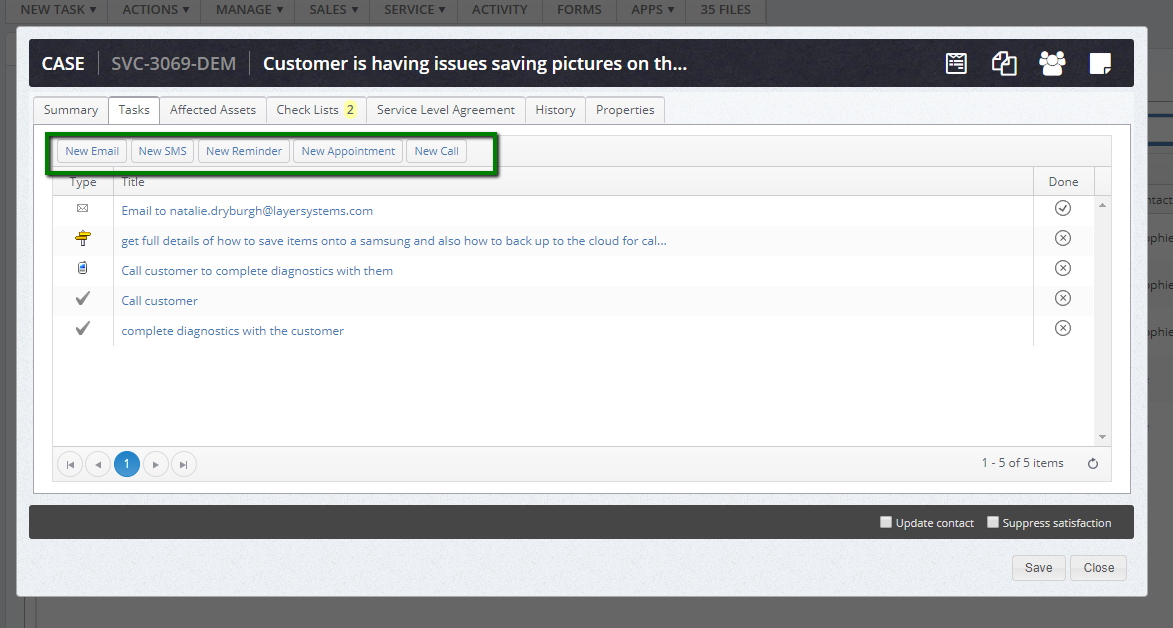
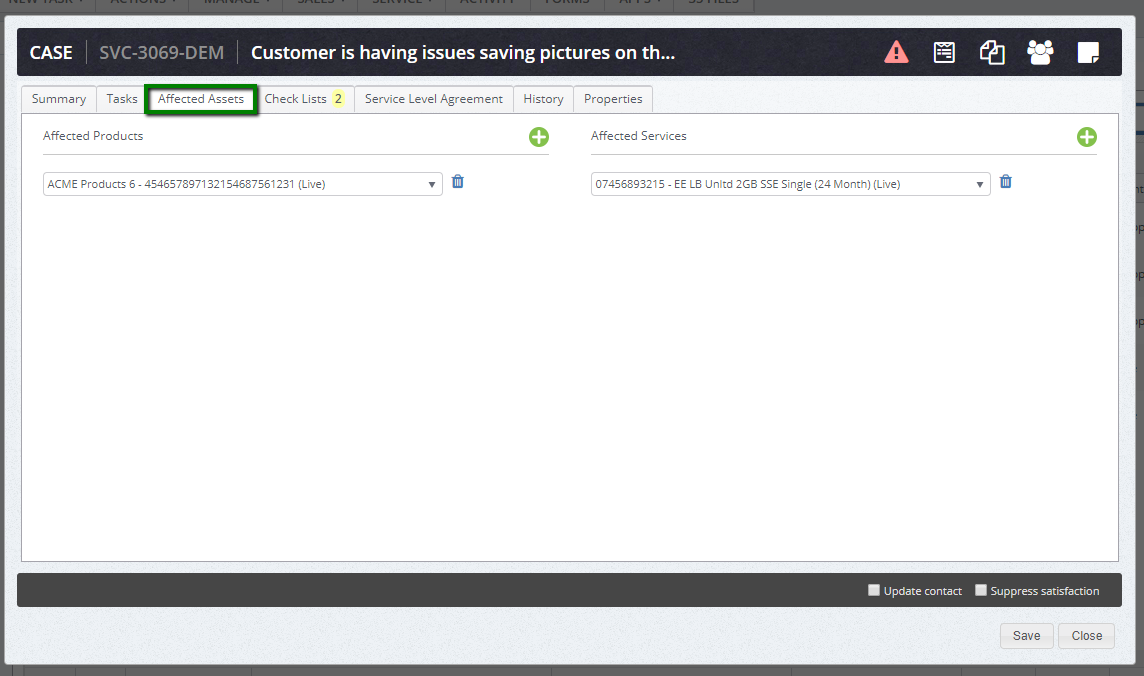
Affected assets
In the case you can link the case to the asset which the case is relating to please click here for a guide on how to add the affected asset. This article will also show the reporting options associated with this feature.
Checklists
You can create checklist for all your case categories should you wish too. Please click here for support on how to create a case checklist.
If you change the case category this will also impact the checklist tasks please click here for support and additional information on how this will impact your case.
To manage your check lists please see below video on how to change your checklist task from to do, to doing, to done.
N.B. Please note the above is a gif video please ensure you are using chrome to view this.
In addition to the pre-populated checklist you can also create a new checklist task for yourself at any time please see video below.
N.B. Please note the above is a gif video please ensure you are using chrome to view this.
Service Level Agreement
This tab will show you all the details you require regarding the service level of the case.
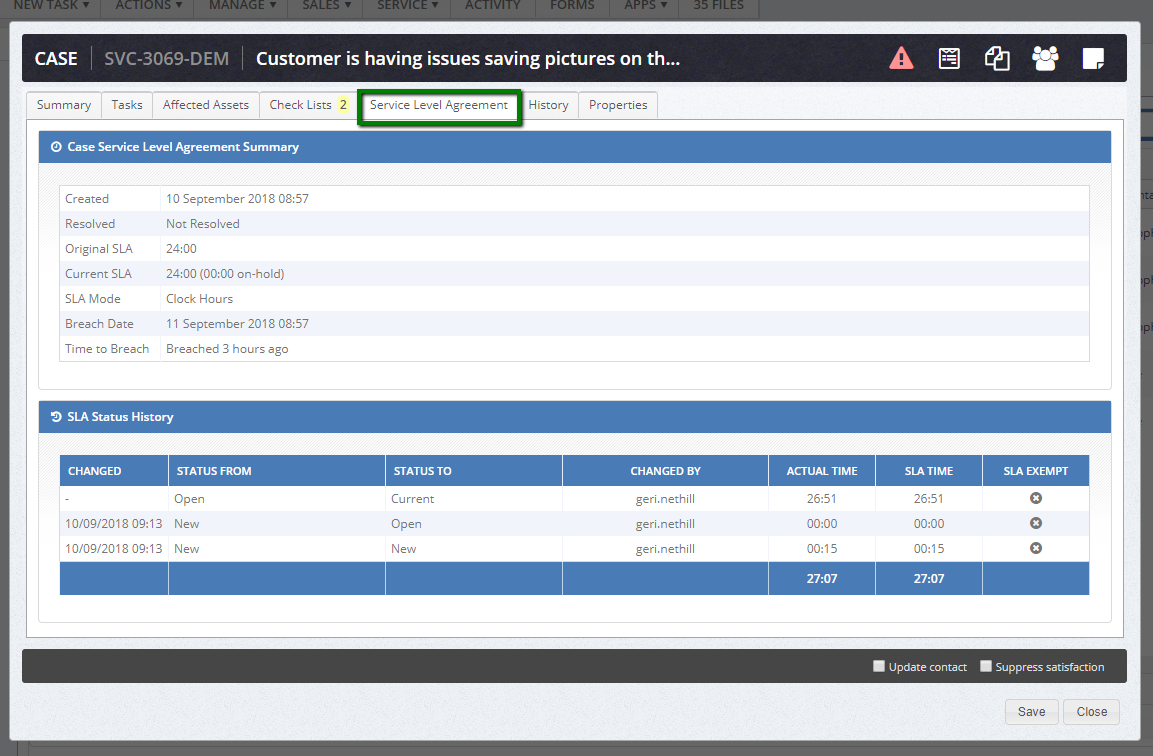
- Created:- this is the date and time the case was created
- Resolved:- the date and time the case was resolved if applicable
- Original SLA:- the case SLA when the case was created
Current SLA :- the SLA for the current case category ( this will show the new SLA if the category is changed) - SLA mode:- this details if your company is using clock hours or business hours for your SLA. If you have business hours this in calculated by 8 hours per day Monday to Friday. Please note that bank holidays are not taken into account.
- Breach date:- the date you case will breach SLA.
- Time to Breach:- The time you have left to resolve the case within SLA, if you breach your SLA this will tell you by how long, if you complete the case within SLA it will also detail here how long you had remaining in the SLA.
SLA Status History:- This will detail all the changes which impact the SLA.
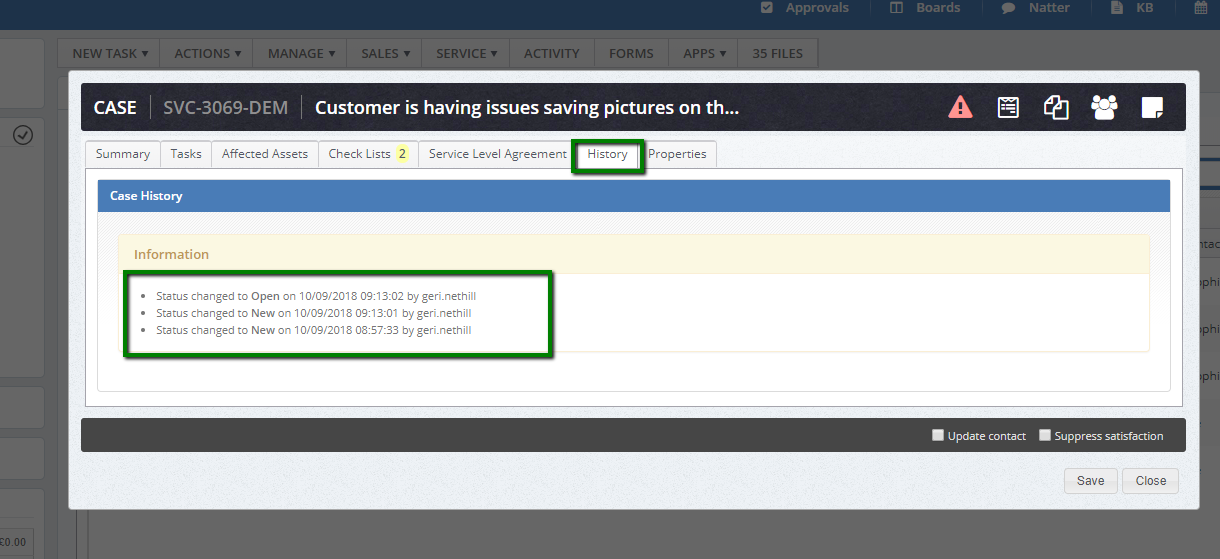
History
This tab will details any changes to the status in the cases detailing the user, time and date of the change.
Properties
This tab details the following

Created:- Time and date the case was created
Creator:- Who created the case
Last updated:- Time and date the case was last updated
Last updator:- User who made the changes
Last Note:- Time and date of last note added to the case
Notes:- How many notes are on the case and link to view notes
Forms
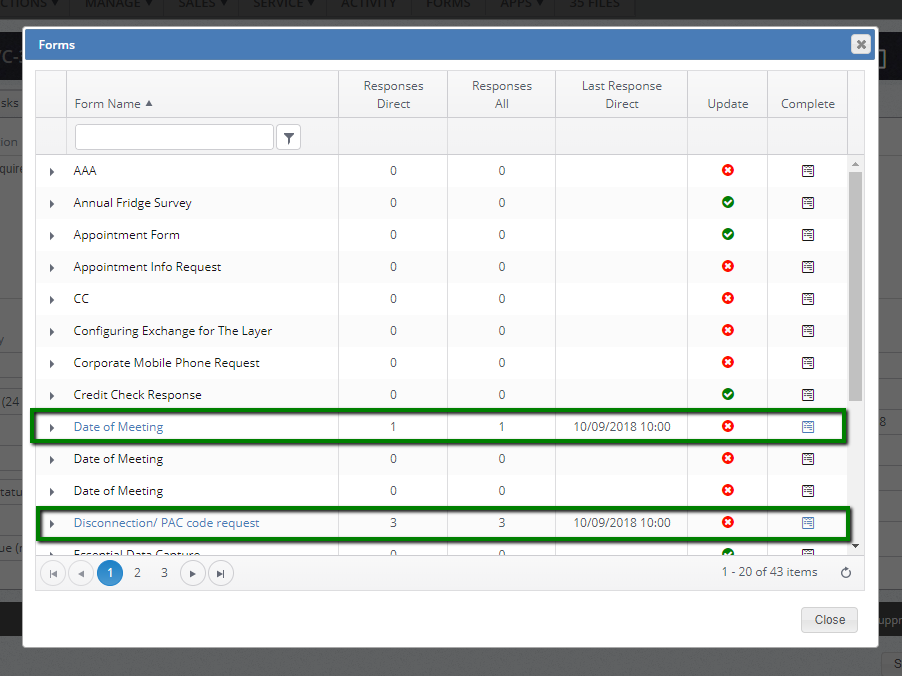
You are able to access the relevant forms by clicking on the forms icon at the top of the case screen as indicated below.
This will open the forms window. Here you will see all forms, any responses, how many responses you have for that form. The date the last response was received. And access to the completed form or a blank version.
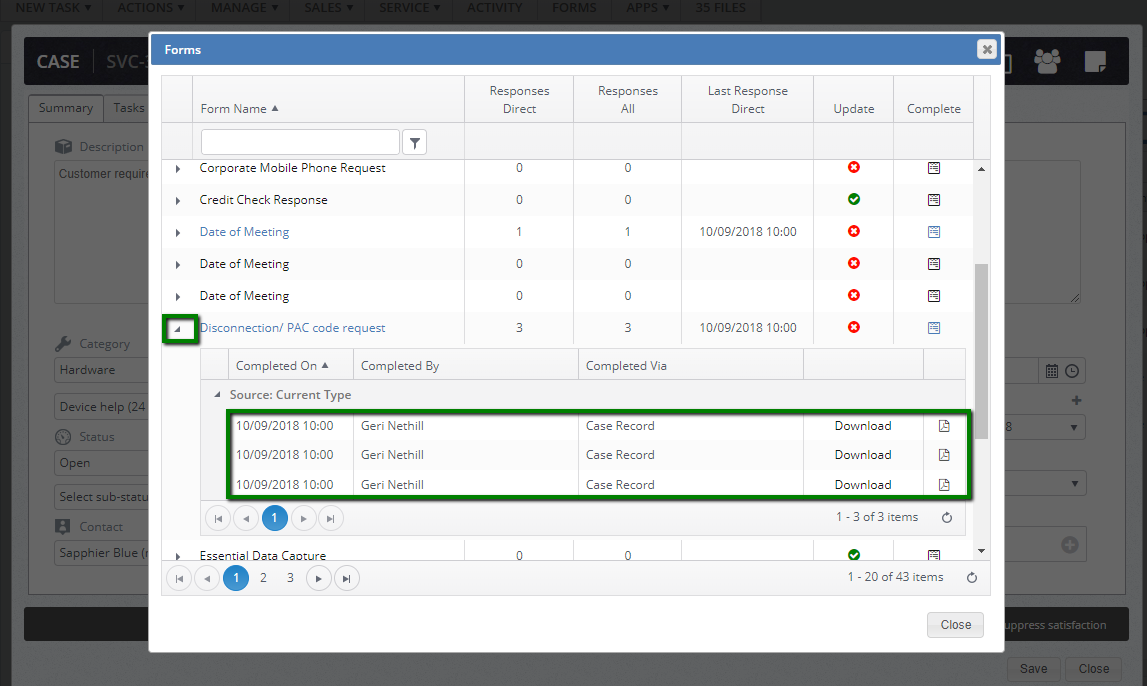
By clicking on the chevron to the left of the form name this will open a drop down list which will detail the date and time the form was completed, who completed it, how the form was recorded. The option to download the form or access the PDF version of the form.
Files
You can add any files to the case you may need to, you can either select them from your PC or drag and drop them from your desktop.
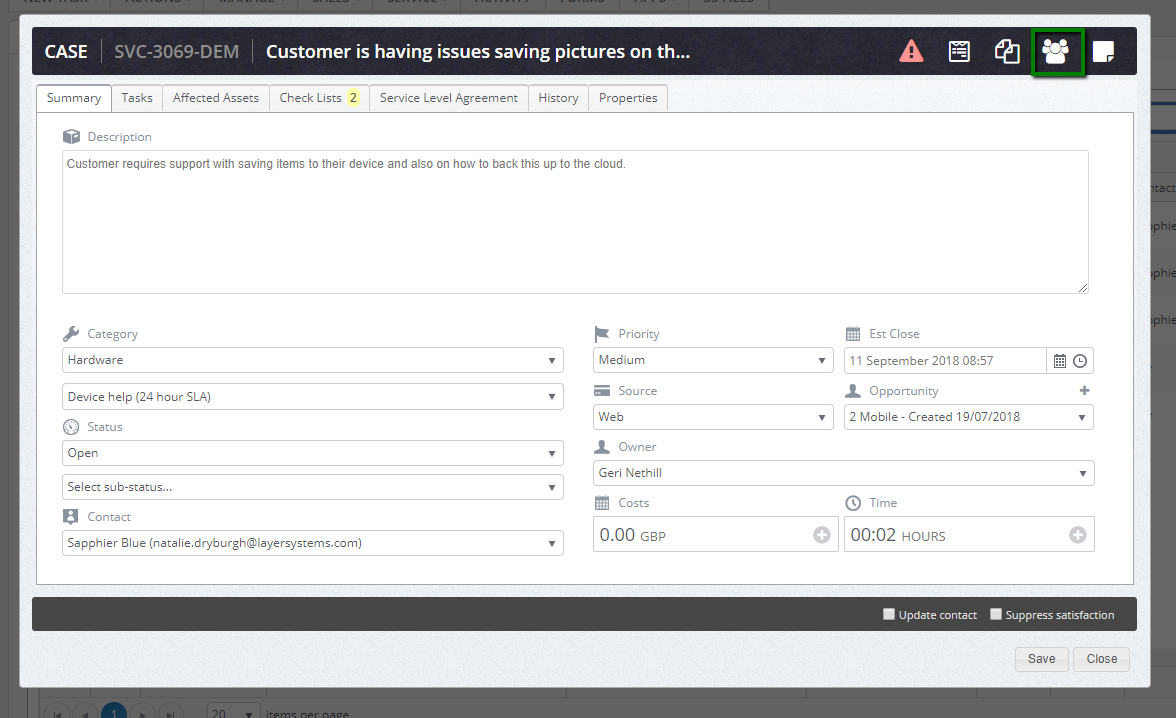
Watchlist
You can also select both internal and external people to watchers on your case. Please click here for more details on how to create an external watcher and how to select them.
Notes
You can added either a public note or a private note to a case.
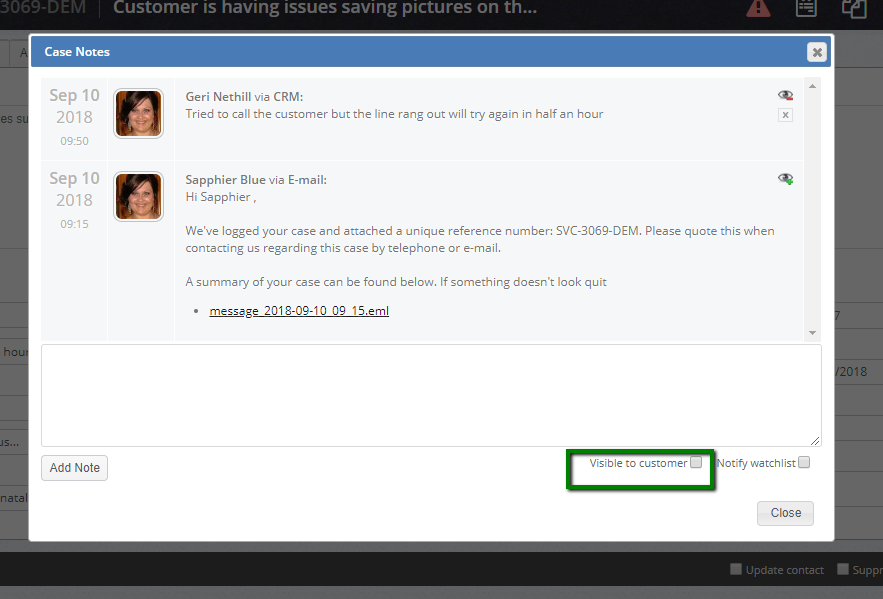
The public notes will pull through to your case update emails if the parameter has been selected, in addition any public note will be visible to the customer through the customer portal.
Private notes are for internal use only, the customer wouldn’t have visibility of them unless they request to see all details your company holds on them.
 This icon indicates the note is private and not visible to the customer.
  his icon indicates the note is public.
If you have selected a note to be public or private and you wish to change this please click on the icon which will change the setting for you.
Breached case
Should you breach your SLA and the case is still open you will be able to see this detailed at the top of your case window with this icon. 