
What are Sales Order Templates?
The “Sales Order Templates” feature allows you to create customisable, pre-filled Excel documents from sales order data.
What Can These Be Used For?
This feature lets you, for example, populate a provisioning spreadsheet provided by a supplier. This can act as an alternative to manually copying and pasting from Data Capture.
Templates could potentially be configured to populate any other form that requires sales order data to be input.
How Does This Work?
At a high level, we pull out relevant sales order data and map it to various cells within an unpopulated spreadsheet in Excel format, which is uploaded to The Layer. This forms the sales order template.
As supplier forms vary, we need to configure a sales order template for each one. This basically involves telling The Layer which data is needed, and which cells it should be mapped to.
Using a Sales Order Template with an Order
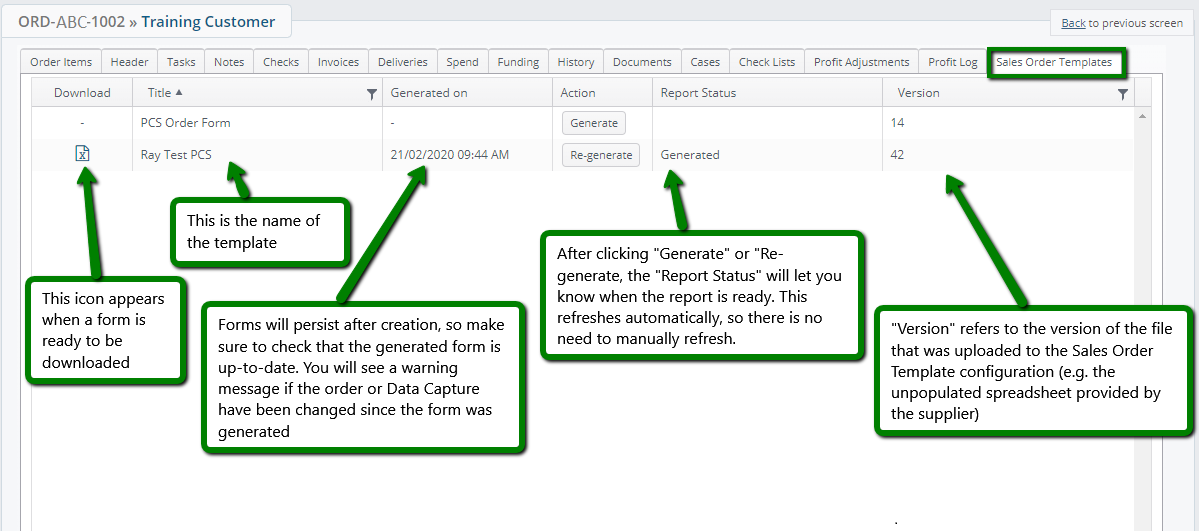
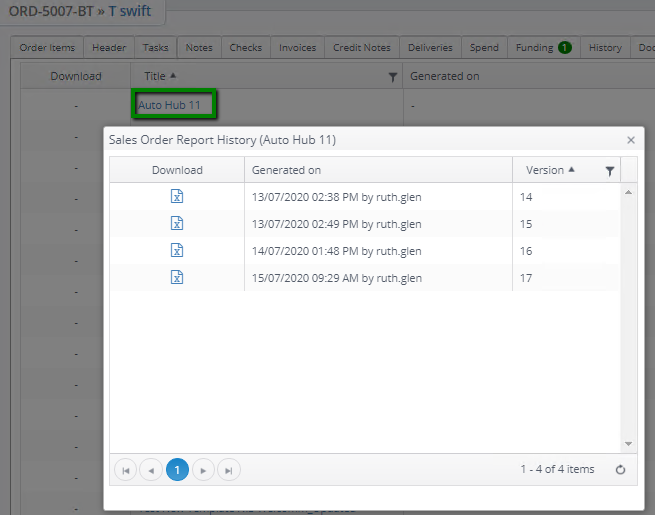
If a Sales Order Template has already been configured in your instance of The Layer, you can access it from the "Sales Order Templates" tab on the order screen. Click on "Generate" or "Re-generate" button to begin creation of the form. Please note, depending on the nature of the sheet, it may take some time. Most forms should generate within seconds, but more complex sheets - ones containing more complex functionality - could take up to a few minutes.
This tab will refresh every few automatically, and update the Report Status when your sheet has been generated. You can then click on the Excel icon to download your completed form.
A generated form will persist, so you can re-download a form again later if you wish. However, if you have made any changes to your order in Sales Order, or Data Capture, you should regenerate your sheet! You will see a warning message if either of these have been changed since generation, but we advise that you always check the generated date before reusing a form.
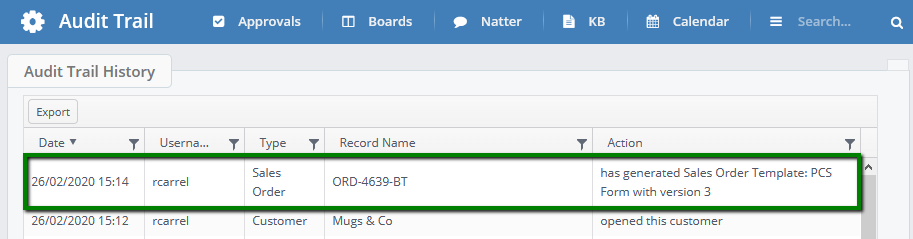
Audit Trail
Generation of a Sales Order Template will show in the Audit Trail to users with Settings access:
Configuration of a New Sales Order Template - Initial Set-Up (Advanced)
The amount of data in The Layer, combined with potential complexity of supplier order forms, means that configuration can be quite an involved process. This is detailed below.
In order to populate the spreadsheet, we need to make certain data from The Layer available. We do these by mapping certain fields to “Template Columns”. For example, we can take the post code from the Addresses database table and map it to a column called “Post Code”.
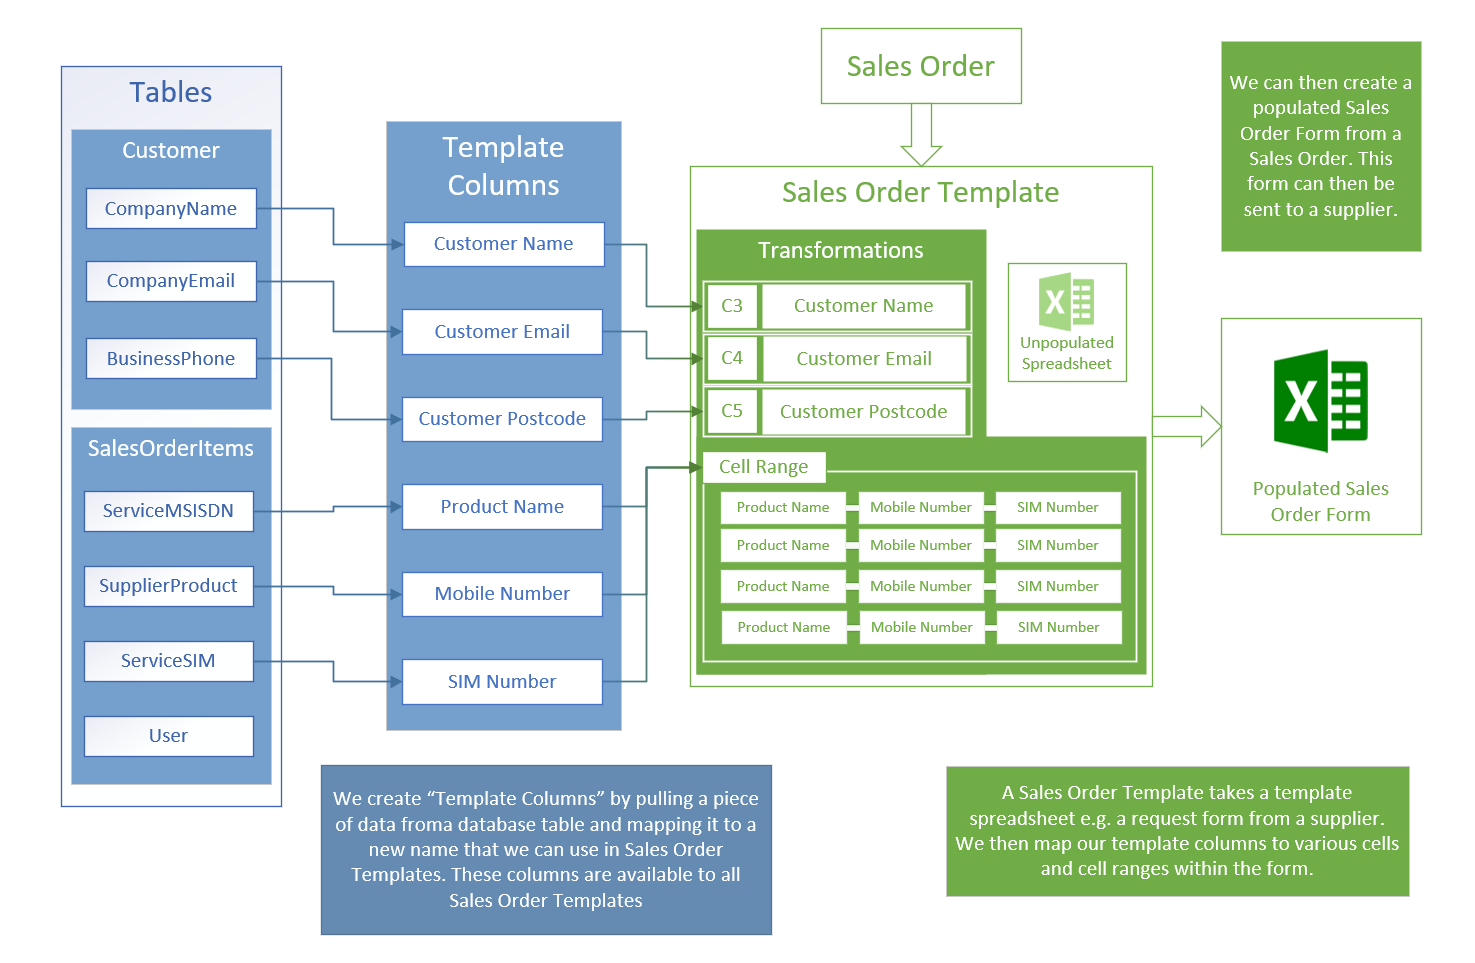
A Sales Order Template configuration comprises:
An unpopulated spreadsheet to form the basis of the template – e.g. an order spreadsheet provided by a supplier.
Transformations – this refers to the mapping between a Template Column and a specific cell within the spreadsheet template. It can also refer to a group of Template Columns being mapped to a cell range.
The process of creating a Sales Order Template involves taking this input spreadsheet, and using transformations to populate it with data from The Layer. Please note that the process to create a Sales Order Template is advanced. We recommend speaking to your contact at The Layer if you would like to look into having a Sales order Template configured.
Example Case
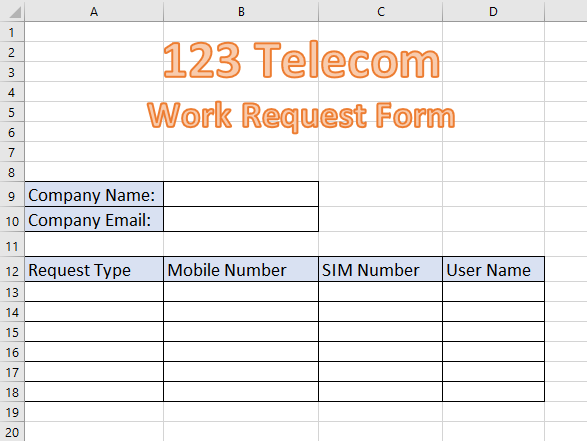
123 Telecom accepts work order requests by means of a template sheet they provide. Any new connections that must be set up, or any other work request that must be carried out, need to be requested via this form.
Such a form could be populated manually by copying data from the Layer. Instead, we create a Sales Order Template in The Layer to automate this process.
Defining the Template Columns for the Document Header
Before we can fully create the form, we need to define our list of Template Columns – which data we will need.
Before we look at data relating to order items (the actual requests) we will look at Company Name and Company Email.

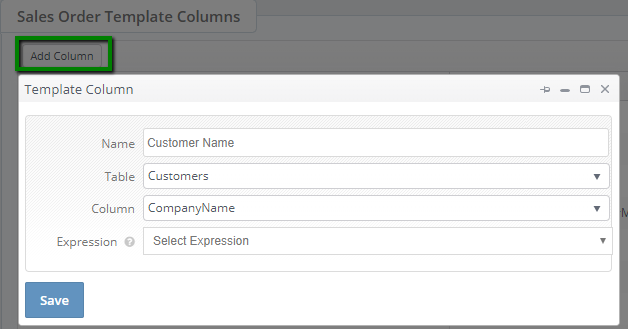
A new template column requires a name. If the field name on The Layer is different to the name on the supplier spreadsheet, it is advisable to use the name that will show up on the spreadsheet, for ease of mapping.
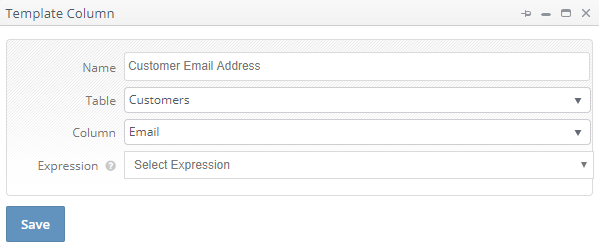
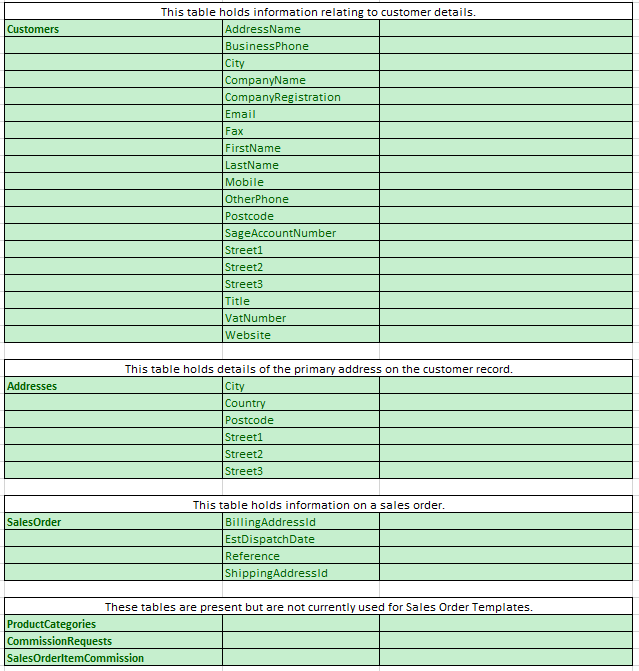
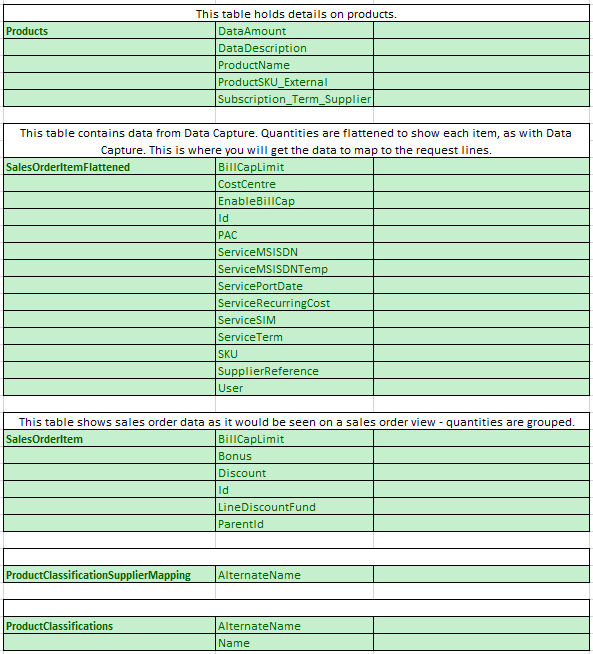
The table refers to the various tables in the database – examples include Customers, Addresses and Sales Order Items. It may not always be obvious which table contains the data you need. In our case, both the customer name and email are stored in the Customers table, as CompanyName and Email respectively. Please note you may see the same, or similar column names across multiple tables. Please see Addendum 1 for a full list of tables and fields.
For our example, we would repeat the process for the Customer Email column.
A Note on "Expressions"
The primary data for a Sales Order Template originates from SalesOrder/Product tables. However there are scenarios where linked details have to be fetched from connected tables and presented in a particular format.
"Expressions" are pre-defined functions that allow you to fetch and transform data from related tables into the format required for presentation.
Expressions are used for such purposes as retrieval of child item details, and addresses other than the default customer address. For full details, see Addendum 2.
Defining the Template Columns for the Request Lines
Now that we have taken care of the fields in the header of the form, we need to decide which columns we need for the actual work request lines in the body of the spreadsheet. In this case, our sheet requires:
- Request Type
- Mobile Number (pertaining to the line itself not the customer)
- SIM Number
- User Name
We are using "AlternateName" from the “ProductClassificationSupplierMapping” table to retrieve the request type (e.g. New, Upgrade). This is explained later in more depth, but the summary is that we use this to reconcile the classification names we have in The Layer with the request type names in the supplier form.
Mobile Number corresponds with "ServiceMSISDN". SIM Number corresponds with “ServiceSIM”. User Name maps to “User”. These all exist within the “SalesorderItemFlattened” table, which stores most data relating to order lines. Many of these fields are populated from Data Capture.
Once these have been mapped, we have all the template columns we need to create the sales order template.
Creating a Sales Order Template
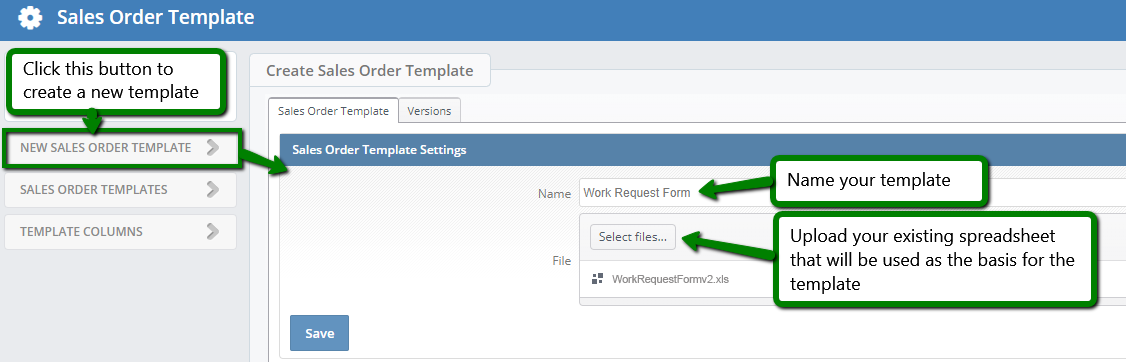
You can also replace the supplier template form later by selecting a new file. A record of template files is stored on the versions tab, and you can view these again by clicking on the name.
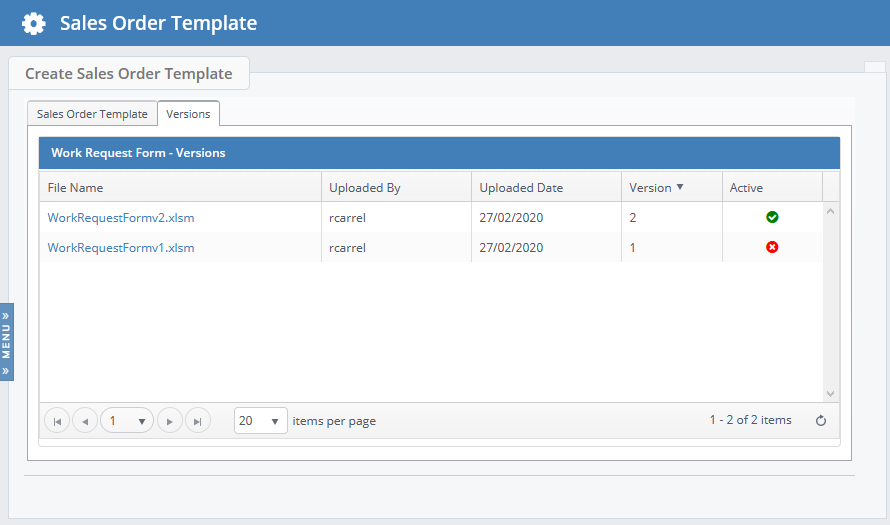
If you had previously generated an older version against an order, when you upload a new template these will be stored in the order and can be viewed by clicking on the template name in the Sales Order template tab.
Adding a Transformation for a Single Template Column
A "transformation" is a mapping between data from The Layer (via Template Columns) and a specific cell (or cell range) within the spreadsheet template.
To map our Customer Name and Customer Email, we do as follows:
![]()
![]()
![]()
Adding a Transformation for a Cell Range - Service Request Lines
![]()
The cell range will apply to every item line on the order (so long as it meets product type / supplier eligibility rules) – you do not need to know in advance how many lines your order will have. In our example case, the range must cover the area indicated below:
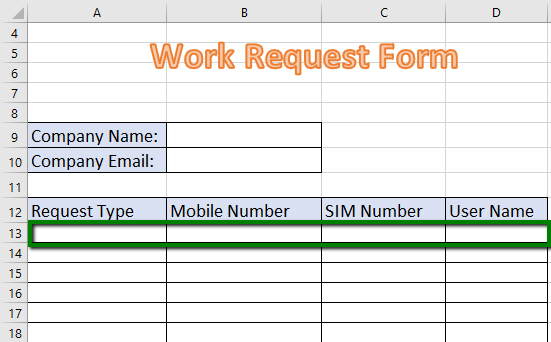
Our range transformation should look like this:
![]()
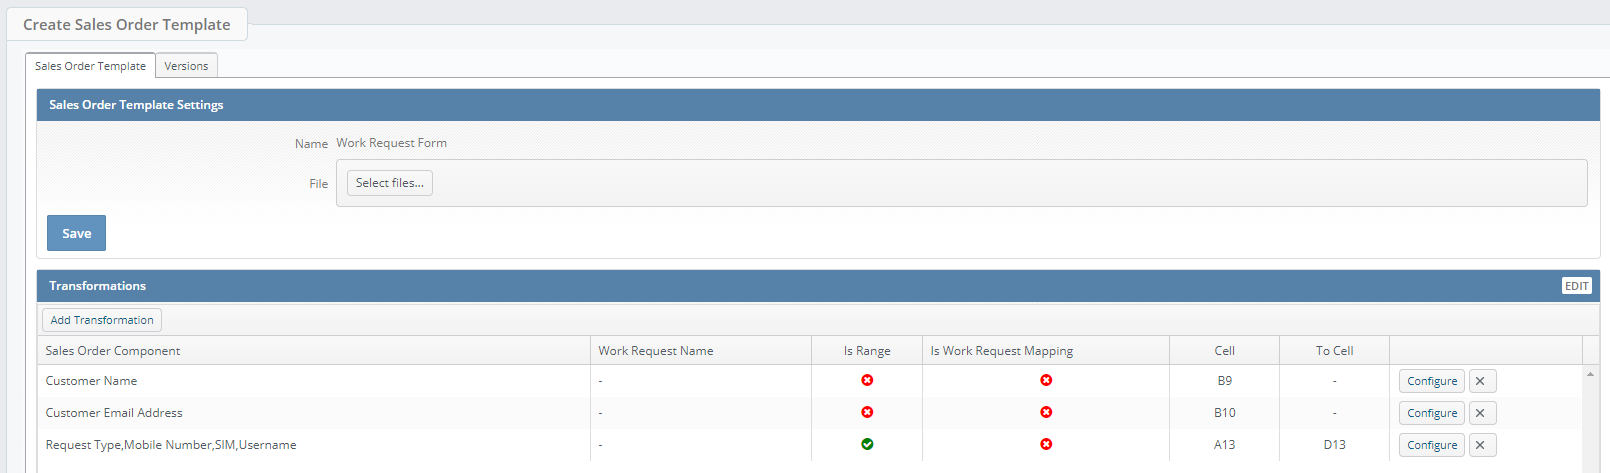
And our Sales Order Template configuration looks like this:
Child Services
If the "Show Parent Services only" box has been ticked for a cell range, child services will not show up as their own lines on the output. However, you can pull child service details into the parent line, providing that you have established a parent-child link between the services. Prices will be aggregated. Child services can be shown by adding a template column with Template Column configurations such as:
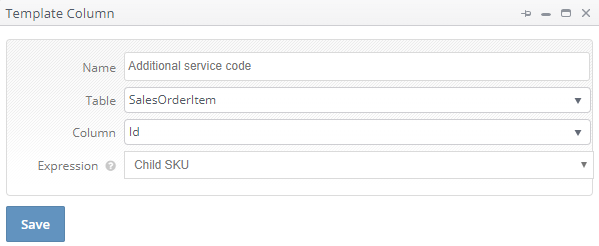

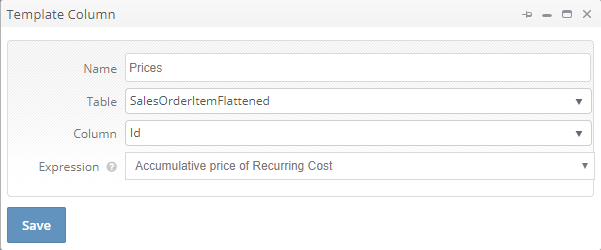
This relies on your services being linked correctly in Data Capture. The "Expression" selection lets us ask a parent item on the sales order what its child items are. Please see the section on expressions for more details.
Supplier Alternate Names for Classifications
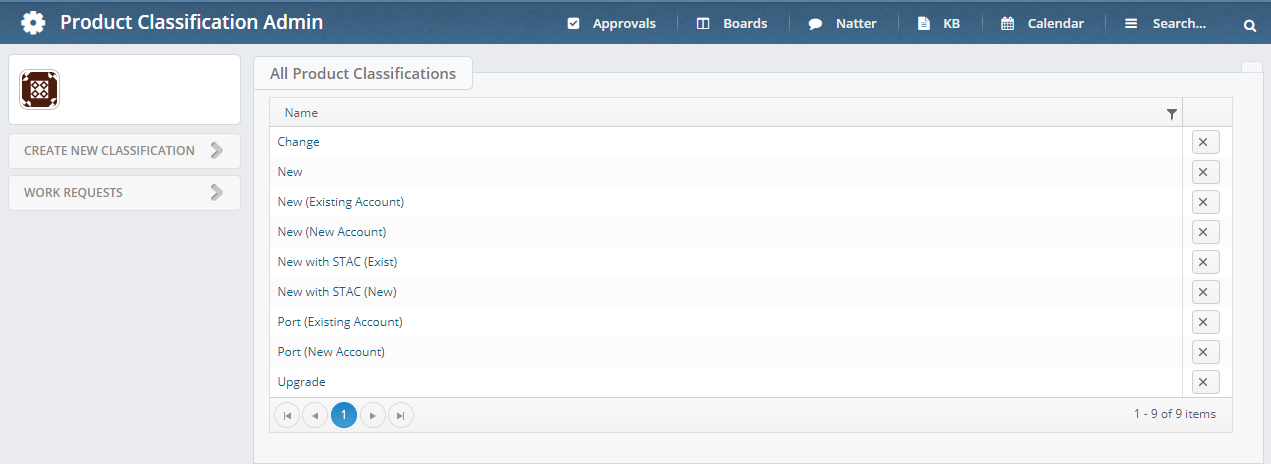
You may need to map service classification types from The Layer (e.g. New, Upgrade) to types defined by the supplier. For example, "New" > "New Connection". This may allow cells with drop-down menus with a limited range of values to be populated by matching the supplier alternate name.
You can do this from Settings - Product Classification. Click a classification name, then select the "Work Request Mappings" box.
Work Request Mappings
Work Request Mappings are designed to cater for supplier forms that require users to tick a box to indicate work request types present in a form, such as the form below:
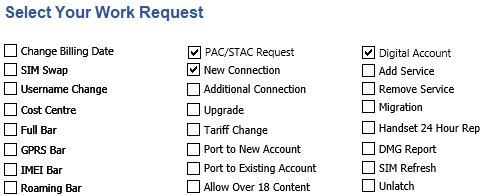
The idea is that, if any work request types are present on an order, the relevant boxes will be ticked. We can automate this by defining "work request mappings". We create one of these to correspond with every work request check box that we expect to use.
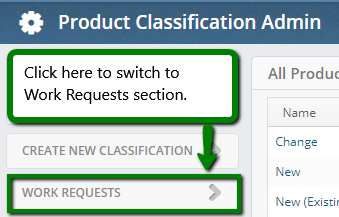
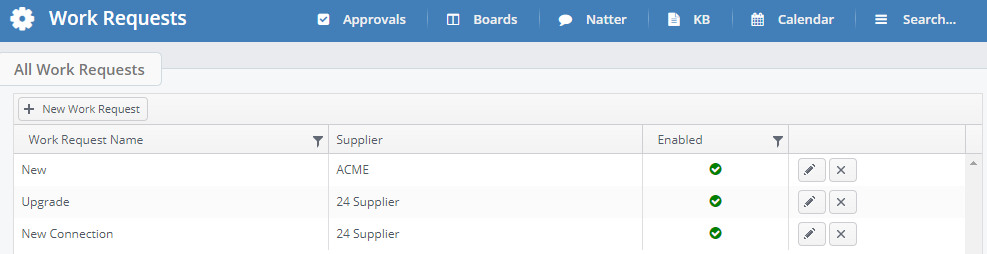
From Settings > Product Classifications > Work Requests...
We add lines with three components:
Name - You should name this the same as the corresponding work request tick box on the supplier form.
Supplier - Choose supplier from drop-down menu. This work request will only apply to order items for that supplier.
Enabled - Set whether or not this work request is active.
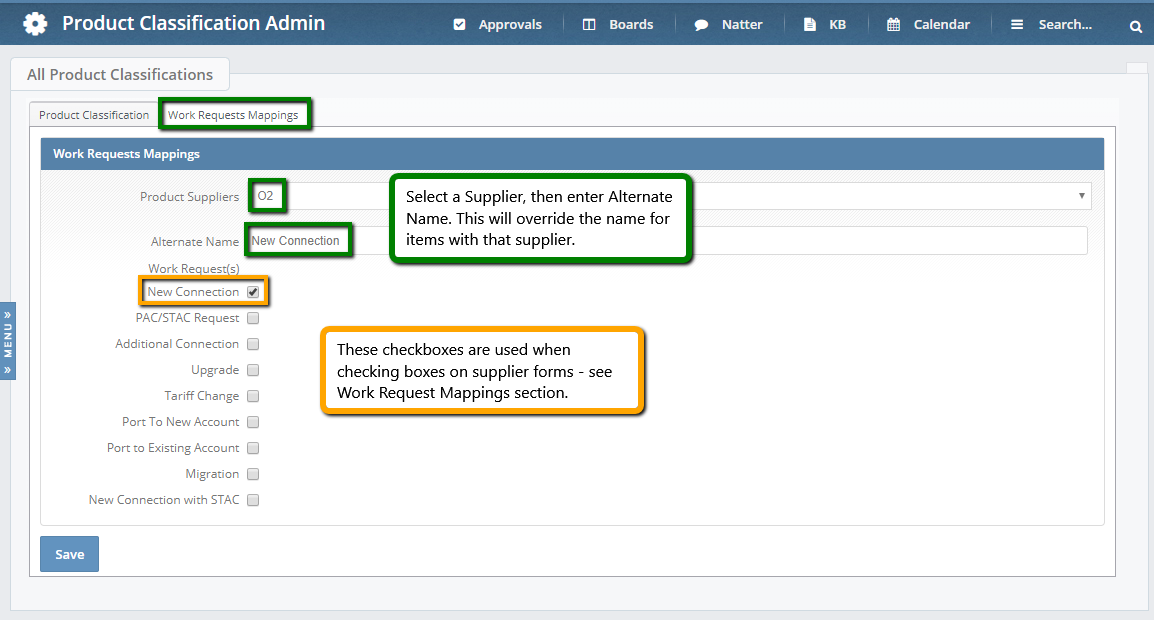
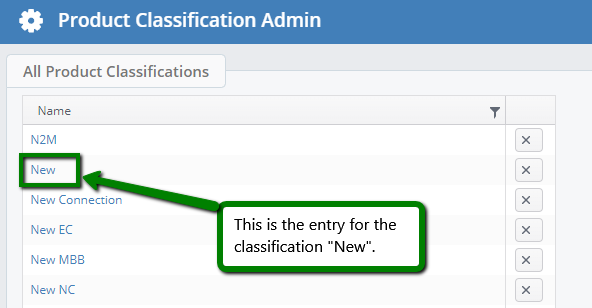
We now need to connect each work request mapping to a Product Classification. For this we go back to Settings > Product Classifications. Select a product classification that you want to map, e.g. "New". Click on the "Work Requests Mappings" tab, and select the supplier.
Different companies have slightly different names for various request types. If the work request type name is different on your supplier form then you can select the supplier from the list, and then type the new name into the field below.
The last thing we need to do to link this classification to the work request types in the form is to tick the relevant "Work Request(s)" box.
Please note, you can change these settings for any number of suppliers in the list. A value will persist even when you change the Product Suppliers drop-down. To clear it, you must delete the text / untick the box.
Addendum 1 - Reference: Template Columns - Available Tables and Columns
Addendum 2: Expressions - Explanation and Expressions in Use
Sales Order Templates are required to transform available data in a particular format to be presented on the Excel Document. The primary data for Sales Order Template originates from SalesOrder/Product tables, however there will be scenarios where linked details will have to be fetched from connected tables and presented in a particular format.
We have provided an option to create Expressions which allows you to fetch and transform data from related tables in a format that is required for presentation.
Useful Expressions
Expressions can be considered as pre-defined functions that accepts some parameters and returns an evaluated result. The following are the predefined expressions currently available in the system.
1. Child SKU
Input Parameter : Table Name - SalesOrderItem, Column Name - Id
Output : This expression fetches all the Children of the selected SalesOrderItem and returns their SKU in a CSV format.
2. Child Service Names
Input Parameter : Table Name - SalesOrderItem, Column Name - Id
Output : This expression fetches all the Children of the selected SalesOrderItem and returns their Names in a CSV format.
3. Accumulative Price of Recurring Cost
Input Parameter : Table Name - SalesOrderItemFlattened, Column Name - Id
Output : This expression fetches all the Children of the selected SalesOrderItemFlattened and evaluates and returns the total recurring cost of the Parent and Children.
4. Address Line 1
Input Parameter : Table Name - SalesOrder, Column Name - BillingAddressId/ShippingAddressId
Output : This expression fetches the Billing/Shipping Address of the selected SalesOrder and returns the Address Line 1 field.
5. Address Line 2
Input Parameter : Table Name - SalesOrder, Column Name - BillingAddressId/ShippingAddressId
Output : This expression fetches the Billing/Shipping Address of the selected SalesOrder and returns the Address Line 2 field.
6. Address Line 3
Input Parameter : Table Name - SalesOrder, Column Name - BillingAddressId/ShippingAddressId
Output : This expression fetches the Billing/Shipping Address of the selected SalesOrder and returns the Address Line 3 field.
7. Address City
Input Parameter : Table Name - SalesOrder, Column Name - BillingAddressId/ShippingAddressId
Output : This expression fetches the Billing/Shipping Address of the selected SalesOrder and returns the Address City field.
8. Address County
Input Parameter : Table Name - SalesOrder, Column Name - BillingAddressId/ShippingAddressId
Output : This expression fetches the Billing/Shipping Address of the selected SalesOrder and returns the Address County field.
9. Address Post Code
Input Parameter : Table Name - SalesOrder, Column Name - BillingAddressId/ShippingAddressId
Output : This expression fetches the Billing/Shipping Address of the selected SalesOrder and returns the Address Post Code field.