
Before starting, ensure the following have been completed:
- Ensure email template for web lead notifications has been mapped to company email template with approrpriate parameters
- Ensure one or more users are linked to the "presales" group within the company as this group receive notifications for submissions
- Ensure the default mail agent is set
Consult Settings -> Company Settings -> Web Leads for sample source code.
Available fields
- FirstName
- LastName
- CompanyName
- PhoneNumber
- Website
- API
- Enquiry
Available Contact Preferences (for GDPR purposes)
- Can Email
- Can SMS
- Can Phone
Available Marketing Preferences (for GDPR purposes)
- Can Email
- Can SMS
- Can Phone
Optional (To Create Linked Expiry)
- ExistingSupplier
- ExistingExpiryDate
- ExistingQty
On the page that you wish to update, copy the sample form; you may wish to change the styling to more suit the style and conventions on your own website.
Next you will need to create two pages that will handle the result of the form submission to The Layer; a success and an unsuccessful page. These need only be simple pages that should be used to inform the user if their submission has been completed successfully.
Take a note of the full URL of these pages and update the appropriate hidden field values (ReturnURLSuccess, ReturnURLFailed) on the form.
E.g.
<input name="ReturnURLSuccess" id="ReturnURLSuccess" type="hidden" value="http://www.success.com" />
<input name="ReturnURLFailed" id="ReturnURLFailed" type="hidden" value="http://www.failed.com" />
To
<input name="ReturnURLSuccess" id="ReturnURLSuccess" type="hidden" value="http://www.mycompany.com/contact/success.html" />
<input name="ReturnURLFailed" id="ReturnURLFailed" type="hidden" value=" http://www.mycompany.com/contact/error.html" />
Save the changes and test your form - any submissions will instantly be available as a New Lead in The Layer
Setting up the web lead notification against each user profile
You can then decide which users you want to receive notifications when a lead is received from your website.
This is done as below by going into settings -> users and then ticking the 'New Lead Via Web Lead Capture' in the 'Communications' tab.
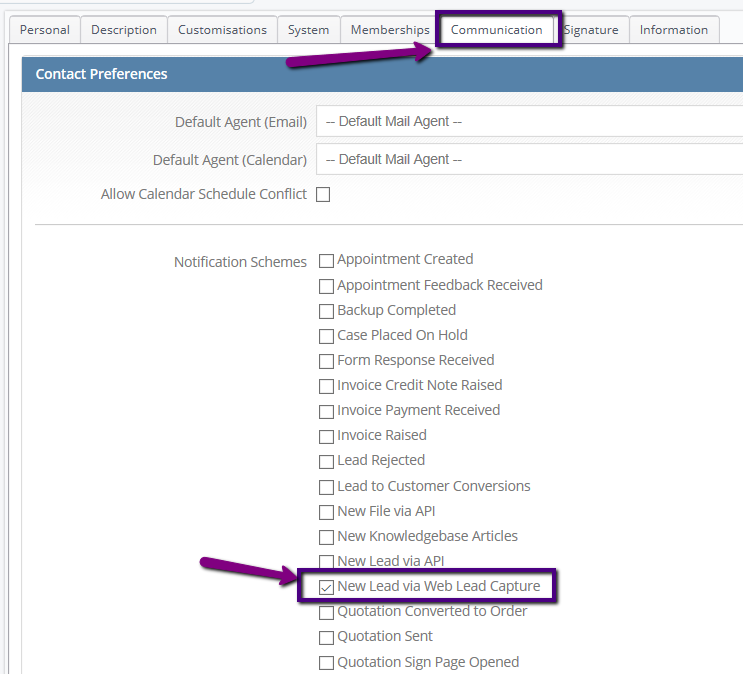
Please note that if this is not ticked for any users, then no one will receive the automated email detailed below and you will miss any leads that come in via your website.
As all web leads are unassigned with the source 'Web', you can set up a work stack for either 'Unassigned Leads' or a stack by lead source = 'Web' and filter by date.
Setting up the automated email work flow notification for when a lead is received via web lead capture
Once you have decided which users are to receive the notification you can edit and map the email template, this is shown in the following KBA
Please note that your template should have the following text (this has been recently updated and is no longer linked to an end user or business unit)

The HTML code for this is:
<span style="font-size:12px;color:#425b83;font-family:Arial,sans-serif;"><p>A new web form has been completed.</p><p>Please contact $$company$$ via the following lead on The Layer.</p>
<p>The lead information is available here: <a href="$$link$$">$$link$$</a></p>
</span>