
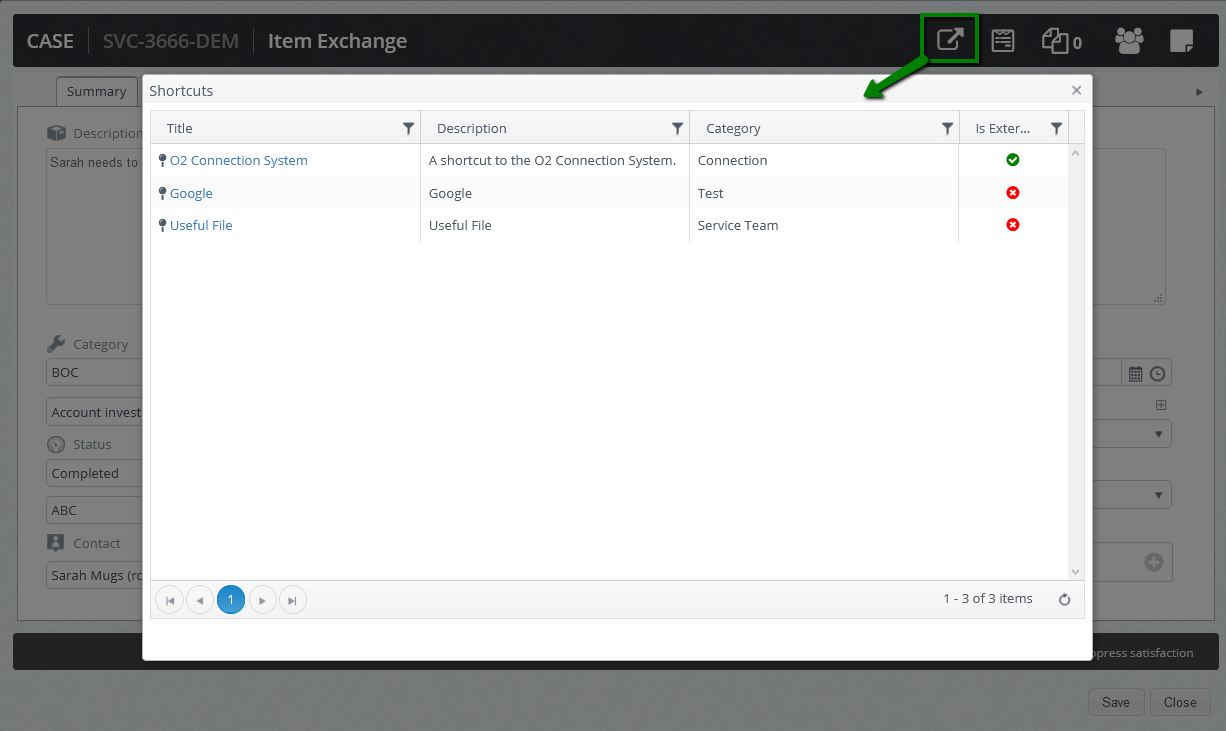
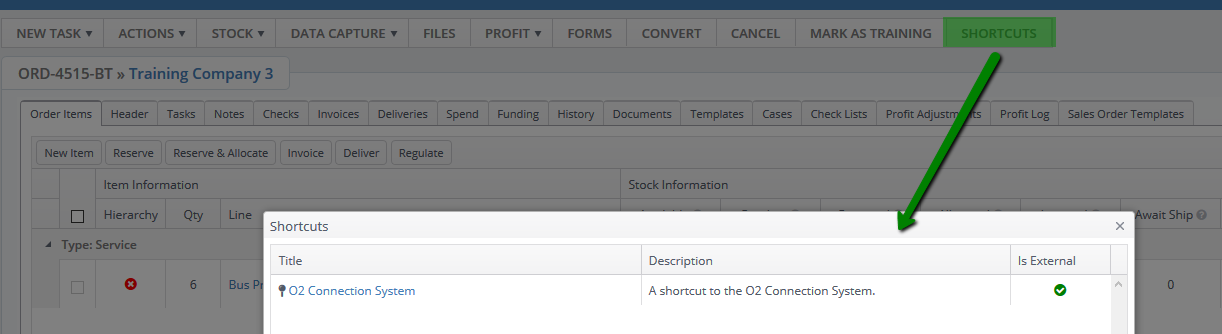
This feature allows you to add links to external apps or files from Cases, Quotations, Opportunities, Customer or Lead records as well as Sales orders. The purpose of it is to provide Layer users with quick access to context-relevant files or external apps and also the ability to email the external links or files to customers.
Settings -> Customisations -> Shortcuts
Step 1 - Create a Shortcut Category
In order to organise your links within The Layer, first create relevant categories for the shortcut links you’d like to create (see gif below). The categories are designed to enable administrators to make the links visible in the relevant areas of The Layer and also to personalise these by the selected teams.
Step 2 - Create Shortcuts
A shortcut can be a link to a specific website (e.g. a supplier portal for the connections team with easy access from sales orders, for example) or to a file stored on The Layer. See gif below on how to add a link from a file to a shortcut.
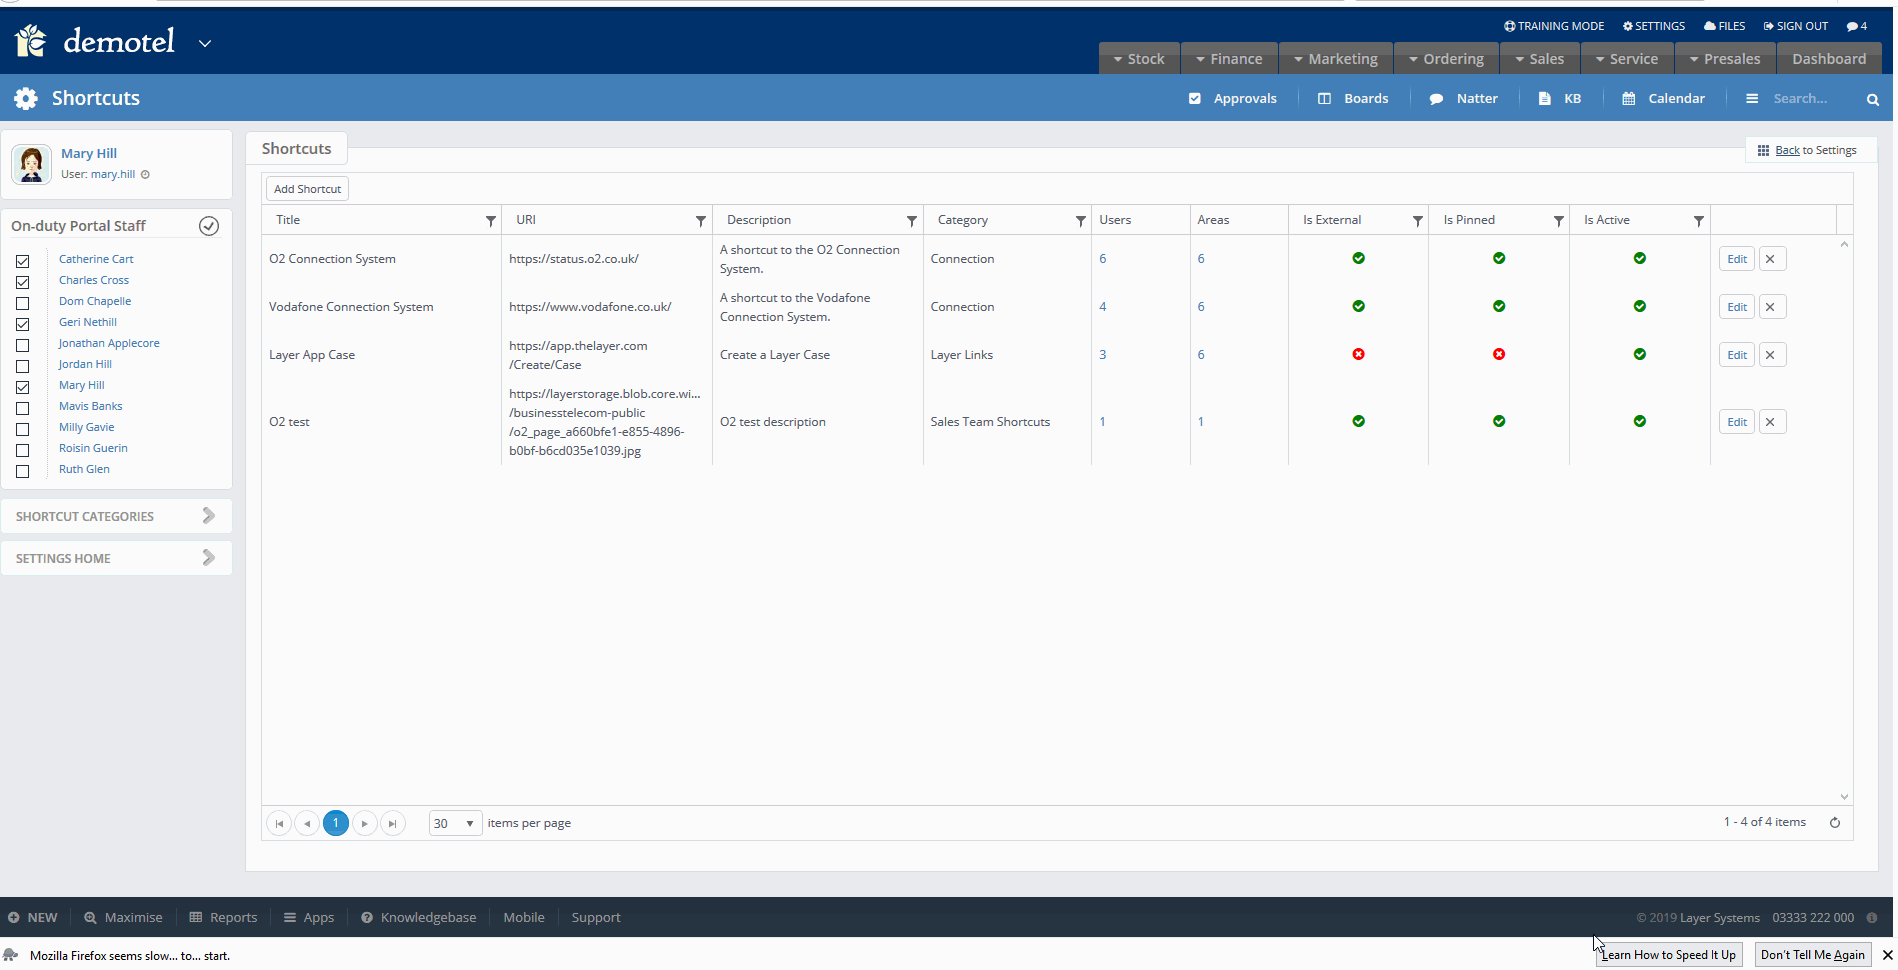
Title - this text will be presented in the email with the hyperlink.
Description - add description if different to the title or simply add the same text
URL - add the hyperlink to this field
Category - select which category the link belongs to for easier mangement of the links
Pinned - means that the shortcut will appear at the top of the shortcut modal for quick access. Use this field to mark the most used links
External - means that the shortcut will also be accessible from the email and therefore can be sent out to your customer or supplier from The Layer
Active - once you are happy with the shortcut set up simply activate it. The shortcut will only be visible for users if it's been activated.
Once the shortcut is created, set up accessibility of the shortcut across the app and specify users that need access to the shortcut.
Users - From the drop down option either select individual Users or by team. Selected users will have access to shortcut.
Areas - Select which areas you want the shortcut to be accessible (e.g. customer, quote, opportunity etc.)

Step 3 - Accessing Shortcuts
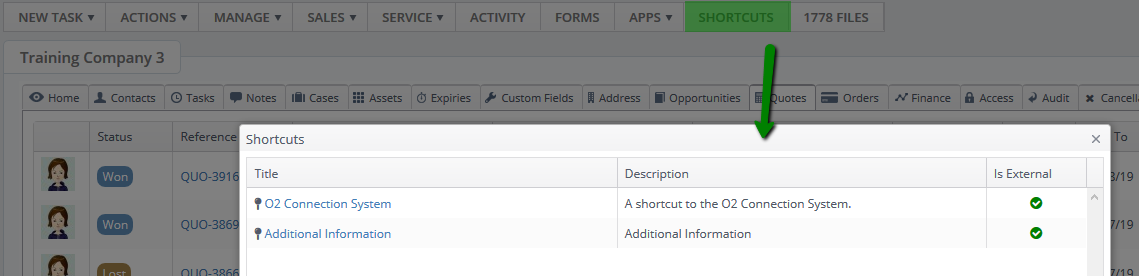
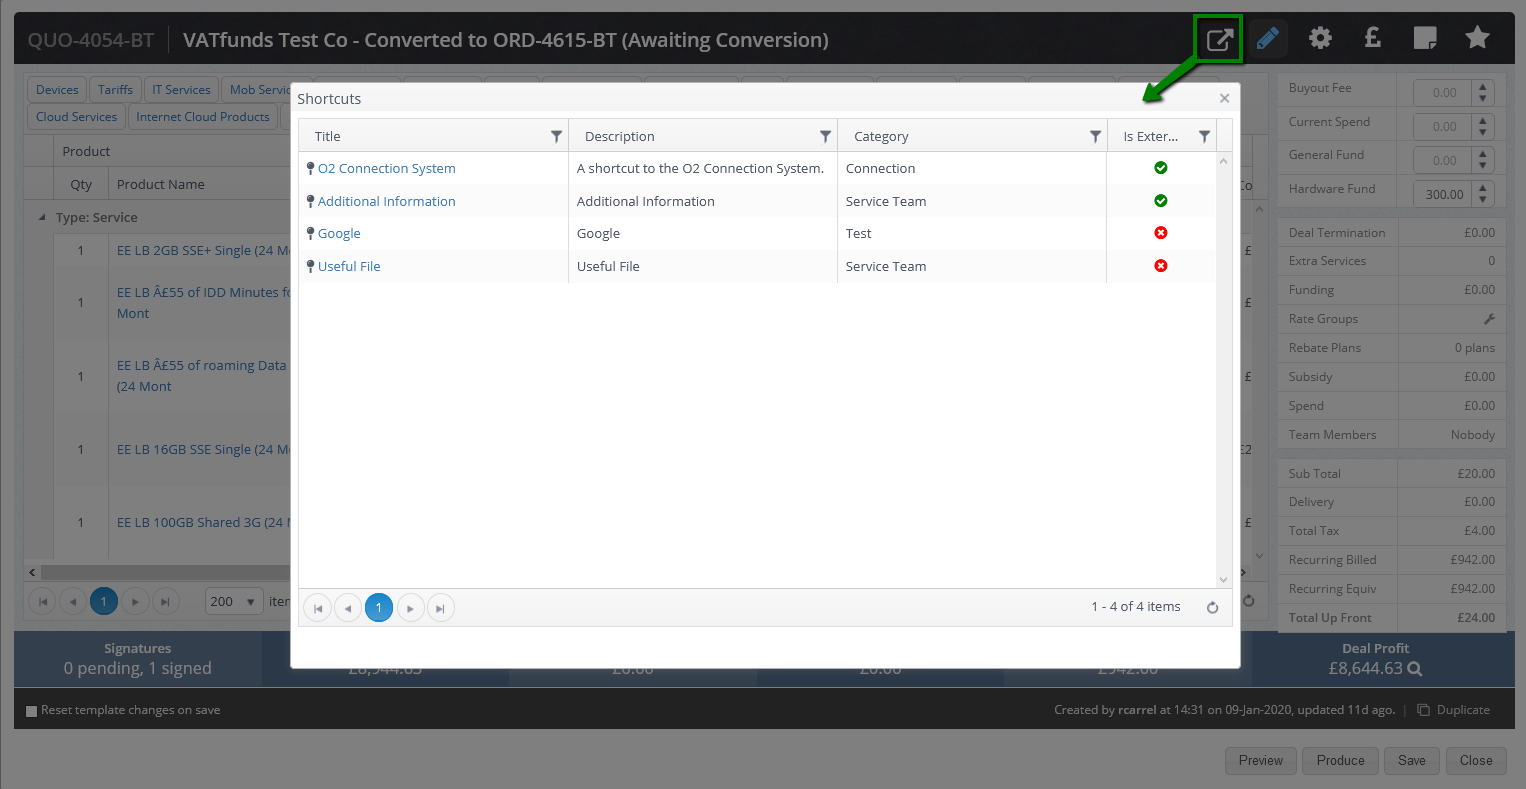
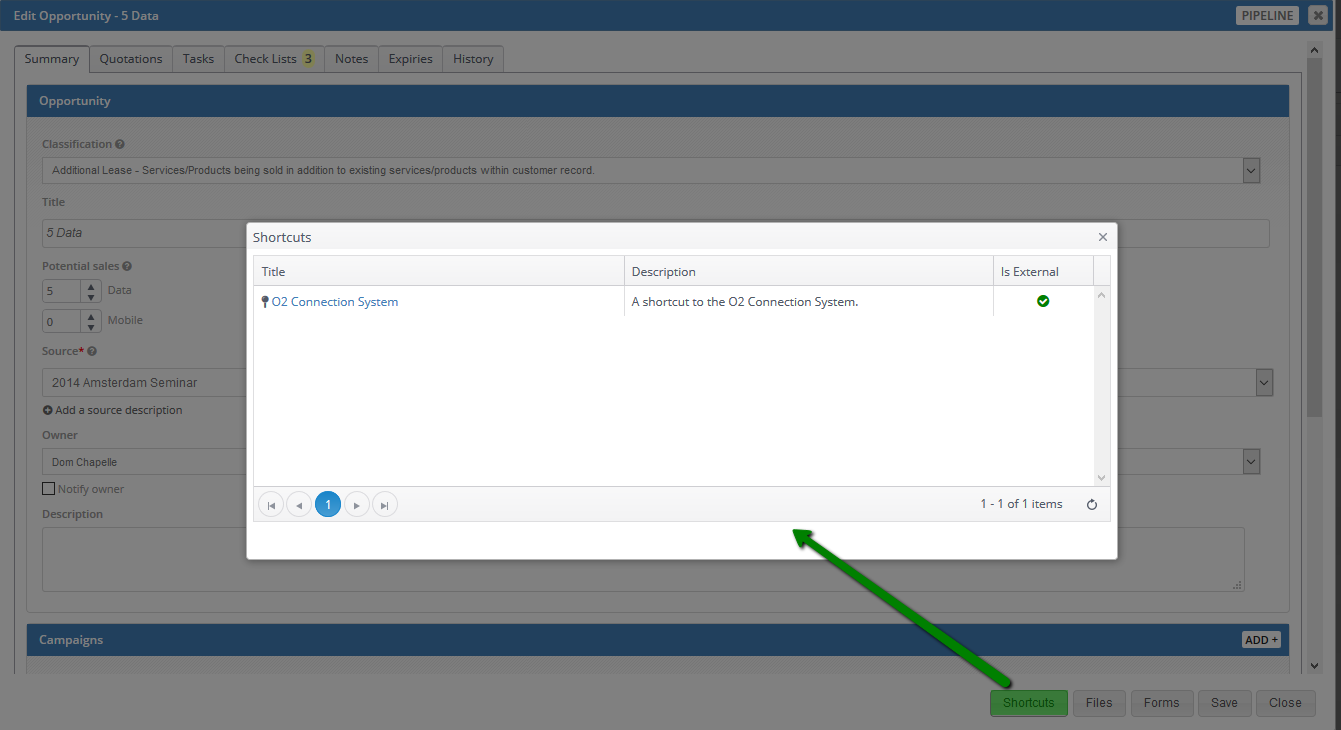
Shortcuts are accessible from the following areas. This will however depend on the set-up.
Shortcuts in Customer and Lead records
Shortcuts in Quotations
Shortcuts in Opportunities
Shortcuts in Cases
Shortcuts in Sales Orders
Step 4 - Email shortcuts
Active and external shortcuts can also be emailed to your customer. Select a link from the drop down option. This will add the link to the body of your email.

Audit Trail
Audit trail will capture when a link or file has been accessed by a Layer user.
