In The Layer, it's possible to create a new or amend an existing appointment in The Layer, you can also select a priority or to star an appointment, to differentiate these appointments, to identify those which can/cannot be moved. This can be then used in a work stack to note urgent or starred appointments. You are also able to use bulk actions in Task work stacks to update your appointments. In this article we will demonstrate how to update appointments and create specific work stacks for these appointments.
Setting priority / starred Appointments when creating a new Appointment
There are multiple areas from which you are able to create an appointment in The Layer: Opportunity, Customer/Lead record, Sales Order and Cases. The way of updating the priority or starring the appointment is the same for all. In our example, we will create a new appointment straight from a customer record and set the priority of this appointment to Urgent.
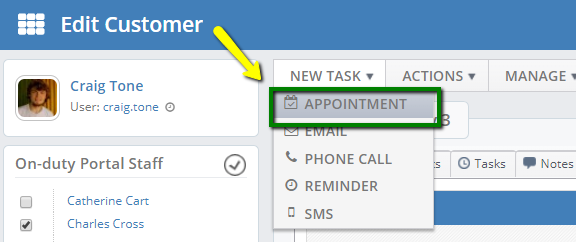
In the customer record, hover over the New Task drop-down button and choose Appointment.
Fill in the required fields, select a linked opportunity if required, set the appointment type, assignee, pick the start and finish date and time of the appointment, then go on with choosing the Contact and updating the Body of the Appointment.
select Urgent (note you can create stacks for any priority status).

Now, to mark the appointment as Starred, simply tick the "Starred" field. In our example, we will leave this un-ticked for now, to demonstrate how this can be updated once the appointment has been created.
When you’re happy with the set appointment, click Save. The Appointment will now appear in the Tasks tab of the customer record as well as being visible in associated work stacks and calendars.

How to star an Appointment
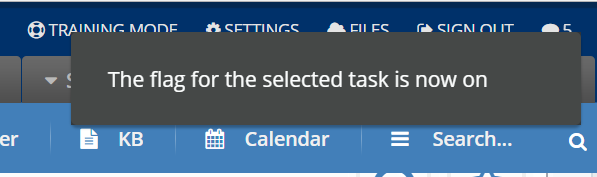
As mentioned in the previous section, if you want to amend an appointment after it’s been created and star the appointment, you can do so from the Tasks tab in a customer record. You can either go back into the appointment editor window and tick the "Starred" button (as shown in the section above) or you can use the shortcut to quickly mark the appointment as Starred. Simply click on Star icon next to the appointment and it will be marked as Starred.

The message below will pop up to advise the appointment has been flagged and the star icon will change as well.

How to Update Priority of the existing Appointment
There are two ways of updating priority of an existing appointment.
Updating priority from a Customer/Lead record
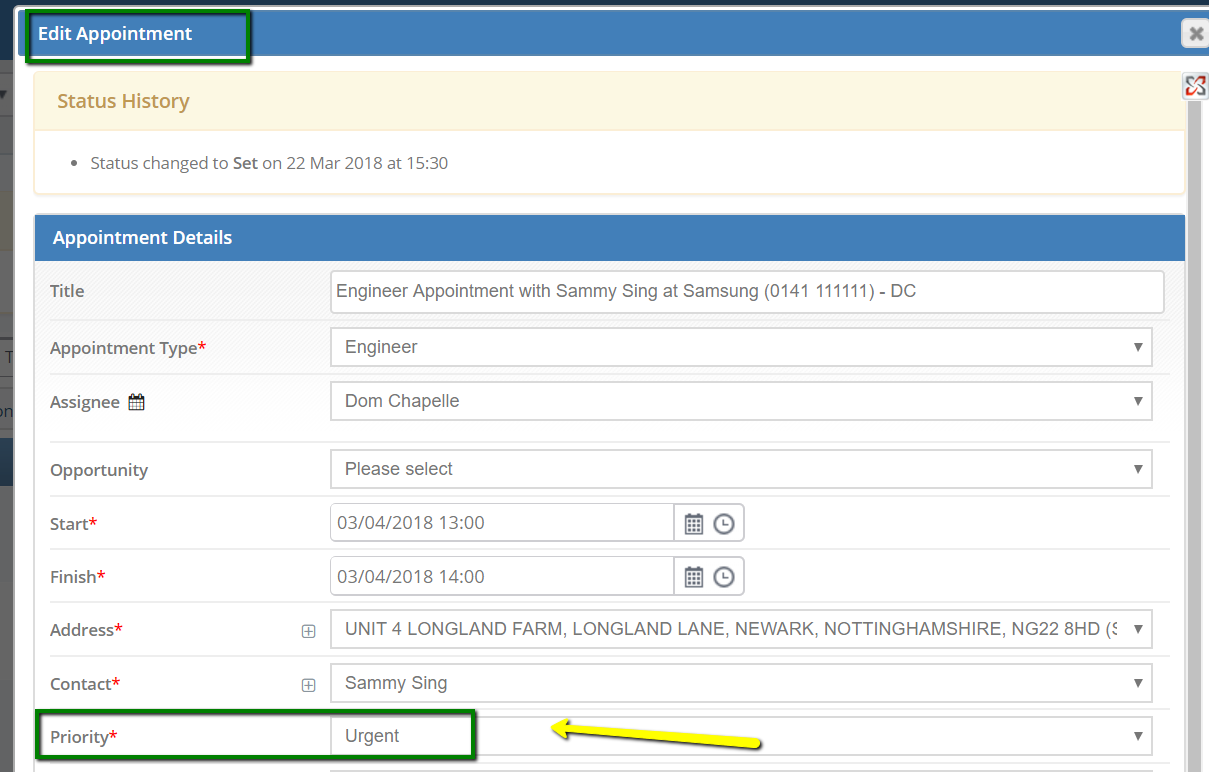
Go into the Tasks tab in a customer or lead record, find the appointment you want to update and click on its title. The Edit Appointment window will pop up from where you are able to change the priority of the appointment.
Updating priority from a Task work stack
Within a Task work stack you are able to update priority of your appointments. You can do that by single appointments or in bulk. Go into any Task work stack, tick the check box next to the appointment(s) you want to update and click Update Priority.
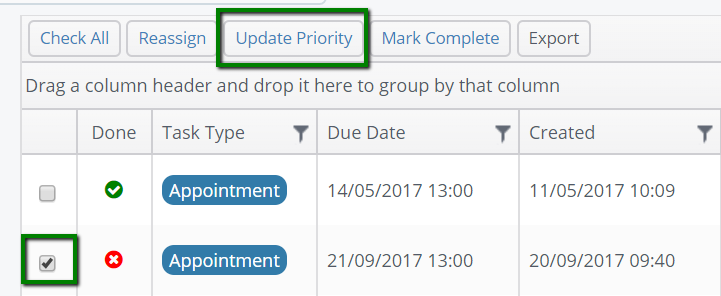
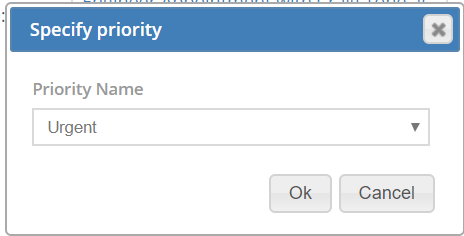
From the "Specify priority" window choose the new priority and click Ok.
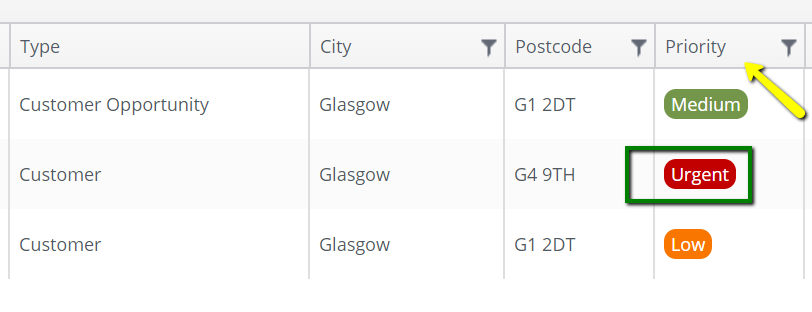
In the Priority column in the grid view of the browsing session the priority has now been updated.
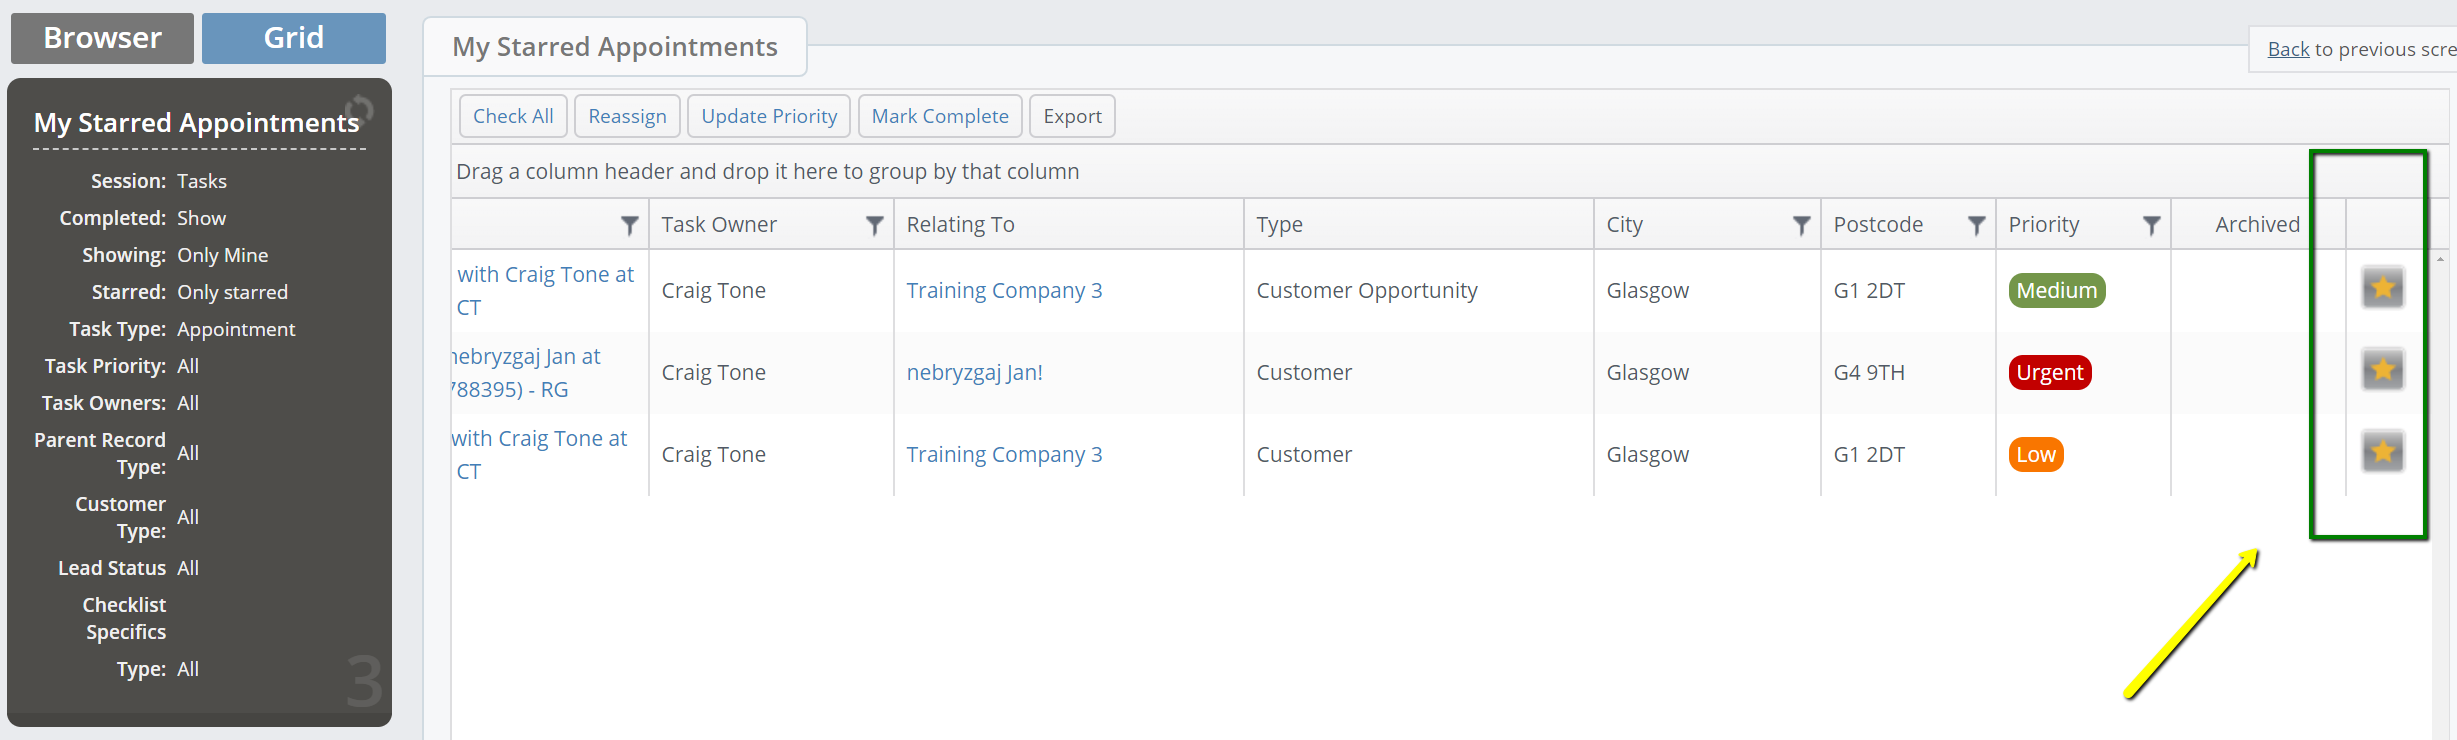
How to create a Work stack for Starred Appointments
To create a work stack for starred appointments, you need to create a new Task work stack and set appropriate filters for it.
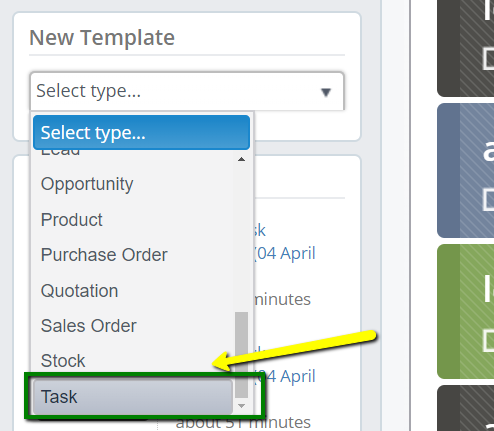
Go into the Layer module, where you would like the work stack to appear and choose Task from the New Template Type drop-down.
Follow the usual process of creating a new work stack: Choose the Title, View Mode, Order and Display zone.
If you want only the Starred appointments to appear in your work stack, choose Show only starred from the Display options.
Then proceed with the creation of the work stack by setting the Due Date, Task type – choose ‘Show appointment tasks‘. You are also able to specify the Task Owner and Customer Type or Lead Status of the associated record.
Click Save and the work stack will now be created. As you can see in the image below, it will only include the starred appointments.
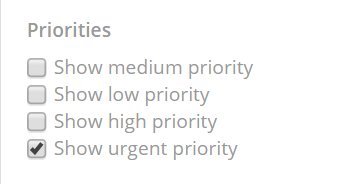
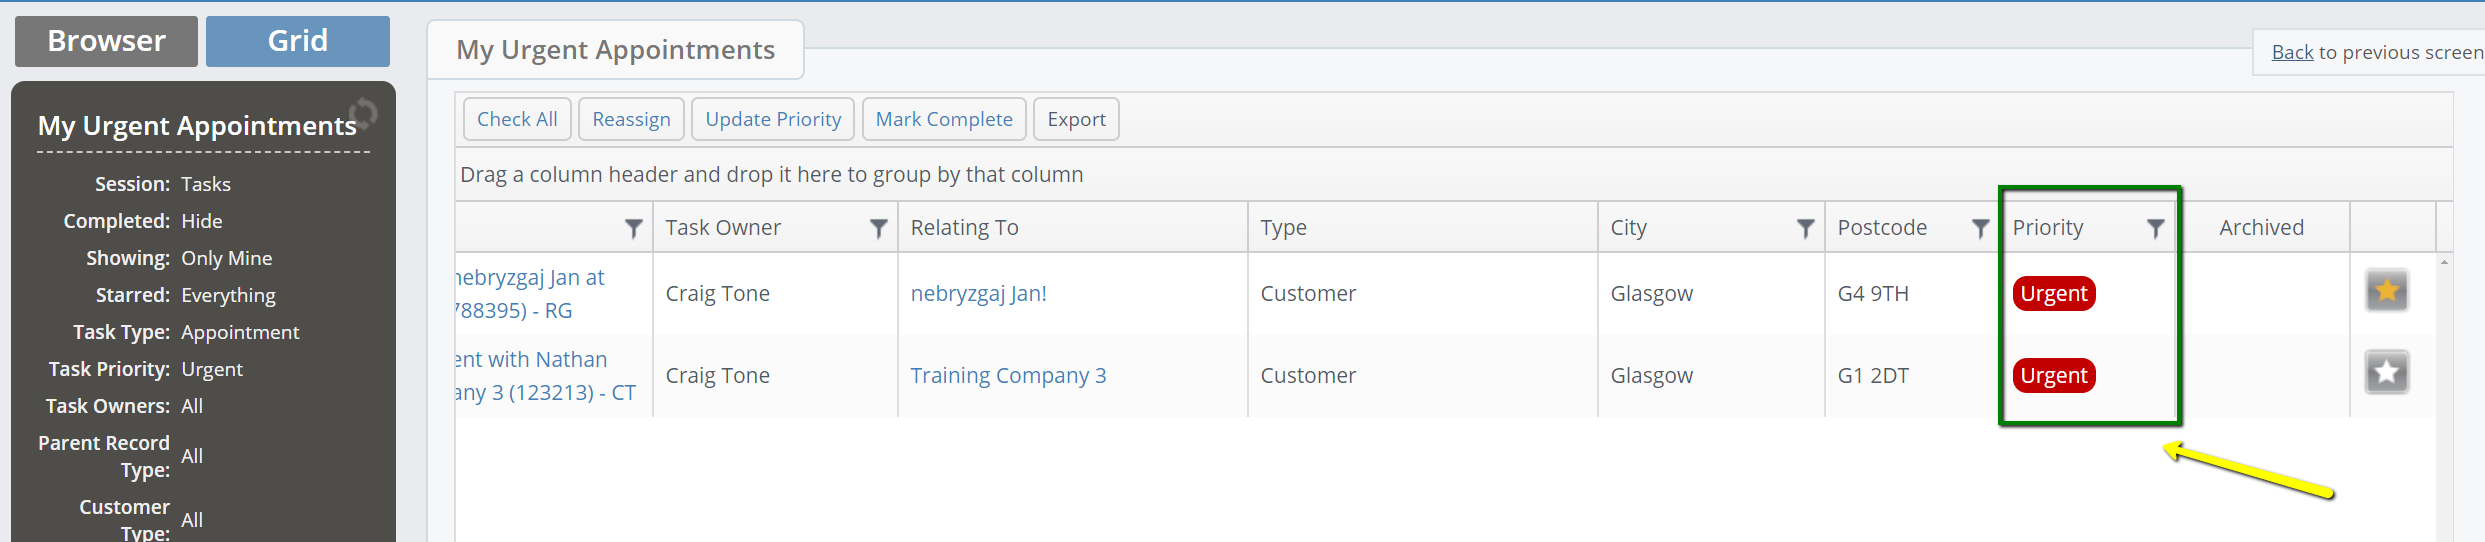
How to set a Work stack for Urgent Appointments
Follow the usual process of creating a new work stack: Choose the Title, View Mode, Order and Display zone.
Then proceed with the creation of the work stack by setting the Due Date, Task type – choose ‘Show appointment tasks‘ here, and you are also able to specify the Task Owner and Customer Type or Lead Status of the associated record.
In the Priorities section, choose the filters you want to apply to your work stack. In our example below, we will pick the "Show urgent" priority option.
Click Save and the work stack will now be created. As you can see in the image below, it will only include urgent appointments.
How to Reassign and Mark Complete tasks in bulk
Within the Tasks work stack you are also able to reassign or mark your tasts as complete in bulk.
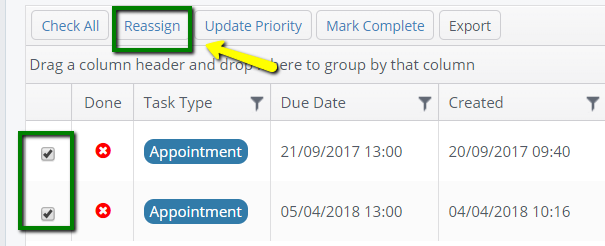
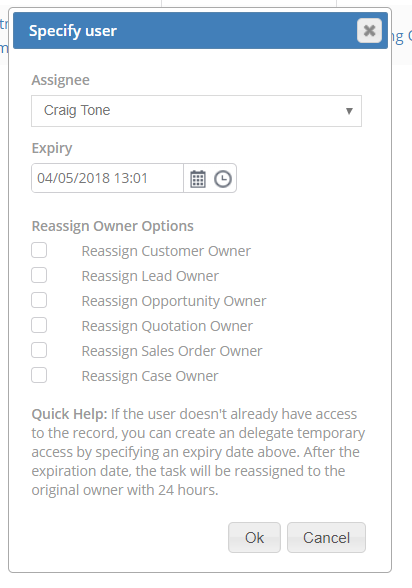
To Reassign tasks in bulk, check the tick boxes next to the tasks you want to reassign and then click the Reassign button, as shown in the image below:
The next step is to Specify the user to whom the tasks will be rassigned to. Choose the Assignee from the drop-down list of the available users. In case the user doesn’t have access to the associated customer or lead record, you can delegate temporary access to a new Assignee by specifying an Expiry date. After the expiration date, the task will be reassigned to the original owner within 24 hours.
You are also able to reassign owners of the records linked with the appointment, such as Customer/Lead record, Opportunity, Quotation, Sales Order or Case owner.
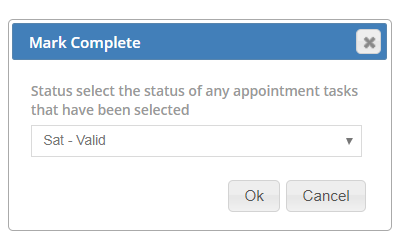
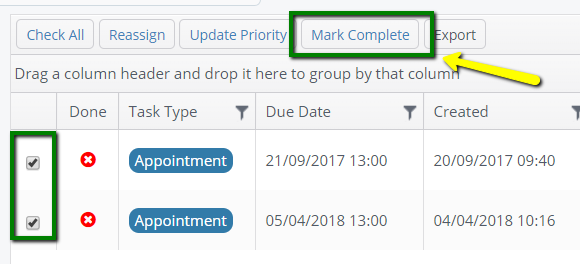
To "Mark Complete" your tasks in bulk, click the Mark Complete button once you have selected the tasks you want to complete:
(NB. you will need to consider the final status of the appointment as below and only select tasks that this status will be applied to)
The next step is then to choose the Status of the Appointments. In our case we will choose Sat – Valid. Once you click Ok the appointments will be marked as done.