- All
- Account balance (2)
- Adding (4)
- adjustment (1)
- administration (23)
- Allocating payments (2)
- appointment (9)
- appointment-feedback (1)
- assets (17)
- Authorisation (7)
- bar-code (1)
- Bonus (1)
- branding (2)
- Browser (1)
- business-units (1)
- calendar (2)
- Case Categories (7)
- Case wach list (2)
- Case Watcher (3)
- case-notes (2)
- Cases (24)
- case-sla (7)
- case-sweep (1)
- Chargeable Feature (1)
- Checklist (7)
- Commissions (2)
- company-logos (1)
- company-settings (5)
- cost_centre (1)
- custom (2)
- Custom Report Groups (1)
- Custom Reports (4)
- customer (39)
- customer-portal (1)
- custom-fields (2)
- custom-product (1)
- custom-service (2)
- Data (7)
- data-capture (2)
- data-migration (7)
- Delegated Access (2)
- delete (9)
- Digest Feeds (2)
- Digests (2)
- duplicates (2)
- Editing (2)
- Email (7)
- Email Signature (2)
- email-attachments (1)
- email-templates (6)
- environment-settings (1)
- exchange-server (4)
- Expiry (5)
- Export (3)
- files (1)
- finance (38)
- forms (3)
- Funds (10)
- gdpr (3)
- Groups (1)
- Hold Back (1)
- how-to (197)
- Images (2)
- integrations (11)
- internet-explorer (2)
- Invoice (10)
- knowledgebase (9)
- leads (21)
- lease (1)
- Liabilities (2)
- mail agent (6)
- mail-triage (2)
- marketing (5)
- merge (4)
- Mobile (2)
- Notification (2)
- office-365 (4)
- on-boarding (5)
- Opportunity (23)
- ordering (52)
- outlook-plugin (5)
- permissions (8)
- portal (3)
- presales (21)
- Pricebook (13)
- Product Stock (9)
- product-group (1)
- purchase-order (6)
- quotations (42)
- reconciliation (1)
- record (25)
- renewals (3)
- Reports (15)
- Sage (12)
- sales (86)
- Scheduled Email (1)
- search (3)
- Secure File (1)
- service (38)
- Services (9)
- settings (54)
- set-up (2)
- Signature (4)
- sites (1)
- sla-breach (1)
- sms (1)
- Stock (21)
- subscription (1)
- tags (1)
- tasks (12)
- terms (1)
- troubleshooting (5)
- unassigned (1)
- Updating (4)
- Upload images (2)
- user-roles (2)
- users (15)
- video (19)
- warehouse (1)
- widgets (12)
- work-stacks (21)
- Less
- More
- All
How to Create a New Lead
New leads can be added by pressing New from the bottom left of the screen.
To create the lead follow these steps:
1.Select New Lead from the pop up.
2.Populate all of the information in the New Lead window i.e. Company Name, Contact details etc.
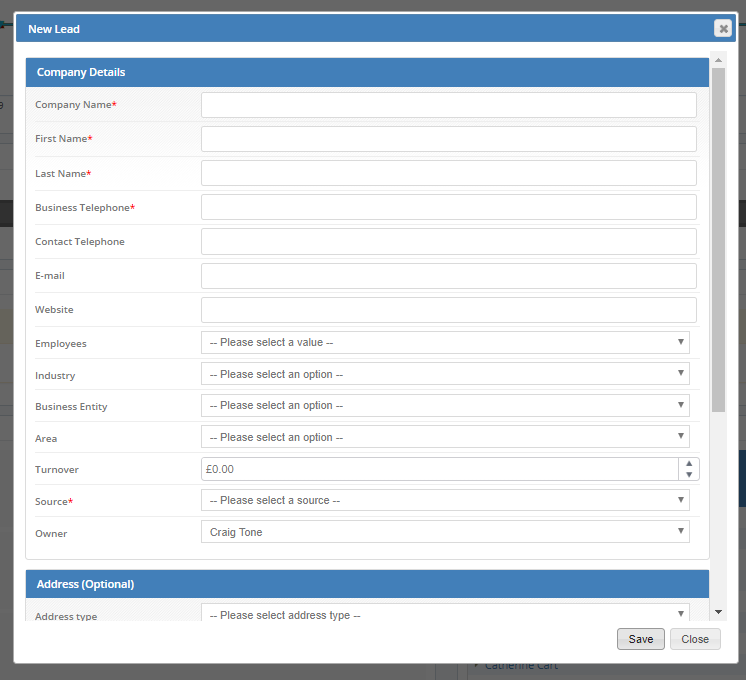
Company Name - this is a Mandatory field. In case company name is not known, consider using the Contact name (Sole Traders, Consumers)
First Name / Last Name - of the key contact
Business Telephone - this is a mandatory field - this will populate telephone fied against the Lead record
Contact Telephone - this will populate telephone field against the key contact as specified above.
Email address: Must be saved before any emails can be sent.
Area: Ensure that Area is updated as this will allow you to focus on leads within a certain area once you have built your leads up.
Source: Mandatory field. When a lead is referred, the Lead Source can be identified using the drop down menu.
Owner – this needs to be updated in order for your work stacks to show correct data. This defaults to the user that's currently logged in.
3. You can also add an address.
Choose the Address type, fill in the Address fields if known, and move on to the next step.
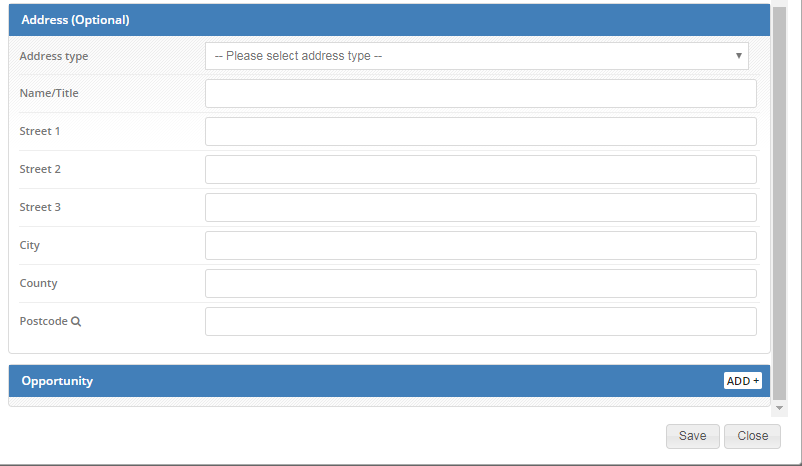
N.B.address must be logged before any appointments can be booked.
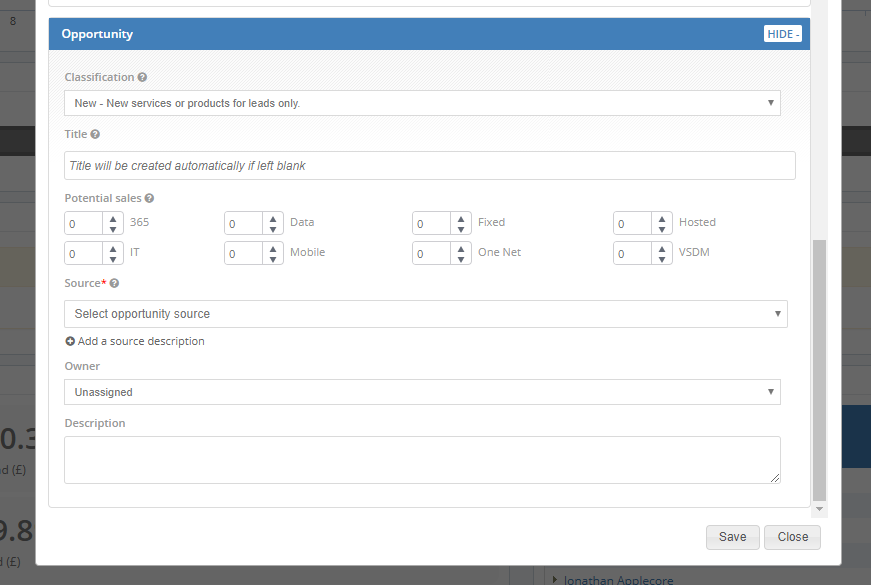
4. You can create an opportunity at this stage as well. Click the Add button to open the Opportunity editor.
For better understanding of how to create an Opportunity and for further details about the fields within the opportunity please see the following KBA:
Understanding Opportunities: How to create an opportunity in the Layer
5. Once done press Save
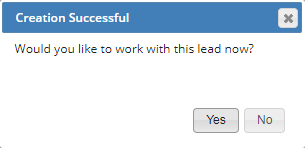
6. Click Yes to work with the lead now.
All relevant data that is available should be added to the lead record, e.g. contacts, email address, address etc.
At the point of initial call to the lead, any existing information can also be verified and added/updated.
Author: Emily O'Connor