This feature is part of a Mail Triage application, which is a chargeable service offered by the Layer, should you require any further details on this please contact your Layer administrator for more information.
For more information about Mail Triage setup, please refer to the following article: Mail Triage
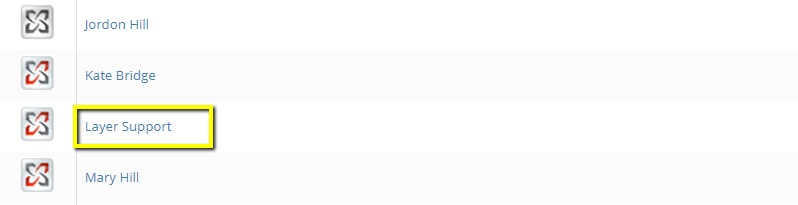
Step 1: Access Mail Agent
The Automatic Responses are set up via Mail Agents, so the first thing you need to do is to access the Mail Agent you want to set up the Auto Response for. Go into the Settings zone, click on Mail Agents and access the Mail Agent you want to work with. In our example, we are going to set up the Auto Response for the Layer Support Mail Agent. 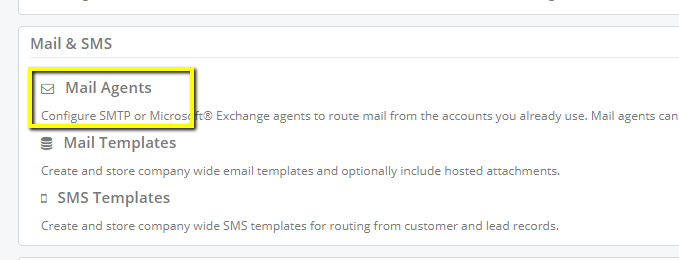
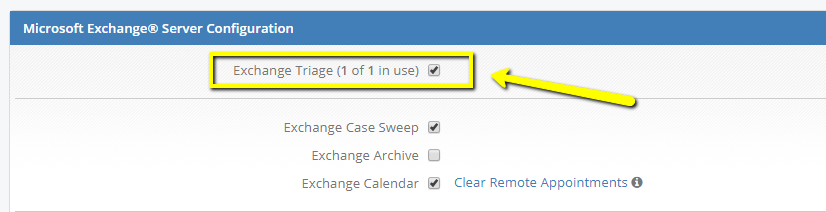
Step 2: Ensure the Mail Triage is activated
The Mail Agent you want to set up the Auto Reply for must have the Mail Triage activated. To check this for your Mail Agent, go into the Microsoft Exchange Server Configuration section of the Mail Agent settings and ensure the Exchange Triage tick button is ticked. In case it's not, you can still activate this in case you have a spare license, however, if you don't have a free license, please either contact your Layer Administrator for a new license or you would need to choose a different Mail Agent with the Mail Triage activated.
Step 3: Activate Automatic Response
This is done by clicking the Auto Response tick button. Please do not Save the mail agent yet, as before you do that you need to update both the Subject and the Template of the Auto Response (see next steps). Please note the Mail Triage - Automatic Responses section of the Mail Agent settings will only appear in the Mail Agents with the Mail Triage activated (see Step 2).

Step 4: Update the Subject
Go into the Subject field and type in the text you want to use as a Subject for your Auto Response. Here you can also use the {subject} parameter which will populate the original subject of the received email into your subject.

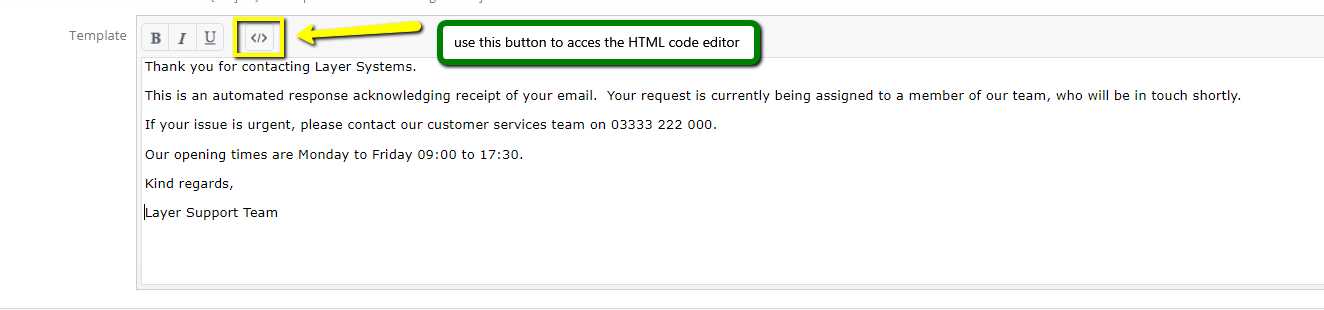
Step 5: Update the Template
Go into the Template text field and type in the text you want to use as the email body of your automatic response. The text field toolbar also offers you with the basic text editor options, as well as you can access the HTML of the template from here, which can be useful in case you would like to create some more advanced template, or you already have your auto response in HTML and you only want to copy and paste it here.
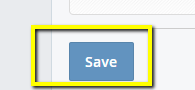
Step 6: Save the Mail Agent
Once you're happy with your Auto Response, the last step is to Save the Mail Agent. Click on the Save button at the bottom of the page and the Automatic Response will then be activated.